BROKEN ARROW // 14-Deck Bible · 1.2.0 meta
What's new in 1.2.0: 6th RF specialization — Rosgvardiya (Rosgvardiya + FSB + Army Reserve: Uran-9, BARS, SOBR, Reservists, Border Guards, T-62M, Uragan-1M, Ka-50, Sapsan, MiG-31BM, Tu-95); 2 new maps (Daugavpils, Coal Mountain); T-72B3 lost its APS (T-72B3A appeared); Shturmoviki moved to Mechanized, Ing.Shturmoviki — to Gds.Tank; Su-30SM — to Coastal; B-2 with B61 went up to 1400; artillery (Smerch/Tornado/HIMARS/MLRS) got more expensive; full price rebalance.
Variant labels: MAX — realizing the maximum potential; UNORTHODOX — an unexpected move that breaks patterns; LOW-ELO — a risky gambit that breaks the game for weak opponents but is punished by strong ones.
Master deck matrix (cheat sheet)
| Deck | Specs | Archetype | Tier | Win condition in one line | Cost of mistake | .DEK |
|---|---|---|---|---|---|---|
| RU_ROSGVARDYIA+COASTAL | Rosgvardiya + Coastal | Naval storm + blobs | A | Position → blobs in 14-seaters under smoke → Uragan-1M and the naval sky finish off | medium | .dek ⬇ |
| RU_ROSGVARDYIA+GUARDS | Rosgvardiya + Gds.Tank | Uran-9 swarm + TOS/Uragan | S | Vympel+SOBR blobs under smoke, TOS-1 and Uragan-1M burn positions, armor mops up | medium | .dek ⬇ |
| RU_GUARDS+VDV | Gds.Tank + VDV | Airborne + meta-balance | S | LMUR one-shots from Mi-28NM under the Buk/Tor umbrella, VDV elite holds the ground | medium | .dek ⬇ |
| RU_COASTAL+MOTO | Coastal + Mot.Rifles | Missile squall | A | Tochkas every 2 minutes + Tornado-S on targets, naval infantry takes points | medium | .dek ⬇ |
| RU_MECH+MOTO | Mech.Inf + Mot.Rifles | Siege army | A− | Guided Malkas and Tyulpan erase fortifications, the T-72B/B3A swarm mops up | low | .dek ⬇ |
| RU_GUARDS+MOTO | Gds.Tank + Mot.Rifles | Steel wedge | A | Fist breakthrough under a moving AA umbrella and Tornado-S | medium | .dek ⬇ |
| RU_MECH+VDV | Mech.Inf + VDV | Blobs + high-precision grind | S | Umbrella → SEAD chain → LMURs and guided Malkas execute, blobs take the ground | medium | .dek ⬇ |
| US_MARINE+BALTIC | USMC + Baltic | Frontline fortress | A | Aggressive start → LAV-L depot network → impossible to dislodge | medium | .dek ⬇ |
| US_STRYKER+SF | Strykers + SF | Wheeled blitzkrieg | A | Best flank in the game: recon triad + tempo + HIMARS and air waves | high | .dek ⬇ |
| US_MARINES+SF (NUKE) | USMC + SF | CQB grind + nuclear gambit | B | The strongest infantry grinds in close combat; B-61 in case of match end | fatal | .dek ⬇ |
| US_ARMORED+MARINES | Armored Bde + USMC | Tank escalation | B | Three buildup steps: from recon to 10 tanks and GMLRS | high (micro-heavy) | .dek ⬇ |
| US_ARMORED+SF | Armored Bde + SF | AMPV Hammer | A | Smoke walls → AMPV assaults of 2-4 vehicles with a supply cycle | high | .dek ⬇ |
| US_MARINE+STRYKER | USMC + Strykers | The All-Rounder | A | AAVP assaults + PAC-2 in pairs + one of the strongest air tabs | medium | .dek ⬇ |
| US_MARINE+AIR | USMC + Airborne(US) | Heavy flank + Air for Everything | A | Pinpoint flank: F-15EX/Strike Eagle/Hornet + helicopters for every task | high | .dek ⬇ |
RU_ROSGVARDYIA+COASTAL "Priboy"
A huge roster that is, in DuroSVK's words, "actually very simple to play": the core is perfect seating math — 14-seat transports for the 7-man squads of both specs — topped by a full budget air system for every situation. Do not rush: take a strong position and push only after building up.
Ideology and gameplay
The deck stands on two pillars. First, seating math: both the BT-3F and the Typhoon-K carry exactly 14 men, and almost every Coastal/Rosgvardyia squad is 7 men — two squads per vehicle with zero wasted seats, smoke onboard (Typhoon gets it via the Kord upgrade). Second, the author's air system: a cheap Su-30SM interceptor with 9 km missiles, a cheap MiG-29K SEAD jet, the Su-33 blob-sweeper, the MiG-31BM tank executioner and the Tu-22M3 hauling eight KAB-1500s. The author explicitly advises against an aggressive opener: settle into a strong position, assemble your blobs, and win the trade economy.
Pros
- Lossless seating: 14 seats = exactly two 7-man squads; BT-3F is tougher, Typhoon is faster — pick per task
- Uragan-1M — 30 mid-range rockets in 10/15/30 salvos: obliterates and panics any area, covers both Buratino and Tornado roles
- T-62M with maxed armor — 18 HP for 125 pts (140 with Arkan missiles): most tanks need three hits to kill it
- Budget air system: Su-30SM (2×R-37 + 2×R-77) intercepts planes worth several times its price
- Tu-22M3 (550 with 8×KAB-1500) — frontline deletion plus a SEAD trap with the MiG-29K
- Flexibility: several viable strategies in one deck, from node defense to air execution
Cons
- No aggressive opener (author's stance): fast Tigrs and Akulas exist, but rushing a disciplined enemy does not pay off
- T-80BVM (255) is the main tank but cannot duel Abrams head-on
- Zero MANPADS in the entire deck: the sky rests on Pantsirs alone — losing them is fatal
- No flashbangs or shotguns; anti-infantry launchers have a minimum range — same-building or point-blank forest fights are off-limits
- Shoulder-launched RPGs only on Morskaya Pekhota and Pogranichniki — all close AT rides on two squads
- Only one MiG-29K: without it, long-range SEAD is gone
Seating doctrine (deck core, per DuroSVK)
A hull is two squads plus smoke. The author's working combinations inside the BT-3F and Typhoon (14 seats, all pairs are 7-man):
| Load | Role |
|---|---|
| Morskaya Pekhota + Spetsnaz Vympel | Strike pair: line mass plus RMG stand-off |
| Morskaya Pekhota + Rosgvardia | Point-trade blob with AT cover |
| Alpha OR Chernye Berety (RShG-1) | Elite anti-infantry hulls: separate vehicles only — they do not fit together (7+12 > 14 seats); do not field them as a pair either — no handheld AT |
| Spetsnaz VMF + 2× Pogranichniki | Cheap infiltration with handheld AT (RPG-18) |
| 2× Morskaya Pekhota | Pure close-AT hull: the only handheld RPGs vs armor |
- Treat Morskaya Pekhota as a close-range AT squad: it and the Pogranichniki are the only carriers of shoulder-launched RPGs. Always bring several of them alongside your anti-infantry blob.
- Range is law: never fight inside the same building or nose-to-nose in a forest — no flashbangs, and your powerful anti-infantry launchers have a minimum engagement range.
- Smoke before every assault: Floks mortars smoke the approach so transports close the distance fast. Smoke shells are few — keep supply nearby, but never on the firing position.
- KamAZ-6560 is a blob accelerator: after the first firefight, load infantry and supplies in bulk — blobs grow right in the field.
- Insure the flank early: a Tigr with Pogranichniki plus at least one Termit on watch.
Hidden potentials
- T-62M (125 fully armored; 140 maxed out with Arkan missiles) — 18 HP: a cheap wall that most tanks crack only on the third shot. Avoid tank duels; excellent versus infantry and light vehicles.
- Su-33 (270 fully loaded with 48×OFAB-100) — blob removal for a laughable price; approach low before the run.
- MiG-31BM (355 with guided clusters) — four guided cluster bombs delete ANY tank or armored blob.
- BARS (SPG-9M) — the versatile long-line ATGM team: answers APS vehicles and infantry alike; reinforce with FSB snipers for long-range anti-infantry damage and counter-fire recon.
- DT-30PM Vityaz (50) — all-terrain heavy supply: feeds the Uragan and Floks where trucks cannot go.
Opening deployments
MAX "Positional perimeter"
Infantry in BT-3Fs and Typhoons takes a strong position (seating recipes above) → Floks on smoke support → Pantsir behind the front edge → light vehicles (Uran-9) or extra infantry in second line. Playing a flank — mandatory Tigr with Pogranichniki plus a Termit overhead. No rush: the first firefight is won by discipline, not speed.
UNORTHODOX "Vympel in the rear"
Spetsnaz VMF + 2× Pogranichniki on Tigrs slip wide right after the points are taken: their job is not to kill but to light up the rear and cut logistics. While the enemy reorients, your KamAZ trucks are already growing a second blob on the front. Infiltration is a bonus, not an obligation — simply holding the flank is fine too.
LOW-ELO BREAKER "Akula guard, Sapsan blitz"
Mi-8AMTSh-VN Sapsan (S-13 + 2 LMUR) strikes first head-on, Ka-50 Akula with R-73s guarding above. Low-ELO without early SHORAD loses its opener to S-13s and a pair of LMURs. Against a strong player: a Pantsir in the lineup is mandatory, otherwise this is a gift.
Mid-game
MAX "Uragan preparation"
Termit and FSB snipers hold the target in vision → Uragan-1M lays a 15-30 rocket salvo on a stubborn position or a spotted backline SAM → Floks smoke the approach → hulls with blobs close in and dismount. The position ceases to exist before the assault begins.
UNORTHODOX "Tu-22M3 SEAD trap"
MiG-29K first: it fires 4×Kh-31P from safe distance — enemy AA intercepts and reveals itself. Mark every launch point → immediately send the Tu-22M3 and drop KAB-1500s onto those marks, full afterburner. The run is nearly suicidal — but the enemy's long-range AA dies beyond repair.
LOW-ELO "T-62M wall"
3-4 fully armored T-62Ms plus Uran-9s screened by infantry push the axis. Low-ELO dumps all its AT into 18 HP worth 125 points while the Urans melt his positions under the infantry screen.
Late-game
MAX "Full air system"
The Su-30SM loiters in the rear intercepting anything close (9 km missiles), the MiG-31BM removes the most expensive tank of each cycle with clusters, the Su-33 sweeps blobs with 48 bombs, and the Katran's Hermes missiles finish broken-through armor. The sky works like a conveyor: cheap in — expensive out.
UNORTHODOX "Execution on call"
The MiG-31BM stays on station all late game: any command tank or armor concentration lit by a Termit or BARS receives four guided clusters. The enemy starts hiding his expensive assets — and loses map presence by himself.
LOW-ELO "Broom and hail"
A fully loaded Su-33 for 270 plus Uragan-1M on repeat over the points: every low-ELO concentration becomes a write-off. Between runs, BT-3F blobs simply occupy the emptiness.
Combo chain "Priboy" (max realization)
Unit synergies
| Unit | Best partner | Why |
|---|---|---|
| Morskaya Pekhota | BT-3F + Spetsnaz Vympel | Author's load: 14 seats = two sevens; the armored hull delivers, Morskaya covers close AT |
| Alpha OR Chernye Berety (RShG-1) | one squad per hull only | They do not fit together (7+12 > 14 seats), and do not field them as a two-vehicle pair — neither has handheld AT |
| Spetsnaz VMF | 2× Pogranichniki (RPG-18) | Cheap infiltration with handheld AT on Tigrs |
| BARS (SPG-9M) | FSB snipers | Long line: AT vs APS armor plus damage/recon against infantry |
| T-62M (18 HP) | Uran-9 | The HP wall soaks fire while the drone melts positions behind an infantry screen |
| MiG-29K (4×Kh-31P) | Tu-22M3 (8×KAB-1500) | The author's SEAD trap: AA reveals itself intercepting — KABs follow the marks |
| Ka-52K Katran (8×Hermes-A) | Ka-50 Akula (R-73) | Hunter + guard: the Akula usually wins heli duels against US counterparts unless outnumbered |
| Sapsan (S-13 + 2 LMUR) | KamAZ-6560 / DT-30PM | LMURs burn very fast — supply nearby, re-arm is quick |
| Uragan-1M | Floks | Volume erases the position, smoke opens the assault — two halves of one strike |
| Pantsir-S1 | Any blob | Zero MANPADS in the deck: the SHORAD is every blob's mandatory roof |
Tactical groups
MIN — "Assault hull" (~265 pts)
BT-3F with Morskaya Pekhota (75) + Spetsnaz Vympel (100).
Why: the smallest cell of the seating doctrine: line mass, RMG stand-off and close AT on one armored hull with smoke.
MID — "Node" (~990 pts)
T-80BVM (255) + T-62M (125) + Uran-9 (65) + Pantsir (170) + BARS (100) + blob hull (~190) + KamAZ (85).
Why: autonomous sector holding: a tank, an HP wall, a drone, an anti-air roof and a re-armable blob.
MAX — "System strike" (~2170 pts)
Tu-22M3 with KABs (550) + MiG-29K (315) + Su-30SM (265) + Katran (275) + Uragan-1M (325) + S-350 (270) + Pantsir (170).
Why: the full "spotted → SEAD → KABs → intercept" cycle: enemy AA and frontline removed in one blow. The match bet.
RU_ROSGVARDYIA+GUARDS "Oplot"
A center-of-the-map deck by DuroSVK: a balanced opener on Tigrs and Typhoons, and once the front settles — heavy APS armor plus the deck's most powerful element in the author's own words: the TOS-1 and Uragan-1M pairing the whole strategy is built around. No organic fighters or SEAD — a team deck that repays allied air cover with fire funnels and Buk one-shots.
Ideology and gameplay
The deck plays in three phases. Opener: the Typhoon-K (the Kord upgrade grants smoke) with an elite load takes key positions, a KamAZ brings the second wave and supplies, and the Floks and Buk-M2 come out on the first points. Mid: the fire funnel — TOS-1 and Uragan-1M alternate or stack to soften a node, infantry rides the BMO-T built on a T-72 chassis, and heavy APS armor (Barbaris, Drozd, Terminator) shuts down the AT threat. Late: heavy CAS — the MiG-31BM with guided clusters and the Tu-95 carrying a 9000 kg bomb — flown in coordination with allied SEAD.
Pros
- TOS-1 (225 with ERA) + Uragan-1M (325) — the deck's most powerful element per the author: double fire preparation on any node
- T-90M (270) has enough penetration to duel Abrams; cheap for what it does — work in pairs against heavier targets
- Buk-M2 at 150 pts one-shots jets (20 damage per missile) — the best mid-range AA economy in the game
- BMO-T on a T-72 chassis with ERA and two smoke volleys delivers assault troops through fire — and doubles as an AT magnet
- APS wall: T-15 Barbaris (4 APS charges + 4 Kornets) and T-80UM Drozd — the answer to Javelins and ATGM vehicles
- Gvardii Motostrelki — one of the best shoulder-launched AT units in the game, the blobs' primary close-range AT
Cons
- No organic ASF or SEAD (the author's deliberate choice): fighters and AA suppression must come from teammates
- Slow opener: little speed overall, only the Tigrs accelerate
- The Tu-95 is slow and easily shot down — never launch without an allied SEAD sweep
- Support units are supply-hungry — without MT-SMs and KamAZ trucks the fire park stalls
- No AA helicopter (activation points ran out) — the author's compensation: play the center, not the flanks
- The Drozd avoids tank duels: low cannon penetration, infantry and light vehicles only
Hidden potentials
- An empty BMO-T is an AT magnet: unload the infantry and ram the bare hull into enemy AT teams — they waste rockets on a T-72 chassis, then the Terminator or Barbaris follows up and melts the hapless squads.
- Do NOT upgrade the Buk-M2 to the Buk-M3: the upgrade removes the jet one-shot (you only gain extra missiles and slightly more range). The 150-point one-shot is the unit's entire point.
- Akula with Kh-25 — APS ignored: shorter reach than LMUR, but the missile completely bypasses active protection and deals 20 damage — an executioner for ATGM carriers and IFVs.
- FSB snipers (140) — not just recon: modest damage, but they panic squads fast and are profoundly annoying to play against.
- MT-SM (30) — cheap fuel for the fire park: the support tab's hunger is a known weakness, solved for pocket change.
Opening deployments
MAX "Typhoon perimeter"
The Typhoon-K with smoke and a "Vympel + Alpha" load makes short work of any squad and APC on the point → a KamAZ with Ingenery-Shturmoviki, Gvardii Motostrelki and supplies follows as the second wave → good high-rises available — put Verba and BARS there (the effect multiplies) → points permitting, bring the Floks and Buk-M2 immediately: they are needed from the start.
UNORTHODOX "Verba in a Tigr"
Opening with a Verba team in a Tigr is the author's answer to an early helicopter rush: the fast hull intercepts the enemy's heli route while the Buk unfolds. A Termit overhead for the picture. Break the rush — and the enemy starts the match in the red.
LOW-ELO BREAKER "Double greeting"
Save for a TOS-1 + Uragan-1M package against the first enemy concentration: low-ELO bunches its opener into a blob — and eats 30 Uragan rockets first, then a thermobaric TOS volley into the panic. One such greeting decides the match's opening economy.
Mid-game
MAX "Fire funnel"
TOS-1 lays a thermobaric volley on the strongpoint → Uragan-1M finishes the area with a 15-30 rocket salvo → the Floks lays several consecutive smoke lines → BMO-Ts carry Ingenery-Shturmoviki and Gvardii Motostrelki into the breach → Barbaris and Terminator follow. The node is taken once, and for good.
UNORTHODOX "Bare BMO-Ts"
Drop the assault troops at the buildings — then shove the empty BMO-Ts straight into the enemy AT teams: rockets vanish into an ERA-fitted T-72 chassis, the squads are left dry. The Terminator or Barbaris rolls in next and melts the now-useless AT infantry. Cheesy — and it works even against strong players.
LOW-ELO "Terminator on the point"
The BMPT Terminator (240 with twin AG-17s) sits on a contested point behind a screen of Gvardii Motostrelki: low-ELO feeds it infantry, and its Javelins meet a wall of RPG-28s. Keep the smoke launchers charged — the Terminator has no APS.
Late-game
MAX "Coordinated heavy CAS"
The MiG-31BM instantly removes any tank or cluster of armored vehicles with its guided clusters; request SEAD from teammates — and the Tu-95 drops a 9000 kg bomb on a concentration: lethal to infantry across the radius, and it kills armor too. Your air tab is small, but every sortie is an event.
UNORTHODOX "Mini-nuke on request"
Termits and FSB snipers hold vision on an enemy backline gathering (logistics, depots, repair park) → allied SEAD sweep → the Tu-95 delivers the "mini-nuke". Even a miss on target hits the economy: the enemy disperses his rear and loses density.
LOW-ELO "Buk farm"
2-3 Buk-M2s with radar micro (on — fire — off — displace) plus a Pantsir in cover. Every enemy sortie becomes a 150-point one-shot: low-ELO pays in airframes for your missiles and eventually stops flying altogether.
Combo chain "Oplot" (max realization)
Unit synergies
| Unit | Best partner | Why |
|---|---|---|
| Ingenery-Shturmoviki (KS-K) | BMO-T (ERA + upgraded engine) | The T-72 chassis and two smoke volleys deliver the best CQC squad for its price where it is needed — alive |
| Spetsnaz Vympel | Spetsnaz Alpha in a Typhoon-K | The author's opening load: short work of any squad and APC, smoke from the Kord |
| Gvardii Motostrelki | Any anti-infantry blob | Primary close-range AT: one of the best shoulder-fired launchers in the game; always keep 1-2 squads nearby |
| PZRK Verba + BARS | A high-rise | The author's pair for tall positions: the effect multiplies with floors |
| TOS-1 | Uragan-1M | The deck's most powerful element per the author: thermobarics plus volume — the strategy is built on this pairing |
| T-90M ×2 | Each other | Cheap for its capability — feel free to work in pairs against heavier targets |
| T-15 Barbaris | T-80UM Drozd | An APS wall versus Javelins and ATGM vehicles: Barbaris also wounds tanks with Kornets, Drozd cleans up infantry |
| Buk-M2 | Pantsir-S1 | Mid-tier one-shots plus the game's best SHORAD; the Pantsir is fragile — cover only |
| Ka-50 Akula (Kh-25) | APS armor | The Kh-25 ignores APS and hits for 20 — finishing what the armor could not crack |
| MiG-31BM | Termit / FSB snipers | Spotting → 4 guided clusters → any tank in the game removed |
Tactical groups
MIN — "Assault hull" (~240 pts)
BMO-T with Ingenery-Shturmoviki (70) + Gvardii Motostrelki (75).
Why: the smallest assault cell: CQC, close AT and near-unkillable delivery with smoke — for the price of a mid-tier IFV.
MID — "Breach" (~1200 pts)
T-90M (270) + T-15 Barbaris (250) + Terminator (200) + BMO-T with assault troops (~165) + Gvardii Motostrelki (75) + Buk-M2 (150) + Floks (90).
Why: autonomous node-taking: an APS fire fist, assault delivery, smoke and an anti-air roof.
MAX — "Fire funnel" (~2760 pts)
2× T-90M (540) + Barbaris (250) + Drozd (250) + Terminator (200) + TOS-1 (225) + Uragan-1M (325) + Buk-M2 (150) + Pantsir (250) + Akula (215) + MiG-31BM (355).
Why: the full realization of the author's strategy: funnel, breach, consolidation and airborne armor execution. The match bet.
RU_GUARDS+VDV "Zavesa"
"There are so many OP units to abuse, I don't even know where to start" — that is how DuroSVK opens his guide to this deck. Elite 5-man VDV squads inside 15-seat Skhrezhets, the Bradley-killing B-15 Kurganets, the game's most annoying helicopter — the Mi-28NM with double LMURs — and an Su-34 with a FAB-3000 that brings its own SEAD. A deck where every card is best-in-slot.
Ideology and gameplay
A deck of quality, not mass: every unit is best in its slot, and the player's job is to play them in the right order. The infantry core is elite 5-man VDV squads inside the Skhrezhet (BTR-MDM, 15 seats = three squads); the armor is T-90Ms working in pairs plus three APS carriers; the sky is closed by Buk-M2 one-shots and the fast missiles of the 250-point Tor; executions are carried out by the Mi-28NM with eight LMURs and the Su-34 with a three-ton bomb. The author warns explicitly: the T-14 Armata and T-15 Barbaris-57 are not in this deck because both are overpriced noob traps.
Pros
- Three Skhrezhet recipes (15 seats) for any task: 3× Shturm all-rounders, a Spetsnaz CQC hull, AT recon
- Mi-28NM (515 with 8× LMUR) — per the author "the most annoying, OP helicopter in the game": one-taps vehicles from afar, hits infantry too
- B-15 Kurganets — the Bradley killer: AT missiles fired in short succession nullify the target's APS, and the 57 mm melts everything else
- Su-34 (525): FAB-3000 + 2× Kh-31P — a bomber with organic SEAD, survivability built into the airframe
- Complete AA: the Buk-M2 one-shots jets for 150, the 250-point Tor (NOT the 150 one!) swats even jets with fast missiles
- Gvardii Motostrelki with the RPG-28 — THE BEST handheld AT weapon in the game
Cons
- Elite is expensive: Mi-28NM (515), Su-35S (515), Su-34 (525) — every mistake costs points
- Kurganets: weak armor (both kinetic and HEAT), APS runs out quickly — keep your distance
- The Terminator has no APS — without charged smoke launchers it gets eaten by Javelins
- VDV Shturm carries only 6 rockets (3 AT + 3 anti-infantry) — re-arm after every engagement, no exceptions
- T-80UM Drozd — infantry and light vehicles strictly; never enters tank duels
- Modest logistics: KamAZ VDV and MT-SM only — no big depots to be built
Skhrezhet doctrine (infantry core, per DuroSVK)
The BTR-MDM ("Skhrezhet", 15 seats) carries three elite 5-man squads. The author's three working recipes:
| Recipe | Role |
|---|---|
| 3× VDV Shturm | All-round hull: both AT and anti-infantry rockets. The law: keep them supplied — only 6 rockets per squad (3+3) |
| 2× VDV Spetsnaz + 1× Shturm | CQC hull: push with Spetsnaz, the Shturm stays behind and supports |
| 2× VDV Razvedka + 1× Spetsnaz | AT recon: Razvedka brings great AT capability and decent anti-infantry |
- Ingenery-Shturmoviki — one of the best CQC squads for its price: powerful shotguns and flashbangs handle almost everything. They ride in BMO-Ts.
- Gvardii Motostrelki (RPG-28) — the designated close-range AT squad; in this deck they ride Kurganets hulls with the Epokha module and Afghanit APS.
- The BMO-T cheese: unload the infantry, then ram the empty hull into enemy AT teams until they waste their rockets; follow with a Terminator.
- AGS-40 Balkan (50) — pocket-change stand-off when going inside is not an option.
Hidden potentials
- Sarmat-2 (50) — the deck's fastest vehicle: in the opener it can disrupt the enemy's deployment or sneak into the rear and pick off a high-value target (SAM, artillery).
- LMUR hits infantry too: within the Mi-28NM's reach no unit is safe — not armor, not SHORADs, not infantry.
- 2S41 Drok (40) — a dirt-cheap smoke mortar: smoke discipline for your assaults at almost no cost.
- Msta-S (240 in the M2 version) — guided rounds: pops enemy supply depots and high-value backline targets; the author flatly orders you not to sleep on them.
- Mi-35M (295) with Igla-S and Vitebsk ECM — escort for the Mi-28NM: shields the execution from enemy heli hunters.
Opening deployments
MAX "Skhrezhet fan"
Two BTR-MDMs with the recipes (3× Shturm and the Spetsnaz hull) fan out onto two points → Sarmats go to disrupt the enemy's deployment → Verba into a high-rise, the Tor behind the front edge, the Buk-M2 unfolding in the rear → the Drok smokes the approaches. Every point is held by elite troops that cannot be killed cheaply.
UNORTHODOX "Sarmat raid"
All Sarmats loaded with VDV Razvedka slip into the rear in the opening minutes: the target is the enemy's SAMs and artillery before his umbrella is up. The Orion (upgraded sensors) keeps the picture. Even a failed raid drags the enemy into rear-guard duty — and weakens his opener.
LOW-ELO BREAKER "Mikhalych blitz"
The Mi-28NM with double LMURs strikes first, head-on. Low-ELO without early SHORAD loses its opener to two-kilometer one-taps. The author's rule: if the enemy pushes a SHORAD at you, drop behind a forest or a tall building fast (and one-tap the SHORAD itself in the process).
Mid-game
MAX "LMUR execution under the dome"
Buk-M2s, at least a pair, with radar micro → the 250-point Tor holds the close tier (radar ON!) → the Mi-28NM executes armor and SHORADs with terrain-hugging dives → the Skhrezhet hulls occupy the cleared ground. The dome pays for itself many times over while the helicopter runs up the score.
UNORTHODOX "Kurganets ambush"
The B-15 Kurganets sits at stand-off range on a spotting cue: its AT missile salvo punches through APS to remove Bradleys and ATGM carriers, the 57 mm shreds infantry. Gvardii Motostrelki sit nearby against assaulting infantry; distance is law: the armor is weak and the Afghanit runs dry.
LOW-ELO "Buratino doorbell"
TOS-1 lays a 15-rocket volley on the point, and Ingenery-Shturmoviki on BMO-Ts collect the ruins. Low-ELO sits in buildings to the bitter end — and burns with them. Remember: a spotted TOS is a priority target, displace it immediately.
Late-game
MAX "The Su-34 protocol"
Fly low, hold fire → climb right before the target → FAB-3000 onto the concentration → the two Kh-31Ps cover the ingress and egress. The Su-35S (4× R-37 + R-77 + ECM) stands guard: shooting down drones and intercepting enemy bombers. The package is self-sufficient — no SEAD support needed.
UNORTHODOX "Msta on the depot"
The Orion finds the enemy's backline supply depots → the Msta-S blows them up one by one with guided rounds. An enemy without logistics stops re-arming his AA and artillery — the late game is won by starvation, not by fire.
LOW-ELO "Two Buks, two kills"
A pair of Buk-M2s with radar micro: every enemy sortie is a 150-point one-shot. Low-ELO does not learn from losses and keeps feeding airframes into your economy until the match ends.
Combo chain "Zavesa" (max realization)
Unit synergies
| Unit | Best partner | Why |
|---|---|---|
| 3× VDV Shturm | BTR-MDM (Skhrezhet) | The author's all-round hull: AT + thermobarics; afterwards the transport is a re-arm truck and SPAAG (ZU-23-2) |
| VDV Spetsnaz ×2 | 1× VDV Shturm | The CQC recipe: Spetsnaz pushes, rocket cover from behind |
| VDV Razvedka ×2 | 1× VDV Spetsnaz | AT recon with eyes: great AT but no anti-infantry launchers — the Spetsnaz closes the profile |
| Gvardii Motostrelki (RPG-28) | B-10 Kurganets (Epokha + Afghanit) | The game's best handheld AT plus the Bradley killer: missile salvo through APS, 57 mm against infantry |
| Ingenery-Shturmoviki | BMO-T (ERA + engine) | Delivery of the CQC elite through fire — plus the empty-hull cheese trick |
| T-90M ×2 | Each other | Agile and cheap for its capability — a pair against heavier targets |
| T-15 Barbaris | T-80UM Drozd | Two APS carriers shut down the AT threat; Barbaris wounds tanks with Kornets, Drozd — infantry and light vehicles only |
| BMPT Terminator | Distance + smoke launchers | Melts almost anything, but has no APS: smoke charged, AT infantry far away |
| Mi-28NM (8× LMUR) | Mi-35M (Igla-S + Vitebsk) | Execution under escort: the Mi-35 removes the enemy's heli hunters |
| Buk-M2 | Tor (250-point version) | Mid-tier one-shots plus fast close-tier missiles; the Tor's radar stays on |
| Su-34 (FAB-3000 + 2× Kh-31P) | Su-35S (R-37) | A bomber with built-in SEAD plus a long-range guard: a self-sufficient strike package |
Tactical groups
MIN — "Skhrezhet hull" (~280 pts)
A BTR-MDM with 3× VDV Shturm (60 each).
Why: the smallest cell of the elite doctrine: AT, thermobarics and a 15-seat delivery with a SPAAG — cheaper than a single Bradley.
MID — "Quality node" (~1295 pts)
T-90M (270) + Barbaris (250) + Terminator (200) + Kurganets with Guards (~225) + Buk-M2 (150) + Tor (200).
Why: a sector that mass cannot take: an APS wall, the best handheld AT and a two-layer dome.
MAX — "Full Zavesa" (~3130 pts)
2× Mi-28NM (1030) + Su-34 (525) + Su-35S (515) + T-90M (270) + TOS-1 (200) + Msta-S (240) + Buk-M2 (150) + Tor (200).
Why: the entire execution system at once: dome, LMURs, FAB-3000 and guided artillery. The match bet.
RU_COASTAL+MOTO "Shkval"
A deck of fast openers and heavy support per DuroSVK: Kozlik jeeps — among the fastest vehicles in the game — disrupt the enemy's deployment, BT-3Fs deliver the assault elite, and the support tab (second in importance only to infantry) launches ballistics every two minutes. Three Tochka-Us, a guided Smerch and a complete little air system on top.
Ideology and gameplay
The deck plays on a timer. Opener — speed: Kozliks seize and disrupt, infantry follows in K-16 Bumerangs and BTR-82ATs with a mandatory Igla-S team against helicopters. Mid — the ballistic cycle: all three Tochka-Us sit deep in the rear next to a huge supply dump and launch every 2-minute re-arm, ideally synchronized with SEAD sorties; the guided Smerch picks off AA, artillery, depots and heavy armor. Late — punishment for mistakes: the Katran with top-attack Hermes missiles executes deep pushes lacking SHORAD cover, the Su-33 sweeps blobs, and the Tu-22M3 erases the frontline.
Pros
- The Kozlik (45) — one of the fastest vehicles in the game: disrupts enemy openers and raids the rear for SAMs/artillery
- 3× Tochka-U (150 each): only a 2-minute re-arm — ballistics fly on a cycle as long as the depot lives
- The Smerch (300) with guided rounds — one of the best MLRS in the game: kills even the heaviest armor with precision strikes
- BT-3F: 14 seats plus an armor upgrade — delivers assault pairs like SSO+Diversanty or the 12-man Chernye Berety
- A complete compact air tab: the Su-30SM intercepts, the Su-24MP runs SEAD, the Tu-22M3 and Su-33 erase the ground
- The Katran with Hermes-A (top attack) — punishment for any deep push without SHORAD cover
Cons
- The T-80BVM (255) is weak against enemy tanks — avoid direct Abrams duels; there is no heavy tank in the deck
- Fragile logistics: Urals burn easily — unload infantry at a distance, never risk the trucks
- The Hosta carries only 15 smoke grenades — without supply nearby the smoke dies at the worst moment
- The rocket artillery is very hungry: without a Vityaz-fed depot the Tochkas and Smerch stall
- Average SHORAD: the Osa-AKM is no Pantsir and no Tor; the dome rests on S-300PM + Osas + Igla-S teams
- Thin armor tab: behind the T-80BVM there are only PT-76s and BRDM-ATGMs — no armored breakthroughs here
Hidden potentials
- The Diversanty's RPG-30 ignores APS — a solid rocket against Abrams and Bradleys; but there are only 4 of them — a re-arm vehicle always stays close.
- Mi-24P Fantom (195) with R-60s — takes apart any US helicopters: both an answer to a heli opener and a guard for your launchers late game.
- BRDM-ATGM (85) with 4× Kornet — a cheap no-go zone on a flank or at a crossing.
- PT-76 (90 fully upgraded) with 2A42 and AG-17 — cheap direct fire support for infantry without risking expensive armor.
- Korsar (70) with upgraded sensors — the eyes of the ballistic cycle: spotting for the Tochkas and the guided Smerch.
Opening deployments
MAX "Kozlik perimeter"
Kozliks take the points first and disrupt the enemy's deployment → infantry follows in K-16 Bumerangs (Diversanty) and BTR-82ATs (GRU) with an Igla-S team against helicopters → Osa-AKM behind the front edge, S-300PM in the rear. Keep transports near the infantry: re-arming men, AT and AA ammunition.
UNORTHODOX "Fantom answer"
If your teammates invest in an air and helicopter opener — open with the Mi-24P Fantom: its R-60s take apart any US helicopters, and the enemy's heli opener dies in the first minutes. No allied air game — go standard heavy ground instead.
LOW-ELO BREAKER "Triple greeting"
A fast depot plus all three Tochka-Us simultaneously onto the enemy's opening concentration: low-ELO does not spread out its opener — and loses it wholesale under three ballistic missiles. The cycle then repeats every 2 minutes.
Mid-game
MAX "Ballistic cycle"
The Vityaz builds a big depot deep in the rear → the three Tochka-Us park beside it and launch together every 2 minutes at static targets → whenever possible the volley is timed with an Su-24MP SEAD sortie → the Smerch picks off spotted AA, artillery and depots. The enemy cannot repair between cycles.
UNORTHODOX "Tu-22M3 SEAD trap"
The Su-24MP goes first: 2× Kh-31P from safe distance — enemy AA intercepts and reveals itself → mark every launch point and immediately send the Tu-22M3: 8× KAB-1500 onto the marks, full afterburner. The run is nearly suicidal — but the enemy's long-range AA dies beyond repair.
LOW-ELO "BT-3F blitz under smoke"
The Hosta smokes the approach → a BT-3F with the SSO+Diversanty pair closes the distance and dismounts at the buildings → RPG-30s punch through APS into vehicles while the SSO cleans up infantry in CQC. Low-ELO never figures out where it came from.
Late-game
MAX "Full artillery park"
The guided Smerch removes heavy armor on the Korsar's cue → Tochkas hit the rear every 2 minutes → the Katran's Hermes missiles execute pushes lacking SHORAD → the Fantom guards the launchers from heli hunters. The enemy's logistics dies first, his front right after.
UNORTHODOX "Katran punishment"
Two Katrans hold behind the second line all late game: any deep enemy push without SHORAD cover receives top-attack Hermes strikes through the roof. His expensive armor dies inside your zone, never reaching its target.
LOW-ELO "Su-33 broom"
The Su-33 (410 fully loaded) drops 48× 100 kg HE bombs on every blob low-ELO assembles on a point. Approach low before the run. Survive — return — repeat: it pays for itself almost every time.
Combo chain "Shkval" (max realization)
Unit synergies
| Unit | Best partner | Why |
|---|---|---|
| SSO (AK-15) | Diversanty (RPG-30) in a BT-3F | The author's pair: both carry AK-15s; SSO handles infantry in CQC, Diversanty handle vehicles through APS; the hull stays close to re-arm the 4 rockets |
| Chernye Berety (RShG-1) | A BT-3F of its own | A 12-man CQC squad: shares its hull with no one; keep a small distance so its anti-infantry RPG works fully |
| Morskaya Pekhota | BT-3F / K-16 Bumerang | An all-rounder whose main role is close AT: handheld RPGs against armor |
| PTO Metis | A freshly taken sector | Area denial and defense of new acquisitions — cheap and durable |
| UAZ Kozlik | Spetsnaz GRU / Diversanty | The fastest ride into the rear: disrupt openers, remove SAMs and artillery |
| Mi-24P Fantom (R-60) | Tochka and Smerch launchers | The ballistic guard: takes apart enemy heli hunters approaching your rear |
| Ka-52K Katran (8× Hermes-A) | The S-300PM dome | Top-attack punishment for deep pushes without SHORAD — the dome forces the enemy to push deep |
| 3× Tochka-U | DT-30PM Vityaz (depot) | A 2-minute re-arm plus a big depot nearby = ballistics on a cycle all match long |
| Smerch (guided) | Korsar (upgraded sensors) | Spotting → guided strike kills even the heaviest armor |
| Su-24MP (2× Kh-31P) | Tu-22M3 (8× KAB-1500) | The SEAD trap: AA reveals itself intercepting — KABs follow the marks |
Tactical groups
MIN — "Raid hull" (~255 pts)
K-16 Bumerang (BM turret + Afghanit) with Diversanty (80).
Why: a fast armored hull with an APS-piercing rocket: disrupt openers, remove soft targets, hold a flank.
MID — "Assault node" (~965 pts)
T-80BVM (255) + BT-3F with SSO+Diversanty (~285) + Kornet ATGM (90) + Osa-AKM (170) + Igla-S (100) + Ural (65).
Why: autonomous sector-taking and holding: fire support, assault elite, an AT screen and an anti-air roof.
MAX — "Ballistic cycle" (~2490 pts)
3× Tochka-U (450) + Smerch (300) + Tu-22M3 (550) + Su-24MP (255) + Su-30SM (265) + Katran (275) + S-300PM (225) + Osa-AKM (170).
Why: the full "spot → SEAD → ballistics → finish" cycle: the enemy's rear and frontline die on a timer. The match bet.
RU_GUARDS+MOTO "Heavy Fist"
DuroSVK's heavy Guards deck: maximum APS-equipped armor and the densest artillery park of any RU pairing. Patch 1.2.0 brought Ingenery-Shturmoviki (KS-K) on BMO-Ts into this spec, added a second MiG-29SMT, and delivered the Vena — the cheap smoke carrier this deck lacked for its assaults. A heavy platform, but the heaviest punch in the pool.
Ideology and gameplay
A siege deck: artillery preparation (guided Smerch at 300, TOS-1 at 225, Vena at 100) softens and burns out a position, an armored assault (BMO-Ts, T-15 Barbaris, Terminators) takes it, and an APS/SAM umbrella (T-90M, T-80UM-2, Tor-M2, S-300PM) prevents any answer. The only cheap things here are the meat: Motopekhota and Ingenery-Shturmoviki draw fire and reveal targets while the expensive hardware does the killing. Slow, heavy, nearly impenetrable.
Pros
- The densest APS zoo: T-90M (255), T-15 Barbaris (250), T-80UM-2 (250), Kurganets with Afghanit — enemy ATGMs are devalued
- Best artillery park of the pairing: guided Smerch x2 (300) executes SAMs and artillery in depth; TOS-1 x2 (225) deletes positions with half-salvos
- Vena x2 (100) — new in 1.2.0: a cheap smoke carrier laying several smoke lines under every assault
- Tor-M2 (200) — supremely cost-efficient SHORAD: fast missiles bring down even aircraft straying into the envelope
- B-10 Kurganets — the Bradley killer: 2 Kornets in quick succession plus a Bulat follow-up that also hurts infantry
- Ingenery-Shturmoviki (70) arrived via the patch: a cheap meatgrinder delivered in an armored BMO-T
Cons
- The deck is slow: a fast opening exists, but the core is heavy — long-flank maps are painful
- Air tab is very limited: MiG-29SMT x2 (240) and a single Su-24M2 (310) — every sortie must pay for itself
- No fighter: the sky rests entirely on Tor-M2 and S-300PM (225), and their radars are SEAD magnets
- The T-80UM-2 cannot brawl with US tanks — low gun penetration; its role is strictly counter-ATGM-vehicle and counter-Javelin
- The Terminator (200) is vulnerable to dedicated AT squads: a killed engine means a sitting duck; field it only against an enemy without Javelins
- Few helicopters: opening, ATGM support and rear guard all sit on three airframes
Hidden potentials
- Korsar (60) — the low-altitude flank watchdog: a cheap drone that catches nearly every infiltration attempt; helicopters, airstrikes or a ground QRF finish the job.
- Empty BMO-Ts as living decoys: T-72B-level armor withstands more than any transport; send them first against AT positions, soak 2-3 rockets — then bring in the Terminators.
- MT-SM (30) — the cheapest big depot in the game: carries only supplies, but a lot of them for pennies; park large supply stacks on it for your and your allies' artillery and LRAA.
- T-90M Razvedchik (275) — a recon tank with optics and a Kord: it sees for itself, tanks hits itself, and opens targets for the Smerch without a dedicated spotter.
- T-15 Barbaris — the Trojan tank: a squad of Gvardiya, SSO or GRU rides inside — a "surprise" for the enemy tank that decides to duel a "mere IFV" up close.
Opening deployments
MAX "Guards Sortie"
Fast ground into the middle: Kozliks + BRDM-3 with Diversanty + K-17 Bumerang carrying GRU Spetsnaz + BTR-82s with SSO → Igla-N on a PRP/Kozlik races to the far flank edge (expect the SoF spec with a sniper + Silent Hawk insertion there) → Korsar goes up → Tor-M2 behind the front edge → Motopekhota unloads from Urals just short of the line and walks forward to draw fire and reveal positions.
UNORTHODOX "Fantom Fork"
If your teammates are rushing the central sectors, chip in with two Mi-24P Fantoms (145): the R-60 wins helicopter duels, and once the front sets, the Fantoms rotate to rear-area and flank police duty. A heavy deck with a light start — the enemy expects a steamroller and gets helicopters in minute one.
LOW-ELO BREAKER "Meatgrinder Sweep"
Every Ural full of Motopekhota and Ingenery-Shturmoviki fans out onto the near points immediately; BMO-Ts with Shturmoviki crush the first street position while the enemy is still laying out his two expensive cards. Low-ELO drowns in mass before its armor even arrives.
Mid-game
MAX "Prepare and Storm"
Cheap infantry walks forward to reveal the position and draw fire → pick the execution: a Smerch/TOS strike or a MiG-29SMT airstrike → Vena lays several smoke lines → special forces storm in BMO-Ts (heavy armor + 2 smokes) → Terminators clean up. Every assault follows the protocol, never a frontal yolo.
UNORTHODOX "Bait and Hammer"
Empty BMO-Ts roll first into an AT position and soak rockets (T-72B armor holds) → a T-15 Barbaris with a squad inside enters the duel, and the "surprise" dismounts at close range → the Kurganets finishes Bradleys with its Kornet volley and Bulat. The enemy pays missile prices for empty boxes.
LOW-ELO "TOS Half-Salvo"
TOS-1 (225) closes to short range and fires a HALF-SALVO at the strongpoint — usually enough, and the vehicle is ready for the next position soon after. Low-ELO without counter-battery loses a point per salvo. Keep a supply Ural close.
Late-game
MAX "The Steamroller"
T-90Ms and T-15s lead under Afghanit, Kurganets and Terminators in the second line, Tor-M2 and S-300PM as the overhead umbrella, the Smerch removing counter-battery and SAMs. The line creeps forward unstoppably: enemy missiles die on APS, his bombing runs die on Tors, his points die under tracks.
UNORTHODOX "Cluster Checkmate"
The Su-24M2 (310) stays low for the entire run — the cluster bombs are high-drag, so no climb is needed: RBK-250/500s kill most armored targets in a concentration. A reserve ace for after the enemy has built his AA around the MiG-29SMT threat.
LOW-ELO "Two Tors Per Block"
Tor-M2 x2 (400) + S-300PM (225) = the sky over your sector is closed; low-ELO feeds your umbrella airframe after airframe while 65-pt Motopekhota and 90-pt Kornets hold the ground. The enemy loses without ever finding an air window.
Combo chain "Siege Protocol"
Unit synergies
| Unit | Best partner | Why |
|---|---|---|
| Ingenery-Shturmoviki (70) | BMO-T + Motopekhota (65) | Cheap meatgrinder: unload from a Ural short of the line, walk in and draw fire; the BMO-T delivers under armor with smokes |
| 2S31 Vena (100) | Any assault | The 1.2.0 smoke carrier: several smoke lines under every assault — an obligation, not an option |
| T-15 Barbaris (250) | Gvardiya/SSO/GRU squad inside | APS + armor + 4 top-tier ATGMs + a dismounting "surprise" against close-range duels |
| B-10 Kurganets (Epokha) | Gvardii Motostrelki (75) | Bradley killer: 2 Kornets in succession + Bulat; mid-range is its element |
| T-80UM-2 Drozd (250) | Terminator (200) | Drozd meets Javelins with two APS charges, the Terminator melts infantry; an enemy without AT teams is finished |
| BMO-T (empty) | Terminators | A decoy with T-72B armor soaks AT rockets — then the main force rolls in |
| 9K58 Smerch guided (300) | Korsar / T-90M Razvedchik | Executes LRAA and artillery in depth; spotting decides everything |
| Tor-M2 (200) | S-300PM (225) | A two-layer umbrella replacing the fighter: fast short-range missiles plus the long arm |
| MiG-29SMT (240) | Su-24M2 (310) | FAB-500s onto blobs, high-drag clusters onto armor — two strike profiles for two target types |
| MT-SM (30) | Artillery park and S-300PM | Big cheap depots feeding the Smerch, TOS and LRAA — yours and your allies' |
Tactical groups
MIN — "Screen" (~280 pts)
Motopekhota (65) + Ingenery-Shturmoviki (70) + Igla-N (80) + Ural (65).
Why: the minimum meatgrinder cell: mass draws fire, the Igla closes the sky, the Ural resupplies.
MID — "Assault Node" (~1400 pts)
T-90M (255) + T-80UM-2 (250) + Terminator (200) + Kurganets with Gv. Motostrelki (~225) + BMO-T with Ingenery (~130) + Tor-M2 (200) + Vena (100) + Ural (65).
Why: the full siege protocol on one sector: APS wall, clearing element, smoke, umbrella and logistics.
MAX — "Steamroller" (~3020 pts)
Guided Smerch (300) + TOS-1 (225) + Vena (100) + 2x T-90M (510) + T-15 (250) + T-80UM-2 (250) + Terminator (200) + Tor-M2 (200) + S-300PM (225) + Mi-28N (205) + MiG-29SMT (240) + Su-24M2 (310).
Why: the deck's full weight in one fist: preparation, APS breakthrough, both strike profiles. The match bet.
RU_MECH+MOTO "Steel Cordon"
DuroSVK's heavy ground workhorse with a fast opening option. Patch 1.2.0 reworked it: the T-72B3 is gone, replaced by the T-72B3A (new patch unit, 4 APS charges); a MiG-29SMT and two Su-27SM were added; Shturmoviki moved in from the Guards Tank spec; the Su-24M2/Su-24MP were removed. The core is unchanged: a cheap BMP-3 + T-72B grind and a flank locked shut.
Ideology and gameplay
A two-speed deck: a fast opening (a pair of Mi-24P Fantoms with R-60s, or a Kozlik/BTR-82AT rush carrying special forces) and a heavy grind (a swarm of 150-pt T-72Bs plus 85-pt BMP-3s that out-trade anything in a weight class war). On top sits precision depth: guided Malkas, Tulpan mortars, Grads, and the new 1.2.0 strike pair. It is the best flank-duty deck in the faction: the entire anti-infiltration kit (Korsars, BRDM-3, four Igla squads, Diversanty) comes standard.
Pros
- Best grind-for-price in the faction: T-72B x4 (150) + BMP-3 (85) with Shturmoviki/Vampyrs out-trade any weight
- T-72B3A (255) — new in 1.2.0: 4 APS charges survive Javelins and close-range ATGMs, which the old B3 never could
- Area denial out of the box: Kornet-M (90) in high-rises plus Khrizantema (85) on the vehicle side
- Pantsir-S1 x2 (250) — the best SHORAD in the game; S-300V4 x2 (175) — the longest ground-to-air reach
- Guided Malkas x2 (270) — two-shot strongpoints and tanks deep in the enemy rear; a cheaper variant exists if points are needed elsewhere
- Six Motopekhota (65) — disposable mass for attack and defense alike; Shturmoviki (50) arrived via the patch and close the CQC gap
Cons
- No dedicated air-superiority fighter: the MiG-29SMT (240) is a bomber, the Su-27SM (370) a striker — the sky is held by SAMs, not patrols
- Su-24M2/Su-24MP removed by the patch — the cluster bomber and EW platform are gone; the Su-27SM is expensive and there are only two
- No long-range SEAD at all: nothing carries Kh-58s, so enemy LRAA must be removed by artillery
- Helicopter tab is good but not VDV-tier: a single Mi-28N fit, and the Fantoms carry no ATGMs
- Ural-based logistics (65) are fat and fragile: without a locked flank, raiders cut them to pieces
Hidden potentials
- UAZ Kozlik (45) with KPVT — a four-seat raider: Igla and Diversanty squads (both 4-man) fit perfectly; its speed can disrupt the enemy deployment or kill a soft high-value target in his rear within the first minutes.
- BRDM-3 with PRP-5 (65) — cheap high-class optics: a spotter for Malkas and Grads that you can risk on the flank without regret.
- Ural-5323 (65) — a hidden APC: hauls huge supplies plus 2-3 infantry squads; in this deck it matters more than half the combat units, because the supply appetite is enormous.
- Grad HE (125) — an interdiction tool, not a killer: panic on the front line and blown supply depots for a laughable price; kills are optional.
- Su-27SM (370) with PKB-500U — the 1.2.0 tank guillotine: four guided cluster bombs delete ANY tank in the game; use precision strike instead of a basic bombing run — the release range is slightly longer.
Opening deployments
MAX "The Cordon"
GRU Spetsnaz and SSO in BTR-82ATs/K-16s take forward positions → Kozliks carrying Igla and Diversanty race to the far edge of the flank, onto the obvious infiltration point → BRDM-3 (PRP-5) provides flank optics, Korsar goes up → Motopekhota in Urals takes the near points → Pantsir behind the front edge, S-300V4 in the rear → Deva lays the first smoke screen. Enemy Comanches and Silent Hawks meet a locked door.
UNORTHODOX "Double Fantom"
Two Mi-24P Fantoms (145) as your first units — the R-60 is devastating in helicopter duels — followed by infantry in Kozliks and Urals with supplies. Only if your teammates also open air: alone you will be erased by Stinger spam. Team sync is a requirement, not a suggestion.
LOW-ELO BREAKER "Kozlik Raid"
Every Kozlik with Diversanty and Iglas swings wide at spawn: low-ELO players don't cover their rear, and your KPVTs/Kords remove their SAMs, artillery and depots before the front even makes contact. The raid is allowed to die — it has already paid for itself.
Mid-game
MAX "Grind Fist"
4 T-72Bs + a pair of BMP-3s (Shturmoviki/Vampyrs) + a T-72B3A on point: the lead tank's APS eats the first ATGMs, the mass behind out-grinds the rest. Kornet-M in a high-rise and Khrizantema behind the ridge close the avenues — the enemy cannot feed armor to save the point.
UNORTHODOX "Scheduled Panic"
Grads (HE) hammer depots and staging areas instead of squads — panic and starved logistics; then a Tulpan (140) or Meteorit (90) cracks the leaderless strongpoint, and Shturmoviki with Ognemetchiki walk into the ruins. Cheap, dirty, effective.
LOW-ELO "Bomb-Truck Blitz"
MiG-29SMT (240) runs in low and climbs only for release: 4x FAB-500s wipe the blob off the point. Low-ELO without early SHORAD loses its entire opening. Against strong opponents — only after their AA is spotted and suppressed, otherwise it's a gift.
Late-game
MAX "Precision Execution"
BRDM-3/Korsar hold the spot → guided Malkas two-shot a strongpoint or tank in depth → the Su-27SM precision-strikes surviving heavy armor with PKB-500Us → the Mi-28N's Atakas mop up any unsupported push. Every expensive enemy unit dies on purpose.
UNORTHODOX "SAM Rat-Trap"
S-300V4 and Pantsir radars stay dark until the target is inside the envelope; fire, displace, repeat. Enemy SEAD (you have none of your own, so you know its pain) flies home empty again and again while your umbrella farms his airframes. The air war is won from the ground.
LOW-ELO "Endless Motopekhota"
A 65-pt Motopekhota on every empty point, a 150-pt T-72B behind every corner, a 45-pt Kozlik in every ditch. An opponent with two expensive cards physically cannot clear your presence — you win on hold points.
Combo chain "Cordon and Execution"
Unit synergies
| Unit | Best partner | Why |
|---|---|---|
| T-72B x4 (150) | BMP-3 (85) with Shturmoviki/Vampyrs | The author's grind classic: a cheap tank plus a direct-fire BMP (100mm, 30mm, 3 PKTs) out-trades anything |
| T-72B3A (255) | Point of the fist | The 1.2.0 newcomer's 4 APS charges eat the first ATGMs/Javelins — lead the column with it |
| Mi-24P Fantom (145) | Mi-24K (100) | R-60 hunter plus a cheap rocket ship with great optics: rear-area and flank police after the opening |
| UAZ Kozlik (45) | Igla-N / Diversanty (4-man) | A perfect seat-for-seat fit; flank lock or rear raid depending on the situation |
| 2S7M Malka guided (270) | BRDM-3 / Korsar / any laser | Spot → a 203mm two-shot onto a strongpoint or tank in the deep rear |
| MiG-29SMT (240) | Suppressed/dark enemy AA | The benchmark blob remover: 4x FAB-500; low on approach, climb only for release |
| Su-27SM (370) | Spotted heavy armor | 4x PKB-500U precision strike removes ANY tank in the game |
| Pantsir-S1 (250) | Back line and blobs | The best SHORAD in the game; expensive — keep safe distance, smoke charge for the worst case |
| Ural-5323 (65) | Motopekhota + depots | Supplies plus 2-3 squads per run; the deck's chief logistician given its appetite |
Tactical groups
MIN — "Outpost" (~275 pts)
2x Motopekhota (130) + Igla-N (80) + Ural (65).
Why: the minimum point-holding cell: mass, AA and lift for the price of one tank.
MID — "Fist" (~1300 pts)
2x T-72B (300) + T-72B3A (255) + Khrizantema (85) + Pantsir (250) + BMP-3 with Shturmoviki + BMP-3 with Vampyrs (~330) + Ural (65).
Why: an autonomous sector: grind mass, an APS spearhead, area denial, SHORAD and logistics in one package.
MAX — "Steel Cordon" (~3450 pts)
2x guided Malka (540) + Grad (125) + Tulpan (140) + 2x T-72B3A (510) + 2x T-72B (300) + Khrizantema (85) + Pantsir (250) + S-300V4 (175) + Mi-28N (205) + MiG-29SMT (240) + Su-27SM (370) + flank lock (Kozlik + Igla + BRDM-3, ~190).
Why: the deck fully realized: grind on the front, executions in depth, a locked flank. The match bet.
RU_MECH+VDV
"Master Deck for the TOP Player" — the verdict of DuroSVK (top-100 ladder), confirmed by mass adoption at high ELO. Patch 1.2.0 only made it stronger: the T-72B3M is replaced by the T-72B3A (new unit, 4 APS charges), Shturm-SM received armor, and the infantry tabs deepened — Iglas from 2 to 3, RPG-29 Vampyrs from 2 to 3. Mechanized siege backbone plus VDV verticality: playable on the front, in the grind, and on the flank.
Ideology and gameplay
The deck rests on two doctrines. The first is blobbing: cheap, dense dual-purpose infantry masses (VDV Shturm carries both AT and thermobaric rockets) break points for pennies under permanent smoke. The second is precision execution: everything expensive on the enemy side dies on purpose — guided Malkas, Mikhalych's LMURs, FAB-3000s delivered by the Su-34 protocol. A rare profile: the deck has blobbing and anti-blobbing at once — your blobs crush, their blobs are erased from the sky.
Pros
- Blob doctrine: the cheapest dual-purpose infantry mass in the game; patch 1.2.0 deepened the tabs (Iglas and Vampyrs now come in threes)
- T-72B3A (255) — new this patch: better penetration than the base T-72B, and 4 APS charges survive Javelins and close-range ATGMs
- Guided Malkas x2 (270) — two-shot strongpoints and tanks on designation; accurate even without a laser
- Mi-28NM LMURs (245) — an oppressive top-attack weapon: one-taps SHORADs, targets infantry, a 2 km death zone
- Full air cycle: MiG-35 (365) long-range SEAD → Su-34 (335) FAB-3000 → Su-35S (335) sweeps the sky and patrols long
- S-300V4 (175) + Pantsir (250) + Igla x3 umbrella; the Pantsir is one of the best SHORADs in the game
Cons
- Long flanks are the weak spot (author-acknowledged): on Riga and Dead Center, hand flank duty to a Motorized+VDV deck
- No volume artillery: a mass counter-battery duel is lost in advance — the answer is precision only
- A single MiG-35 — losing it ends all long-range SEAD and breaks the Su-34 strike chain
- Smoke from one source: the Devas x2 (55) carry plenty of shells, but losing them strips the blobs naked
- Blobs die without reloads: Shturm carries few rockets, and field resupply depends on KamAZ trucks (40) and BTR-MDMs
- Average logistics: one Mi-26 (110), two PTS-4s (60), KamAZ trucks — feeding a long heavy siege is hard
The blob doctrine (deck core, per DuroSVK)
A blob is a transport packed with full-profile infantry. Two working recipes:
| Recipe | Composition | Role |
|---|---|---|
| BTR-MDM (15 seats) | 2x VDV Shturm + 1x VDV Spetsnaz or Razvedka | Assault blob: AT + thermobarics + elite infantry; after dismount the ZU-23-2 BTR-MDM works as a close-range AA gun |
| KamAZ VDV (14 seats, 40 pts) | 2x VDV Shturm + 1x Ognemetchiki | Cheap blob: building burn-out plus AT cover; pure trading mass |
- The reload law: Shturm carries few rockets — reload after every engagement; without RPGs the squad is useless. Transports resupply in the field (the 40-pt KamAZ doubles as the ammo mule): the blob reloads without leaving the point.
- Smoke is an obligation: the Deva carries a large smoke stock — hold 2-3 screens simultaneously and shift the blobs after every enemy wind-up: make him guess where the bomb should fall.
- A fire belt around the mass: BMP-3s (85) with Motostrelki (60), Shturmoviki (50) or Vampyrs (70) — cheap direct support beside the blob; with three Vampyr cards now, every axis gets one.
- Kornet-M in a high-rise is a denied zone: infantry fires from buildings onto tank roof armor; one VDV Kornet (120) with the M upgrade closes an entire avenue.
- Armor by task: T-72B (150) against infantry, Sprut-SDM (135) against vehicles and across water, T-72B3A (255) if the enemy fields heavy armor and Javelins — APS decides.
Hidden potentials
- Forpost (50) — the unshootable sentinel: a small drone beyond LRAA reach that loiters over the flank all match and catches every infiltration attempt. Deploy always, deploy immediately.
- Shturm-SM (60) gained armor in 1.2.0: the cheap ATGM carrier with very fast missiles no longer dies to the first autocannon burst — now a full-value trading piece and side-armor gnawer.
- PTS-4 Duplo (60) — heavy amphibious supply: logistics across water, bypassing bridge ambushes and broken crossings.
- Ka-52 (215) with Iglas — not a striker but a guard: sits over the routes and removes enemy helicopter hunters while the Mikhalych works its LMURs.
- Meteorit (90) — the second-row blob eater: two heavy rockets erase an entrenched position; weaker than a FAB-3000, but usable constantly with no airframe at risk.
Opening deployments
MAX "Blob Perimeter"
VDV Spetsnaz (stand-off) in Typhoons takes forward positions (against SoF/Baltic, don't race them — they're faster and will be there first) → two blobs per the BTR-MDM and KamAZ recipes onto the near points → Forpost goes up, Argus + Spetsnaz + Igla lock the flank → Pantsir behind the masses, S-300V4 in a pair to the rear → Deva lays the first screen. Every point is a smoke-covered mass with AT and thermobarics.
UNORTHODOX "Vertical Fan"
Shturm mass fans out across three points at once + VDV Spetsnaz in Typhoons drives deep into the rear; empty BTR-MDMs stay behind as ZU-23-2 AA guns. The enemy fights on four fronts while your Malkas pound his concentrations. Your own infiltration is a bonus, not an obligation — per the author, simply holding the flank is a fine outcome too.
LOW-ELO BREAKER "LMUR Blitz with Guard"
Mi-28NM (245) as your very first unit, straight in, with a Ka-52 (215) on Iglas as its guard. Low-ELO without early SHORAD loses its opening to 4 LMURs + S-13s, and its helicopter answer gets eaten by the Alligator. Against strong opponents — only under your own Pantsir umbrella, otherwise it's suicide.
Mid-game
MAX "Precision Execution"
Forpost + Orion (90) hold a two-layer spot → MiG-35 (4x Kh-58) removes long-range radars → Su-34 on protocol: Kh-31Ps first, FAB-3000 onto the node → Mi-28NM executes armor with LMURs → guided Malkas break strongpoints → UR-77 breaches the belt → blobs occupy the scorched ground. Every link is deliberate; nothing is spent on volume.
UNORTHODOX "Siege Across Water"
PTS-4s haul supplies across the water obstacle, the siege park and Deva set up on the unexpected bank; Ognemetchiki swim after them on BTOs. The enemy's bridge ambushes and broken crossings are devalued — the siege feeds from the water.
LOW-ELO "Swarm with a Spotter"
3 T-72Bs + 2 T-72B3As press the axis with frontal mass while a BRM-1K (70) corrects guided Malka fire onto whatever lights up. The enemy meets five tanks with AT fire — and dies to 203mm shells from the sky. Low-ELO watches the tanks and never sees the artillery.
Late-game
MAX "Empty Sky, Precise Ground"
The Su-35S (4x R-37 + 2x R-77 + ECM) sweeps any airframe on approach and holds station for a long time → Su-34s with FAB-3000s erase the fortlets → LMURs pick off armor and SHORADs → the T-72 swarm with Spruts drives across the map. Exhausting his expensive units is your points victory.
UNORTHODOX "Intercept of the Century"
Su-35S on standing patrol all late-game: Tu-22M3s, B-1Bs, B-2s fall to R-37s on approach, before release. Thousand-point bombers die for free — the deck's built-in answer to the heavy-bomber meta.
LOW-ELO "Cheap Infinity"
Shturm-SMs at 60 (armored since 1.2.0), Forposts at 50, Shturms at 60, T-72Bs at 150 on every empty point. An opponent with two expensive cards loses to pure presence and hold points.
Su-34 bombing protocol (author's steps)
The ideal wrap-around: a MiG-35 SEAD mission (4x Kh-58) first, the Su-34 run immediately after. Protect the MiG-35 as the main asset: there is only one, and without it long-range SEAD ends — and the protocol becomes Russian roulette.
Combo chain "Precision Execution" (maximum realization)
Unit synergies
| Unit | Best partner | Why |
|---|---|---|
| VDV Shturm x2 | BTR-MDM or KamAZ + 1 elite | The author's blob recipes: 15/14 seats = 2 Shturm + Spetsnaz/Razvedka/Ognemetchiki; the transport then serves as reload mule and AA gun |
| 2S7M Malka guided (270) | Forpost / Orion / BRM-1K | Designation → a 203mm two-shot onto a strongpoint or tank; instant payback for any expensive spot |
| MiG-35 (365, 4x Kh-58) | Su-34 (strike right after) | The SEAD mission opens the corridor — the author's order: MiG first, then the Su-34 protocol |
| Mi-28NM (245, 4x LMUR) | Ka-52 (215, Iglas) | Hunter + guard: the Alligator removes enemy helicopter hunters while LMURs one-tap SHORADs |
| Pantsir-S1 (250) | Blobs | Bodyguard of the masses against aircraft and helicopters; fully upgraded, smoke charge in danger, do not lose it |
| S-300V4 x2 (175) | Su-35S (335) | Paired umbrella + patrol fighter: the ground locks the altitude, the sky farms airframes |
| T-72B3A (255) | Shturm-SM (60) | The APS tank holds the duel while the newly-armored (1.2.0) ATGM carrier gnaws the flank for pennies |
| VDV Kornet-M (120) | High-rise | Denied zone: building infantry hits tank roof armor — one team closes an avenue |
| UR-77 Meteorit (90) | Ognemetchiki on BTOs | 90 points to remove a strongpoint → burn the ruins after; cheap and always available |
| Forpost (50) | Flank (Argus + Spetsnaz + Igla) | The unshootable sentinel catches infiltration → three answers: FAB-3000, helicopters, or a QRF of 2x BMP-3 |
Tactical groups
MIN — "Blob" (~210 pts)
KamAZ VDV (40) with 2x VDV Shturm (120) + Ognemetchiki (50).
Why: the doctrine's minimum cell: AT, thermobarics, burn-out and an ammo mule — for the price of one IFV.
MID — "Node" (~1100 pts)
T-72B3A (255) + T-72B (150) + Shturm-SM (60) + Pantsir (250) + a blob on a BTR-MDM (~210) + BMP-3 with Motostrelki (~145) + KamAZ (40).
Why: autonomous sector control: APS armor, AT, umbrella, blob, support and supply.
MAX — "Precision Grind" (~3480 pts)
2x guided Malka (540) + UR-77 (90) + 2x T-72B3A (510) + 2x T-72B (300) + 2x Shturm-SM (120) + Pantsir (250) + S-300V4 (175) + Mi-28NM (245) + Ka-52 (215) + Su-35S (335) + MiG-35 (365) + Su-34 (335).
Why: the full precision execution: from designation to sector occupation, with the complete air cycle. The match bet.
US_MARINE+BALTIC "Wolf Pack"
A pure frontline deck from DuroSVK's arsenal: air options are limited but sufficient, while your ground choices are ultimate and all-round strong. Assault and defense are equally powerful, and your ground presence is total — pushing you out is nearly impossible. Play aggressively from minute one.
Doctrine and Gameplay
The deck rests on two pillars: speed of first contact (the Wolf WMIK is one of the fastest jeeps in the game and hauls 400 kg of infantry supplies) and immovability of the follow-on force (LAV-ATM + NASAMS denial zones, M1A1 heavy armor, K9 Kõu artillery). You open with jeeps and ambushes, grind the front with an ACV-30 conveyor, and once the line settles you roll in the heavies and make the enemy pay for every meter. The Baltic component brings unique tools: Estonian Jegeris with Wolf jeeps, fully upgraded CV-90s for the Kajinieki, the Scimitar, and extended-range K9.
Pros
- Best-in-class opener: Wolf WMIK — speed plus 400 kg of supplies; your first line is armed and resupplied from second one
- Complete ground arsenal: from Jegeris ambushes to M1A1 FEP TUSK — no weak spots in assault or defense
- Seating math: ACV-30 (14 seats) and AAVP-7A1 (22 seats) — endless elite-infantry combinations
- Two-layer area denial: LAV-ATM + NASAMS on vehicles, Spike + RBS-70 on foot — against ground and helicopters alike
- LAV-L for 25 points — a network of mini supply dumps: rearm and heal anywhere, eggs in many baskets
- Extended-range K9 Kõu — punishes passive enemies trying to artillery you to death
Cons
- Narrow air tab: two Hornets, one Prowler, one F-35B — you will not win the sky alone
- No Pantsir-class SHORAD: NASAMS cannot move with radar on; RBS-70 is anti-helicopter only
- Only two PAC-2 cards and expensive (230 in the 4-missile config) — thin dome, vulnerable to SEAD
- A single, very slow Prowler carries the deck's entire long-range SEAD; it cannot outrun fighters
- Viper/Supercobra have no ECM: against Tor or Pantsir a helicopter lives for seconds
- Elite economics: the best ACV/AAVP loads cost like a tank, and Reserve Marines come only ×4
Seating Math (deck core per DuroSVK)
A transport is an assault module, not a taxi. The author's working recipes:
| Transport | Load | Role |
|---|---|---|
| ACV-30 (14 seats) | SMAW + Force Recon (CQC); Raiders CQC / Marines | The main assault conveyor: spam it with rotating loads — every new APC is a new problem for the enemy |
| AAVP-7A1 (22 seats) | 2×SMAW + Force Recon; Raiders CQC + SMAW; 2×Kajinieki + Force Recon; 2×Jegeris + Zaliukai | Heavy infantry stacks: you dismount right at enemy positions, so take the full survivability upgrade |
- Smoke first: on contact — a Panzermörser smoke screen on the area, identify positions, and launch MICLIC rockets straight into the strongpoint. Only then does the infantry push.
- LAV-L — constantly: keep bringing them and spread the mini-dumps across the map; units rearm and heal anywhere, and losing one dump means nothing.
- Denial zones always in cover: LAV-ATM + NASAMS (vehicle pair) or Spike + RBS-70 (infantry, inside buildings). Remember: NASAMS cannot move and keep radar on at the same time — "drive silent, then light up".
- At least ONE PAC-2 at the first opportunity, but never in the opener: your early push should succeed — which means the enemy will almost certainly come to bomb you.
Hidden Potential
- Wolf WMIK — the jeep-depot: 400 kg of infantry supplies on the fastest wheeled opener in the game; your Jegeris ambush reloads without leaving position.
- LAV-L (25) — the cheapest logistics in the game: a swarm of mini-dumps turns the entire front into one big supply base.
- MICLIC is an assault weapon, not an engineering one: a salvo "in the face" of a strongpoint behind a smoke screen removes the position before your infantry even dismounts.
- M728 CEV (110) — 165-mm building deletion: a cheap answer to enemy infantry in high-rises and a battering ram against break-ins.
- AH-1W Supercobra with 2× AIM-9 (145) — a flying MANPADS: it guards helicopter corridors while NASAMS repositions with radar dark.
Opening Deployments
MAX "Wolf Pack"
Two Wolf WMIKs — one with Jegeris into an axis ambush, the second with Piorun (RBS-70) as early AA → Scimitar forward as eyes → ACV-30 loaded SMAW + Force Recon (CQC) onto the nearest point → MICLIC and smoke mortar in the second echelon → NASAMS the moment the front settles. Every axis gets: eyes, an ambush, smoke and a battering ram.
UNORTHODOX "AAVP Double Landing"
A double load in AAVP-7A1s (2×SMAW + Force Recon) across water or a wide flanking route — straight into the rear of an enemy point; the CEV covers the dismount and demolishes nearby buildings. On water maps the enemy meets 22 seats of elite infantry where he expected a light truck.
LOW-ELO BREAKER "Viper Blitz with Escort"
If the enemy opened without SHORAD — the AH-1Z Viper (8×Hellfire + Hydra) deletes his entire opener while the Supercobra with AIM-9s intercepts the answering helicopters. Against organized air defense — do not fly: hold the Viper in reserve until their SHORADs reveal themselves.
Mid-Game
MAX "Smoke → MICLIC → Assault"
Scimitar and Force Recon mark the strongpoint → Panzermörser lays a smoke wall → MICLIC strikes the positions → the ACV-30 with its SMAW load breaks in → LAV-ATM + NASAMS seal the denial zone on the taken ground → LAV-L hauls supplies forward. Repeat the cycle on the adjacent point.
UNORTHODOX "Backline Hunt"
Scout Snipers + Jegeris + Scimitar seep behind the front line and reveal/kill expensive soft targets — SAMs, artillery, depots. The enemy is forced to hold rear security, and his front line thins out by itself.
LOW-ELO "ACV-30 Conveyor"
Non-stop ACV-30 spam with rotating loads: SMAW + Force Recon → Raiders CQC → regular Marines. Low-ELO opponents cannot switch ammunition and priorities fast enough — every arriving APC poses a new problem.
Late Game
MAX "Heavy Curtain"
M1A1 FEP TUSK and M1A1 HC hold the axis, Kajinieki in fully upgraded CV-90s form the second echelon, K9 Kõu methodically dismantles a passive enemy's fortifications, the PAC-2 + NASAMS dome sits over the front, and the F/A-18C guards the sky with four AIM-174s. The front does not move; the enemy pays for every assault.
UNORTHODOX "JSOW Execution"
The F-35B with 2×JSOW, cued by Force Recon or snipers, immobilizes heavy armor (it won't kill anything above 16 HP, but it will almost certainly cripple it), and the LAV-ATM finishes the stationary target. A cost-efficient way to remove expensive tanks without armor duels.
LOW-ELO "Cheap Perimeter"
Reserve Marines in ACV-30s, Milan (Spike) and Piorun (RBS-70) inside buildings on every point, M60 CEV as a ram against break-ins. Presence everywhere for pennies — low-ELO drowns in the number of garrisons.
Combo Chain "Ground Ram"
The air arm of the chain: the Prowler keeps enemy radar SAMs busy (it cannot outrun fighters — never stray far), and the F/A-18C cycles in the back, lobbing AIM-174s at inbound aircraft — no dogfights; this build exists for long-range interception.
Unit Synergies
| Unit | Best Partner | Why |
|---|---|---|
| Wolf WMIK | Jegeris / Piorun | Speed + ambush + early AA; 400 kg of supplies makes the ambush self-sufficient |
| ACV-30 | SMAW + Force Recon (CQC) | The author's base assault module: thermobarics + close combat + autocannon support |
| AAVP-7A1 (22 seats) | 2×SMAW + Force Recon / 2×Kajinieki + FR | Heavy stack tailored to the task; dismounting at the enemy = full upgrade mandatory |
| NASAMS | LAV-ATM | Vehicular denial zone: helicopters and armor closed by a single position |
| Milan (Spike) | Piorun (RBS-70) | The infantry version of the denial zone — from buildings, in cover |
| Panzermörser (smoke) | AAVP MICLIC | The "smoke → salvo → assault" protocol: MICLIC hits the blinded strongpoint |
| K9 Kõu (ext. range) | Scimitar / Scout Snipers | Spotting + extended range = execution of passive enemies and counter-battery |
| AH-1Z Viper | AH-1W Supercobra (AIM-9) | Hunter + escort: the Cobra strips the helicopter response while the Viper works armor |
| F/A-18C (4×AIM-174) | EA-6B Prowler | The interceptor covers the slow SEAD platform; HARMs occupy radars — missiles find targets |
| F-35B (2×JSOW) | Force Recon / Scout Snipers | Spot → immobilize heavy armor → LAV-ATM finishes the kill |
Tactical Groups
MIN — "Wolf Ambush" (~250 pts)
Wolf WMIK with Jegeris (100) + Piorun (70) + LAV-L (25) + a Scimitar when points allow.
Why: the minimum opening cell: speed, ambush, AA and supply — cheaper than a single APC.
MID — "Holdout Node" (~975 pts)
ACV-30 (SMAW + Force Recon) + CV-90 with Kajinieki (135) + M1A1 HC TUSK (225) + LAV-ATM (100) + NASAMS (130) + Panzermörser (85) + MTVR (65).
Why: autonomous sector control: assault, armor, denial zone, smoke and resupply — a full cycle without outside help.
MAX — "None Shall Pass" (~2625 pts)
M1A1 FEP TUSK (280) + 2×M1A1 HC (450) + CV-90 (135) + AAVP with stack (~300) + K9 Kõu (270) + PAC-2 (230) + NASAMS (130) + LAV-ATM (100) + Viper (240) + F/A-18C (330) + Prowler (260).
Why: the full heavy curtain with an air arm: the ground is impassable, the sky is contested. The match-deciding investment.
US_STRYKER+SF "Flank Phantom"
"The best deck for the fight on the flank — not only in the US faction, but in the entire game" — DuroSVK's verdict. You are fast, stealthy and deadly: the longer the flank, the better. Patch 1.2.0 rebuilt the recon tab (Army Snipers and RQ-7 Shadow replace Rangers Snipers and Scouts) and doubled the air-defense dome: PAC-3 MSE ×2 and Centurion C-RAM ×2.
Doctrine and Gameplay
This deck wins through information and tempo. Three layers of reconnaissance — frontline (Stryker RV, Shadow), backline (STT, snipers in the Silent Hawk, RRC), and air (RQ-170 Sentinel) — give you a picture the enemy does not have; the wheeled speed of Strykers and RSOVs lets you occupy positions before him; and the air tab — your ultimate force multiplier — executes everything your recon finds. Do this right and you will never lose control of the flank fight; you may even win the air supremacy struggle for your entire team.
What Changed in Patch 1.2.0
| Change | What it gives you | How to play it |
|---|---|---|
| Added: F-16C Fighting Falcon (260), Army Snipers (M2010) with Stryker RV, RQ-7 Shadow (50), Stryker MC (75), LMTV (40) | A new recon axis "snipers + RV", an untargetable drone, a Stryker-based smoke mortar, cheap logistics and the ultimate blob remover | Deploy Shadow always and immediately; the F-16C is your 260-point answer to any infantry mass |
| Removed: Rangers Snipers and Scouts | Recon is rebuilt around Army Snipers on the Stryker RV and drones | Do not look for the old cards — the new synergies cover their role |
| PAC-3 MSE now ×2, Centurion C-RAM ×2 | A two-layer dome with two copies of each layer: high altitude + the best US SHORAD | Deploy as a "high + point" pair over the flank sector you intend to hold |
Pros
- Three-layer recon is your upper hand: frontline, backline and drones; the enemy plays blind
- Speed: the fastest 6-seat jeep (RSOV) and wheeled Strykers — positions are taken before the enemy arrives
- Force-multiplier air tab: F-22 with JATM, the best SEAD aircraft F-16CJ, F-16V with 4×JSOW kills ANY tank, F-16C deletes blobs for 260
- Insurance for taken ground: a pair of Troopers beats enemy APS with a double Javelin salvo
- Post-1.2.0 the dome is doubled: PAC-3 MSE ×2 + Centurion C-RAM ×2 (SeaRAM — the best US SHORAD)
- Comanche with radar + Killer Eggs with Stingers — a helicopter screen unique among US decks
Cons
- Almost no armor: a single M10 Booker, made fragile by the nerf — head-on tank duels are lost in advance
- Elite is expensive: Delta and Dragoon loads cost like a tank; a micro mistake costs real points
- AT rests on thin ice: a lone Stryker ATGM, RAWS and helicopters — there is no ATGM infantry mass
- The dome is thin on ammunition: PAC-3 carries 4 missiles, C-RAM is expensive (340) — saturated by volleys and SEAD
- HIMARS is a scalpel, not a hammer: little area damage, it needs designation
- On short fronts and closed maps the speed advantage does not materialize — the deck only shines on a long flank
Three Layers of Recon (deck core per DuroSVK)
Recon is your upper hand — utilize all three of its aspects.
| Layer | Units | Task |
|---|---|---|
| Frontline | Stryker RV (fully upgraded) + Army Snipers; RQ-7 Shadow | The RV is unique — Russians have nothing like it, but once revealed it becomes a priority target: fall back immediately. Shadow cannot be locked by SAMs or fighter missiles — it scans the front all match |
| Enemy backline | STT (Pararescue) + Rangers RAWS; snipers in the Silent Hawk; stand-off RRC | STT in the rear is a nightmare: he can't send helis (MANPADS), and with a MAAWS squad he'll regret vehicles too. A sniper pack at the enemy spawn is the most valuable intel of the match |
| Air | RQ-170 Sentinel + F-22 cover | Sentinel excels on the flank far better than on the front: the flank is not crowded with SAMs. Enemy fighters are the F-22's problem |
Hidden Potential
- RQ-7 Shadow (50) — neither SAMs nor AMRAAM/9-km fighter missiles can target it: a permanent flank sentry and a catcher of any infiltration attempt.
- Snipers in the Silent Hawk to the enemy spawn point — the most valuable recon of the match: every enemy departure is lit from the first minutes.
- Troopers strictly in pairs: the double Javelin salvo overloads APS — the enemy's only answer is to smoke off and retreat.
- Precision strike instead of the basic bombing run — on the F-16V and F-35A it adds extra release range to the JSOW: those extra kilometers are the airframe's life.
- HIMARS opportunistic counter-battery: low damage, but you never know when your opponent forgets to displace after a salvo or two; guided munitions delete lased SAMs and depots.
Opening Deployments
MAX "Three Layers from Minute One"
RSOV with stand-off RRC onto a far flank position (the fastest 6-seat jeep — you are not expected there) → Stryker RV + Army Snipers to the frontline → Shadow into the sky → STT on a Silent Hawk along an approach route into the enemy rear → Stryker Dragoon with Rangers and Combat Engineers onto the near point. The enemy plays blind — you see everything.
UNORTHODOX "Spawn Under the Dome"
A sniper pack in a Silent Hawk straight to the enemy spawn point + RQ-170 over the flank: every enemy departure is revealed, and HIMARS with guided munitions methodically removes SAMs and supply depots. The enemy's rear becomes your shooting range.
LOW-ELO BREAKER "Comanche Screen"
RAH-66 with radar + two Killer Eggs with Stingers intercept the helicopter opener low-ELO loves; you stay on the ground under C-RAM cover. Against a strong opponent the Comanche works only from stand-off distance — no heroics.
Mid-Game
MAX "Hit and Run"
Stryker Dragoon with Rangers and Combat Engineers + Stryker MGS + a Stryker MC smoke screen — a series of rapid lunges at the point until you take what you need. Once taken — bring Troopers in pairs: the double Javelin salvo breaks APS and the position holds.
UNORTHODOX "HIMARS Backline Terror"
HIMARS, cued by STT and sniper lasers, removes SAMs, depots and command nodes; opportunistic counter-battery against the forgetful on top. The enemy is forced to pull fighters and infantry back to guard his rear — and the front thins out again.
LOW-ELO "F-16C Meat Grinder"
Save 260 — the F-16C Fighting Falcon wipes any infantry blob with Mk.82/Mk.84s, sometimes killing heavier targets too. Low-ELO bunches up — feed the Falcons.
Late Game
MAX "Clean Sky, Dead Flank"
The F-22 lobs JATMs at inbound aircraft from far away (no dogfight needed or worth the risk) → sky is clear → the F-16CJ runs standing SEAD missions, enemy radars stay silent → the F-16V precision-strikes any tank with 4×JSOW → the Comanche collects the leftovers. Flank control is never lost until the match ends.
UNORTHODOX "Guardian Execution"
The AH-64E with 16×JAGM and LAIRCM launches on Sentinel's cue: one run — minus a company of armor. The 655-point config flies only under a clean sky and suppressed radars, otherwise it is the most expensive firework of the match.
LOW-ELO "Cheap Eyes, Expensive Bombs"
A 50-point Shadow and 105-point Killer Eggs hold the battle picture while the F-35A and F-16V strike precisely at whatever is lit. Low-ELO pays with tanks for your drones.
Combo Chain "Phantom Blade"
Unit Synergies
| Unit | Best Partner | Why |
|---|---|---|
| Army Snipers (M2010) | Stryker RV | The new 1.2.0 recon axis: snipers in cover, RV with Bushmaster II + Javelin — eyes that also fight |
| STT (Pararescue) | Rangers RAWS (Carl Gustaf) | The backline duo: MANPADS + AT — the enemy can send neither helicopters nor vehicles |
| Stand-off RRC | RSOV | The fastest 6-seat jeep = hit-and-run raids and early grabs where you are not expected |
| Stryker Dragoon | Rangers + Combat Engineers | The assault module for rapid lunges; the backbone of hit-and-run tactics |
| Stryker MGS | Stryker MC (smoke) | Fire + screen: the MGS supports the assault while the mortar blinds the enemy |
| Troopers ×2 | A freshly taken point | The double Javelin salvo beats APS — the enemy's only answer is smoke and withdrawal |
| PAC-3 MSE | Centurion C-RAM (SeaRAM) | The post-1.2.0 two-layer dome: high altitude + the best US SHORAD against helicopters |
| F-22 (JATM) | F-16CJ | A clean sky for the best SEAD aircraft: enemy radars stay permanently suppressed |
| F-16CJ | F-16V (4×JSOW) | SEAD opens the window — the precision strike removes any tank in the game |
| Sentinel | HIMARS | Designation for guided munitions: SAMs, depots, counter-battery |
Tactical Groups
MIN — "Eyes of the Flank" (~275 pts)
RQ-7 Shadow (50) + Army Snipers (85) + a fully upgraded Stryker RV (~140).
Why: the minimum recon cell: an untargetable drone + snipers + the unique RV — the enemy is blind, you see everything.
MID — "Hit and Run" (~935 pts)
Stryker Dragoon with Rangers + Combat Engineers (~230) + Stryker MGS (125) + Stryker MC (75) + Troopers ×2 (~220) + C-RAM (210) + HEMTT (75).
Why: an autonomous take-and-hold cycle: assault, fire support, smoke, consolidation and an anti-helicopter dome.
MAX — "Full Flank Package" (~2575 pts)
F-22 (395) + F-16CJ (310) + F-16V (365) + F-16C (260) + Comanche (290) + PAC-3 MSE (165) + C-RAM (210) + HIMARS (225) + Stryker MGS (125) + Dragoon group (~230).
Why: the entire chain "recon → sky → SEAD → execution → occupation" in one deployment. The match-deciding investment.
US_MARINES+SF (NUKE) "The Grinder"
This deck fields the most powerful infantry in the game — and it is the only one carrying a tactical nuclear strike. A CQB grinder for closed maps: Delta and Alpha sectors on Ruda Forest, dense urban terrain. Patch 1.2.0 reshuffled its cards: the B-2 with B61 went up from 1000 to 1400, but PAC-2 became ×2 and JSOWs got cheaper.
Doctrine and Gameplay
The entire point of this deck is the raw power of your extremely strong infantry in the Recon and Infantry tabs: USMC and SOF together provide the best squad pool in the game (Raiders CQC, Delta, RRC, Green Berets Flash, SMAW) plus excellent transport options. It is a heavy-infantry frontline deck built to out-grind any RU deck in special-forces-to-special-forces combat: even when you trade negatively, the enemy runs out of elite infantry long before you do. Strictly for CQB sectors — on a flank or in open fields you will suffer. And when the front fuses into a static knot — the B61 decides.
What Changed in Patch 1.2.0
| Change | What it gives you | How to play it |
|---|---|---|
| B-2 with B61: 1000 → 1400 (that is already the full price of the airframe with the nuke) | The nuke is no longer a cheap trump card — it is a match-level investment | One deliberate run instead of two impulsive ones; if the nuke is not needed, swap the B-2 for fighters, SEAD and CAS |
| Prowler 2 → 1 | SEAD without reserve: losing the airframe leaves the sky bare for your nuke run | Regular but cautious missions; protect it as the only key to the B-2's corridor |
| PAC-2 1 → 2, MTVR 2 → 3, LAV-M 1 → 2 | The dome is no longer a single point of failure; logistics and mortar support fit the 1000-point support limit | Two PAC-2s cover the sector reliably; a pair of LAV-Ms gives smoke and suppression without pauses |
| F-35 cheaper: JSOW 65 → 50 | Two F-35A airframes at 440 — regular execution of armor your infantry cannot reach | Precision-strike off sniper/Sentinel spotting — this is your "long-arm ATGM" |
Pros
- The strongest infantry pool in the game: Raiders CQC, Delta, RRC, Green Berets Flash, SMAW — elite across both tabs
- Seating math: ACV-30 (14 seats) and AAVP-7A1 (22 seats) — endless combinations tailored to the task
- M1A1 HC ×4 — the most cost-efficient heavy armor in the game; do not sleep on tanks
- Post-1.2.0: PAC-2 ×2, LAV-M ×2, MTVR ×3 — dome, smoke and logistics are no longer the bottleneck
- B-2 with B61 — an existential threat: the enemy disperses and fears massing simply because it exists
- F-35A ×2 with cheaper JSOWs (50) — affordable execution of armor at mid-to-long range
Cons
- Closed maps and CQB sectors only: on a flank or in open fields the deck suffers — a narrow niche, hence the tier
- No ATGM infantry at all — by design: AT is a lone LAV-ATM, the Comanche and the Guardian
- The nuke got pricier: B-2 1000 → 1400 (1400 total with B61) — there is no margin for error on the run
- Only one Prowler now: the SEAD chain is fragile, and its loss closes the road for the nuke
- The support tab is locked under a strict 1000 activation point limit — every card counts
- Helicopters are expensive: a fully loaded Guardian at 655 is the enemy air defense's priority target
Seating Math (deck core per DuroSVK)
Load squads according to the situation on the ground — the question is always which capability you need right now.
| Transport | The author's loads | Role |
|---|---|---|
| ACV-30 (14 seats) | SMAW + RRC (the author's favorite combo); SMAW + Para; Rangers + Green Berets Flash; RRC + Para; single squads of Raiders CQC / Delta / Marines | The main assault conveyor of the first half of the match: fast hulls, elite payloads |
| AAVP-7A1 (22 seats, fully upgraded) | Marines + SMAW (the typical one); 2×SMAW + Para; 2×SMAW + 2×Green Berets Flash (very expensive, but anti-everything!); Raiders + SMAW; Delta + MAAWS; 2×Rangers + Flash; 2×RRC + SMAW | Heavy stacks for dismounting right at enemy positions — hence the mandatory survivability upgrade |
| War Pig (12 seats) | Rangers / any fresh squads | Cheap, fast reinforcements + 800 supply points; fragile — do not go near the frontline |
- The opener is a raid, not a capture: the RSOV with Force Recon or Rangers MAAWS drives around, dismounts into ambushes and sneaks behind enemy lines to kill expensive backline units. Do not capture sectors with these forces.
- At least one LAV-AD — mandatory: the enemy loves opening with helicopters; take the Hydra variant — minigun and rockets will support your ground forces.
- Missing ATGM infantry is a feature, not a bug: you do not need it for this deck's role. If you need ATGM — LAV-ATM or Comanche/Guardian.
Hidden Potential
- RSOV with Force Recon / RAWS — not a capture vehicle but a raiding blade: an axis ambush or a knife in the back spotting expensive targets.
- War Pig — a mobile depot: 12 seats and 800 supply points; the front reloads without trips to the rear, as long as you keep it out of reach.
- LAV-AD with Hydra — more than AA: the minigun + unguided rockets work as infantry support fire.
- Green Berets Flash (M202) — anti-everything inside buildings; the 2×SMAW + 2×Flash stack in an AAVP is expensive but has no weak target types.
- F-35A post-1.2.0 — the "long-arm ATGM": JSOWs dropped to 50, and two airframes cover the armor your infantry physically cannot reach.
Opening Deployments
MAX "RSOV Fan"
RSOV with Force Recon + RSOV with Rangers RAWS — flanking drives, ambushes and a knife in the back; do NOT capture points with them → then an ACV-30 with the SMAW + RRC load onto the nearest CQB block → LAV-AD against a helicopter opener → MTVR to the rear, War Pig ferries fresh squads. The enemy is nervous from minute one — his rear is already burning.
UNORTHODOX "Silent Hawk First Strike"
Pararescue on a Silent Hawk — straight onto a rear high-rise of the sector: eyes and MANPADS behind enemy lines from the first minutes. He cannot send a helicopter against them, and a truck cannot dig them out — the enemy is forced to stage a full clearing operation in his own rear.
LOW-ELO BREAKER "Fist in an AAVP"
2×SMAW + 2×Green Berets Flash in a fully upgraded AAVP — straight into the nearest block: low-ELO does not survive the first assault of an anti-everything stack. Very expensive, but against a disorganized opponent you simply repeat the trick.
Mid-Game
MAX "Elite Conveyor"
ACV-30s and AAVPs run a shuttle: Marines + SMAW → Raiders + SMAW → Delta + MAAWS; the War Pig ferries fresh squads and 800 supply; a pair of LAV-Ms delivers smoke and mortar suppression without pauses. Every enemy withdrawal is your step forward; his elite runs out first.
UNORTHODOX "MICLIC in the Face"
Marine heritage: LAV-M smoke on the area → a MICLIC salvo into the strongpoint → an assault by the AAVP stack. On Ruda this removes entire forest strongpoints together with their garrison before your infantry even dismounts.
LOW-ELO "M1A1 HC Wall"
Four of the most cost-efficient tanks in the game support your infantry in CQB, one at a time. Low-ELO burns its entire AT stock against a wall of 225-point Abrams — and you simply roll out the next one.
Late Game
MAX "B61 Decides"
The front has fused into a static knot → Scout Snipers or the Sentinel hold designation on it → the Prowler silences the radars → the B-2 with B61 runs the corridor: 1400 points to delete a sector of resistance → infantry stacks occupy the ruins. Do not be afraid to push the button — this deck is built for exactly that.
UNORTHODOX "Nuke-Free Option"
A variant endorsed by the author: if your team needs the sky more — swap the B-2 for fighters, additional SEAD and CAS. The F-35A ×2 with JSOWs remains your armor executioner, and the freed 1400 points become air presence for the entire match.
LOW-ELO "Prowler Shaping"
Regular Prowler SEAD runs + the Guardian against counterattacks. Low-ELO forgets to displace SAMs after launches — HARMs clear the nuke's path for free, and 16 JAGMs shut down any ground answer.
Combo Chain "The Grinder"
Unit Synergies
| Unit | Best Partner | Why |
|---|---|---|
| Force Recon | RSOV | The raiding blade of the opener: ambush or a knife in the back — but never point capture |
| SMAW | RRC in an ACV-30 | The author's favorite combo: thermobarics + close combat + autocannon in a 14-seat module |
| Green Berets Flash | SMAW in an AAVP | The anti-everything stack: 2×SMAW + 2×Flash has no weak target type in built-up areas |
| Delta Force (CQC) | Rangers RAWS (Carl Gustaf) | Assault + AT in one load: Delta+MAAWS covers both close-combat fronts |
| Pararescue | MH-60X Silent Hawk | Backline eyes with MANPADS: no helicopter can be sent against them, no truck digs them out |
| M1A1 HC ×4 | Infantry stacks | The most cost-efficient armor in the game anchoring the grinder |
| LAV-AD (Hydra) | Frontline infantry | AA against helicopter openers + minigun and rockets supporting the assault |
| PAC-2 ×2 | LAV-AD | Post-1.2.0 — a proper two-layer dome: high altitude + point defense |
| EA-6B Prowler | B-2 Spirit | SEAD opens the corridor for the nuke; the Prowler is single — guard it as the key to the B61 |
| F-35A (2×JSOW) | Scout Snipers / Sentinel | Spotting → execution of armor beyond infantry reach; twice as affordable after 1.2.0 |
Tactical Groups
MIN — "RSOV Raid" (~270 pts)
RSOV with Force Recon (70) + RSOV with Rangers RAWS (140) + resupply economy via MTVR (65).
Why: the minimum opening cell: two raiding blades plus resupply — the enemy is already losing his rear while you have spent nothing serious.
MID — "CQB Block" (~980 pts)
AAVP with a Marines + SMAW stack (~240) + M1A1 HC (225) + LAV-AD (160) + LAV-M (60) + War Pig with Rangers (~130) + MTVR (65).
Why: an autonomous grinder node: assault, armor, AA, smoke, reinforcements and supply — the sector holds without outside help.
MAX — "Grinder + Nuke" (~2525 pts)
B-2 with B61 (1400) + F-35A (340) + Prowler (260) + M1A1 HC (225) + AAVP with a stack (~300).
Why: the full doctrine realized: the aerial executioner, the SEAD key, the armor anchor, the infantry hammer and the B61 itself. The match-deciding investment.
US_ARMORED+MARINES «Three-Step Escalation»
A frontline deck: the best tanks in the game, a solid infantry tab, and heavy direct & indirect fire support that blasts any fortified position apart. It plays slow: three escalation steps until the enemy breaks under the third one. Patch 1.2.0: added F-35B (2×JSOW) and M981 FISTV (spotter), Prowler cut to a single airframe.
Ideology & Gameplay
You play an escalation game. You are not fast — so the opening is built, not gambled: first minutes go to minor skirmishes, recon marks enemy positions, forces mass up. Step one — ACV, Bradley ESV, LAV-M (smoke), recon and some AA: push into your sector, but if the early fight is going sour, drop smoke and fall back — do not bleed units. Step two — a tank or two plus cheap direct support (CEV, Assault Breacher, CATFAE) with a force fire keybind: AMPV/AAVP infantry assaults, tanks stay behind infantry firing direct. Step three — GMLRS ×2 and mountains of supply: counter-battery, SAMs, backline and depots. Mandatory condition: confident hotkey play — radar on/off against SEAD and repositioning SAMs after every launch, or an arty-snipe removes your AA, then your armor, then the whole push.
Pros
- Best armor in the game: M1A2 SEP v3 (315, TUSK2), M1A1 HC ×4 (225, TUSK), recon SEP v2 TUA (260)
- Full breaching kit for direct fire: M60A1 CEV (95), M1150 Assault Breacher (200), AAVP MICLIC CATFAE (185)
- GMLRS ×2 (300) — flexible long-range execution: 6-rocket salvos, fast target switching
- Decent infantry: Raiders CQC (120), Assaultmen SMAW (80), Force Recon (70), AMPV with Bushmaster 2 + BRAT2 APS
- Cheap LAV-M smoke (60) ×2 — the survival tool of every step
- Air insurance: Gunslinger Hornet (330), Prowler SEAD (260), new F-35B with 2×JSOW (340)
Cons
- Very micro-intensive: without force fire and SAM hotkeys the deck never opens up — the author warns off players uncomfortable with hotkeys
- Slow: a lost opening takes long to recover; throwing everything in early = a heavy defeat
- Prowler is now single (was 2) — SEAD windows are rare: the airframe needs almost 7 minutes to return
- GMLRS ×2 eat economy and supply: step three demands a working MTVR logistics chain
- Only one SHORAD type — M6 Linebacker: losing it opens your armor to helicopters
- Helicopter and air tabs are "useful but not significant" — the deck won't win the air war alone
Hidden Potential
- Force fire is the deck's heart: CEV, Breacher and tanks excel at firing "blind" into identified/suspected positions — bind the key before the first fight.
- M981 FISTV (70) — the artillery's new eye: cheap spotter with smoke and cage armor; holds the picture for Paladins and GMLRS without risking elite recon.
- Supercobra as rear guard (135): keep it over your artillery and SAMs — cheap insurance against ground and heliborne infiltrations.
- AMPV without Javelin: Bushmaster 2 + BRAT2 APS at a sane price — an assault taxi you can afford to risk in an APS duel.
- SEP v2 TUA — a tank in the recon tab (260): heavy armor with its own eyes: finds the target, kills the target, while the main fist is still moving.
Opening Deployments
MAX «Step One»
ACV with Reserve Marines and Bradley ESV with engineers into the sector → LAV-M behind (smoke ready) → Scout Snipers and Cavalry Scouts on M3A3 CFV mark positions → Linebacker and a PAC-2 pair cover. Push, but if the early fight turns — smoke out and fall back: this deck recovers opening losses poorly.
UNORTHODOX «Double Landing»
AMPV with double Force Recon CQC and an AAVP-7A1 with Raiders + SMAW assault immediately behind an LAV-M smoke wall — skipping the buildup. Risky by the author's own logic ("don't throw everything into the opening"), but against a slow enemy the point falls before he deploys.
LOW-ELO BREAKER «SEP First Unit»
M1A2 SEP v3 with TUSK2 straight into the sector + CEV force-firing the high-rises. Low ELO without early AT or air has no answer to a heavy APS-duel-survivable fist. Against strong players — suicide: exactly the opening throw the author warns against.
Mid-Game
MAX «Step Two — Breach»
A tank or two (HC / SEP v3) behind infantry on direct fire; CEV, Breacher and CATFAE hit every identified position; LAV-M smokes the axis; assault via AMPV or AAVP infantry. In parallel — SAM discipline: radars on hotkey, reposition after every launch.
UNORTHODOX «Sky Works for the Push»
The Hornet loiters in your rear lobbing Gunslingers at incoming bombers and SEAD jets; the Prowler runs a SEAD sortie whenever possible (it helps your teammates too). Your armor lives because enemy aviation dies on approach.
LOW-ELO «Viper Over the Shoulder»
AH-1Z Viper with 8×Hellfire hovers behind the push and removes any AT threat on spot. Low ELO pushes tanks without AA — every run ends in dead armor.
Late Game
MAX «Step Three — GMLRS»
Both GMLRS on the field + MTVR logistics. Author's priorities: counter-battery → enemy SAMs → backline units and depots. Salvos of 6 rockets, reposition after every salvo. Under that umbrella the SEP v3 fist reaches any point.
UNORTHODOX «F-35B Execution»
The new 1.2.0 airframe: 2×JSOW precision strike removes tanks and SAMs that survived the GMLRS. Go in after the Prowler has thinned the radars — then the F-35B comes home and repeats.
LOW-ELO «Wall of Abrams»
M1A1 HC ×4 + SEP v3 ×2 head-on down the main axis, CEV behind. Low ELO runs into six Abrams without the economy for six answers — and breaks.
Combo Chain «Three Steps»
Unit Synergies
| Unit | Best Partner | Why |
|---|---|---|
| M1283 AMPV (BRAT2) | 2× Force Recon CQC | Author's assault recipe: 12 seats of CQB elite under APS |
| AAVP-7A1 | Marine Raiders + SMAW | Alternate assault: CQC plus twin thermobarics from a heavy armored taxi |
| LAV-M | Any push | Smoke is a commitment at every step: assault and retreat behind the wall |
| M60A1 CEV / M1150 Breacher | Recon marks + force fire | Direct demolition of strongpoints on identified positions — the deck's step two |
| M270A2 GMLRS ×2 | MTVR logistics | 6-rocket salvos with constant displacement demand endless supply |
| PAC-2 + M6 Linebacker | Radar hotkey | Layered AD: long-range and SHORAD tiers with on/off micro against SEAD |
| EA-6B Prowler | F-35B (JSOW) | SEAD sortie opens the corridor — F-35B precision strike finishes tanks and SAMs |
| F/A-18C Hornet | Rear patrol | Gunslingers into enemy bombers and SEAD jets on approach — armor insurance |
| AH-1W Supercobra | Artillery & SAMs | Backline guard against ground and heliborne infiltrations |
| M981 FISTV | Paladin / GMLRS | Cheap spotter holds the target without risking elite recon |
Tactical Groups
MIN — «Step One» (~350 pts)
ACV with Reserve Marines + Scout Snipers + LAV-M + Linebacker.
Why: minimum opening cell: autocannon fighter, eyes, smoke and SHORAD — the sector holds while step two builds up.
MID — «Breach Node» (~1400 pts)
M1A2 SEP v3 + M1A1 HC + AMPV with 2×Force Recon + CEV + LAV-M + PAC-2 + Linebacker.
Why: self-sufficient sector assault: heavy fist, APS-protected landing, strongpoint demolition and air defense in one package.
MAX — «Step Three» (~3100 pts)
2× SEP v3 + 2× HC + CEV + Breacher + CATFAE + 2× GMLRS + Paladin + PAC-2 + Linebacker + LAV-M + 2× MTVR.
Why: full escalation: direct demolition + long-range execution + logistics. Match-deciding commitment — field it once the economy feeds the guns.
US_ARMORED+SF «AMPV Hammer»
A center-frontline deck built around a single vehicle: the 115-point AMPV with autocannon, armor and APS — no Javelin, it isn't needed here. Smoke walls → elite infantry dismounted straight onto enemy positions → reload → next wave. Patch 1.2.0: LMTV moved to the SF spec, F-22 is now ×2, F-35A down to one, Comanche down to one, Killer Eggs ×3, Green Berets ×4.
Ideology & Gameplay
The author calls it "almost embarrassingly simple": everything revolves around the 12-seat AMPV. Loadout recipes are strictly fixed — 1×RRC + 1×Pararescue (the perfect all-rounder), 1×Rangers RAWS + 1×Para (if the enemy fields more armor), 1×Delta Force (if more infantry — keep AT nearby), 2×RRC (against weak infantry). Nothing else goes into the AMPVs. The support tab opens with the M1064A3 smoke carrier: two smoke walls via shift-queued orders — the first blinds the enemy at the assault site, the second covers the depth behind it. Then an aggressive assault with at least two AMPVs, dismount right onto the position, quick re-embark, and cycle: reload at a nearby depot, push again. The assault force scales up to 3-4 AMPVs. Hard garrisons get cracked by the Assault Breacher; captured ground is held by Mech Riflemen + Engineers in M113s or standoff Rangers with Green Berets (flash). Always keep at least one SHORAD and a Rangers Stinger team near the frontline — the enemy will try to stop your pushes with helicopters.
Pros
- AMPV at 115 = autocannon + armor/APS with no Javelin tax: the deck's main (and only) battering force, massed easily
- Full-spectrum elite infantry: Delta Force (115), Rangers RRC CQC (80), Pararescue (70), Green Berets with M202 Flash (90)
- M1064A3 (85) — twin-line smoke walls: the assault doctrine starts with smoke
- Heavy reserve: SEP v3 ×2 (315), M1A2 Abrams ×3 (215), Assault Breacher (200)
- Strong air after 1.2.0: F-22 ×2 with AIM-260, Comanche with radar and Stingers, Guardian with 16 JAGM
- Cheap cycle logistics: LMTV (40, now in SF) and M548A3 (30) — a depot at the front costs nothing
Cons
- One AMPV is not an assault: the doctrine needs two vehicles minimum; embark/disembark under smoke is constant micro
- Weak flank play (admitted by the author): Stryker/SoF or Stryker/Airborne do flanks better
- Comanche is down to one — losing it closes your heliborne recon-hunt game
- Modest long-range artillery: only Paladin ×2, no deep rear-area execution
- Single SHORAD type (Linebacker): once it dies, the push is open to helicopters
- Elite is expensive: a loaded AMPV lost = vehicle plus two squads gone — keeping crews alive is hard but mandatory
Hidden Potential
- War Pig and LMTV are two different logistics: the support-tab LMTV hauls general supply, while the War Pig's 800 supply points are spent by infantry only — park both at the assault node.
- Cavalry Scouts with Javelins strictly in pairs: the simultaneous two-vehicle volley defeats APS — a single shot gets eaten by it.
- RQ-170 Sentinel (200): stealth drone over enemy routes — assaults go in on a picture, not a guess.
- Killer Eggs ×3 (65): a cheap Stinger swarm — route guards and sacrificial scouts, and there are three of them after 1.2.0.
- M901A3 at 50: expendable AT for the second line — trades into enemy armor while the AMPVs cycle.
Opening Deployments
MAX «Smoke → Hammer»
M1064A3 first unit lays two smoke lines (shift-queued) → two AMPVs (RRC+Para) straight into an aggressive assault → Linebacker and Rangers Stinger at the frontline. Dismount on the position, clear, re-embark — and cycle again. Preserve the APS: don't expose the vehicles for free.
UNORTHODOX «Silent SOF Fan»
Green Berets on Silent Hawks and Pararescue on Little Birds slip to the flank/rear simultaneously with the frontal smoke: the enemy faces an assault up front and a raid behind. The Sentinel overhead keeps both fights spotted.
LOW-ELO BREAKER «Four AMPVs Head-On»
4 AMPVs with elite infantry + Assault Breacher in one wave under smoke. Low ELO without layered AT loses the high-rise garrison to a single Breacher strike — and the waves never stop.
Mid-Game
MAX «Assault Cycle»
A depot (LMTV) next to the node → 3-4 AMPVs cycling without pause: dismount → clear → re-embark → reload → assault again. Smoke is refreshed in two walls. The forces cycle easily precisely because supply is close — that is the deck's economy.
UNORTHODOX «Ranger Redoubt»
Captured ground is held cheap: 2× Mech Riflemen or Riflemen + Engineers in M113s; alternative — standoff Rangers + Green Berets (flash) in a War Pig/LMTV — a defense that can step forward when needed. Cheap squads can also be sacrificed ahead of the main assault.
LOW-ELO «Breacher Ram»
Assault Breacher + an AMPV pair against any hard point: the Breacher hits "extremely hard", the garrison disappears, the elite takes the ruins. Low ELO buries infantry in buildings — exactly where it strikes.
Late Game
MAX «Heavy Curtain»
Once the front settles: SEP v3 ×2 + Abrams ×3 hold the axis, Paladin ×2 grind the spots, F-22 ×2 with AIM-260 seal the sky. Then, per the author: "bring in artillery, helicopters, planes — and play with those toys".
UNORTHODOX «Comanche Hunt»
Radar Comanche + Killer Egg swarm: a helicopter denial zone over your front. The Guardian's 16 JAGMs execute armor spotted by the Sentinel — the single Comanche is guarded like a PAC-3.
LOW-ELO «Cheap Infinite Presence»
M901A3 at 50, Mech Riflemen at 60, AMPVs at 115 on every vacated point. An enemy with two expensive cards loses to map coverage.
Combo Chain «Smoke and Hammer»
Unit Synergies
| Unit | Best Partner | Why |
|---|---|---|
| AMPV (115) | RRC + Pararescue | The author's perfect all-round recipe: CQB elite + rescuers on 12 seats under APS |
| AMPV | Rangers RAWS + Para | Anti-armor variant: Carl Gustaf inside the assault taxi |
| AMPV | Delta Force CQC | Against infantry masses — but keep AT (RAWS/Scouts) close |
| M1064A3 | Assault group | Two smoke walls via shift-queue — the mandatory prologue of every assault |
| M1150 Assault Breacher | AMPV wave | Demolishes the hard garrison before the dismount: "hits extremely hard" |
| Cavalry Scouts (Javelin) | Second Cavalry Scouts | The pair's simultaneous volley beats APS — a lone shot does not |
| Rangers (standoff) | Green Berets (flash) + War Pig | A defense that can attack: standoff plus thermobarics in one truck |
| M6 Linebacker | Rangers Stinger | Frontline insurance against the heliborne push-stop |
| RAH-66 Comanche | Killer Eggs ×3 | Radar hunter + cheap Stinger swarm: the helicopter perimeter |
| LMTV + War Pig | Assault AMPVs | A depot at the front = a pause-less assault cycle; the War Pig feeds infantry only |
Tactical Groups
MIN — «Hammer» (~350 pts)
2× AMPV (RRC+Para) + M1064A3 + Rangers Stinger.
Why: the doctrine's minimum working cell: two vehicles under two smoke walls plus helicopter insurance.
MID — «Assault Node» (~1200 pts)
3× AMPV with elite + Assault Breacher + Linebacker + LMTV + Rangers Stinger.
Why: a self-sufficient cycle: smoke, breach, dismount, reload at your own depot, air umbrella.
MAX — «Full Doctrine» (~3000 pts)
4× AMPV + SEP v3 ×2 + Abrams + Breacher + PAC-3 ×2 + Linebacker + Paladin + Comanche + Guardian + F-22.
Why: assault mass under a heavy curtain and an air dome. The match-deciding commitment on the central axis.
US_MARINE+STRYKER «The All-Rounder»
One of the most versatile decks in the game: plays frontline or flank, is beginner-friendly, yet specializes into any kind of fight you want. Fast opening, AAVP waves, paired PAC-2s, and one of the strongest air tabs in the faction: the F-16V removes tanks, the F-16C erases blobs, the Hornet owns the sky, the Prowler runs SEAD.
Ideology & Gameplay
The deck is built for a fast opening: both SuperCobras with Sidewinders, an ACV-30 with the SMAW + Force Recon (CQC) combo, and mandatory Stryker MGS ×2 to annoy the enemy from minute one. SeaRAM (Centurion) comes out as early as possible — the answer to enemy helicopters and LMUR spam. The mid-game core is the fully armored AAVP: 22 seats and the author's favorite recipes — 2×SMAW + FR (CQC), Raiders (CQC) + SMAW, Marines + SMAW, 2×Troopers, 2×Combat Engineers. Long-range AD is PAC-2 strictly in pairs: 2 missiles × 2 launchers fire twice as fast as the single 205-point PAC-2, radars on hotkey, shoot & scoot after every launch, depots close by. The twin MICLIC eats strongpoints in the opening, LAV-M is smoke only. Tanks by task: M1A1 HC covers almost everything, FEP answers heavy armor. The air tab is the trump card: the F-16V with 4×JSOW is a precision tank-eater, the F-16C at 270 erases blobs with 2×2000lb + 6×500lb, the Hornet is a long-range fighter with dogfights strictly forbidden, the Prowler brings 4 HARMs for 260.
Pros
- Maximum flexibility: front or flank, any game phase, the build adapts to your style without losing its core
- One of the strongest air tabs: F-16V (365) one-shots armor with JSOW, F-16C (270) erases stacks, Hornet (330) with 4×Gunslinger, Prowler (260) — top-tier cheap SEAD
- PAC-2 in pairs (150+150): 4 missiles and double the fire rate of the single 205-point version
- HEMTT (75) — the best supply truck in the game: 27 seats = three 9-man squads plus supply
- MICLIC ×2 (135) — cheap position-eater: 3 heavy rockets into one point or spread across several
- Full-profile Marine infantry: Raiders CQC, SMAW, Troopers with twin Javelins, CAAT Dragon with ripple fire
Cons
- Few long-range ATGMs: area denial rests on CAAT TOW-2B and a single LAV-ATM
- PAC-2 is naked alone: 2 missiles per launcher — without depot discipline and shoot & scoot the umbrella collapses
- HIMARS HE (225) — the only long-range artillery and "unimpressive for its price" (author)
- Weak helicopter tab: Viper and Supercobra — that's all
- Early vulnerability to airstrikes: the opening is saved only by dispersion and movement
Hidden Potential
- F-16V — precision strike only, never a bombing run: JSOWs release earlier and farther — 4 missiles erase any armored unit in the game with high airframe survivability.
- F-16C — the blob-eater protocol: fly low, afterburner the whole way, pitch up right before release, pop flares early, drop — then down and home. 8 bombs for 270 points = an erased stack.
- HIMARS is laser-guided: every round is guided — designate the target and one-shot heavy tanks with two rockets; works on hidden depots too.
- Troopers in pairs: 2 Javelins per squad — the simultaneous two-squad volley defeats enemy APS; excellent in defense.
- CAAT Dragon — ripple fire: no Javelin, but it ripple-fires — a cheap single-squad AT screen with no partner required.
Opening Deployments
MAX «The Author's Fast Opening»
Both SuperCobras with Sidewinders into the sky → ACV-30 (SMAW + Force Recon CQC) into the sector → Stryker MGS ×2 harassing the frontline → SeaRAM as early as possible. Units dispersed and moving — early airstrike vulnerability is handled by discipline, not armor.
UNORTHODOX «MICLIC Blitz»
Both MICLICs in the opening or right after the start: 3 rockets into one position or spread across 2-3. The enemy is still deploying — and his strongpoints are already gone. Short range, but devastating when aimed properly.
LOW-ELO BREAKER «F-16C vs the First Blob»
Save 270 — and the F-16C's 8-bomb drop erases the enemy's first infantry stack. Low ELO blobs without AA: one bombing run wins both the point and the trade.
Mid-Game
MAX «AAVP Wave»
The fully armored AAVP (22 seats: 2×SMAW + FR CQC) assaults behind LAV-M smoke, an HC/FEP supports with direct fire, paired Troopers guard the approaches. Deploy close to the enemy or assault immediately — the AAVP's armor is built for it.
UNORTHODOX «PAC-2 Shoot & Scoot»
A PAC-2 pair on hotkey: radar on/off against SEAD, displace after every launch, depots close (but not on position) — fast reload, fast return to long-range coverage. The Patriots stay mobile all game.
LOW-ELO «Viper Execution»
The F-16V waits in reserve: every tank that shows itself eats a 4×JSOW precision strike. Low ELO doesn't hide its armor — and feeds your K/D with it.
Late Game
MAX «Air Pogrom»
F-16V on tanks, F-16C on blobs, the Hornet deep in your rear working enemy airframes with 4×9km missiles (no dogfights — it will wander into enemy LRAD and die), the Prowler runs SEAD whenever no enemy fighter patrol is up.
UNORTHODOX «Laser HIMARS»
Scout Snipers / Force Recon / Shadow hold the laser designation → HIMARS one-shots heavy tanks with two guided rockets and wipes hidden depots. Expensive and unimpressive — but it's the only long-range gun, and with a laser it pays for itself.
LOW-ELO «The AT Bag»
CAAT Dragon + CAAT TOW-2B + LAV-ATM on the approaches, paired Troopers in buildings. Low ELO feeds armor into the denial zone again and again — the cheap AT screen pays for itself many times over.
Combo Chain «From Smoke to JSOW»
Unit Synergies
| Unit | Best Partner | Why |
|---|---|---|
| AAVP-7A1 (22 seats) | 2×SMAW + Force Recon CQC | The author's favorite assault recipe: twin thermobarics plus CQB elite |
| ACV-30 | Reserve Marines / SMAW+FR | Early fighter: autocannon + 14 seats for the opening combo |
| Stryker MGS ×2 | Scouts in Stryker RV | Harassment from minute one + a recon carrier with Javelin and SRAT2 APS |
| PAC-2 | Second PAC-2 | A pair = 4 missiles at double the fire rate of the single 205-pointer |
| Centurion SeaRAM | Rear node | Anti-helicopter and anti-LMUR umbrella: radar on when the helo closes in |
| Troopers ×2 | Buildings on approach | 4 Javelins in one volley defeat APS — the defensive anchor |
| CAAT Dragon | Solo position | Ripple fire lets one cheap squad hold a denial zone alone |
| HIMARS (guided) | Laser designator | Designation = one-shot on heavy tanks with two rockets, plus depot hunting |
| F-16V (4×JSOW) | Prowler | SEAD thins the radars — the Viper's precision run removes any armor |
| HEMTT (27 seats) | 3 nine-man squads (Troopers/Engineers) | The game's best truck: infantry lift and frontline reload in one vehicle |
Tactical Groups
MIN — «Opening» (~350 pts)
ACV-30 + Reserve Marines + Stryker MGS + LAV-M.
Why: fast sector grab: autocannon, 14 seats of infantry, a harasser and smoke — the minimum viable first-minute package.
MID — «Node» (~1200 pts)
AAVP + 2×SMAW + FR + M1A1 HC + LAV-M + PAC-2 + Troopers ×2.
Why: self-sufficient sector assault-and-hold: landing force, tank, smoke, umbrella and AT anchor.
MAX — «Air All-Rounder» (~2900 pts)
M1A1 FEP + 2× HC + AAVP wave + MICLIC + PAC-2 ×2 + SeaRAM + HIMARS + F-16V + F-16C + Hornet.
Why: the ground breaks the point, the air executes the answer — the deck's full cycle in one package. The match bet.
US_MARINE+AIR «Air for Everything»
The flanking alternative to Stryker/SoF for players who want less stealth and more heavy precision punch. Best on short flanks (sector A flank on Rud, both flanks on Snow Castle), but it holds the frontline too — given enough smoke and full MICLIC exploitation. Air units for literally everything: column sniping, blob removal, tank one-shots, anti-helicopter patrol.
Ideology & Gameplay
"Why take this over Stryker/SoF?" Simple: this deck hits far harder while staying surgical. The opening is about speed: the ISV (9 seats + 400 kg of supply) grabs key positions or sets ambushes, the Humvee LRAS3 with excellent optics carries a Recce or Stinger team to the flank — early infiltration or a block against enemy stealth helos. The ACV-30 genuinely fights in early skirmishes (14 seats: SMAW+FR CQC or single Raiders/Marines), while the fully armored AAVP (22 seats) is the ultimate assault taxi. Ground defense: NGWS, Stinger teams, Weapons Squad (2 Javelins — strips APS or one-shots un-smoked armor); offense: Marines, Raiders, FR, SMAW. FEP and HC are workhorses to be protected: heavy armor is scarce. The M8 AGS is a glass cannon strictly used in pairs, the Sheridan a force fire infantry-killer. The umbrella: paired PAC-2s on shoot & scoot plus SLAMRAAM against helicopters. Artillery: the guided-round Brutus — the most cost-effective long-range gun, fed by your recon lasers. And the air: Longbow, Apache, Supercobra, Kiowa, Chinook, Hornet, Prowler ×2, F-15E, F-15EX, A-10.
Pros
- Air for everything: F-15E (300) erases blobs with 4×2000lb, F-15EX (345) one-shots any tank with 3×JSOW — even an Armata or T-15 — in a single pass
- Full helicopter fan: Longbow (330) snipes columns, Apache (150) brings 76 Hydras and panic, Supercobra/Kiowa fly AD watch
- A-10 at 95 — the cheapest CAS answer to enemy helicopter spam
- Brutus (250) guided + recon lasers — best cost-to-effect long-range artillery
- High-speed opening: ISV (9 seats, 400 kg supply) and LRAS3 grab positions and block infiltrations
- Precision over mass: MICLIC ×2, Weapons Squad with twin Javelins, paired M8 AGS — everything strikes deliberately
Cons
- Little heavy armor: one FEP, two HCs — tanks are guarded like gold; no head-on armor brawls
- M8 AGS is glass: it won't survive multiple hits — shoot-and-scoot with displacement and smoke only
- SLAMRAAM dies to almost any scratch — it must stay moving at all times
- PAC-2 carries 2 missiles per launcher: without pairs, depots and radar discipline the umbrella collapses
- Long flanks aren't hers — those want Stryker/SoF stealth; without smoke and MICLIC the frontline sags
Hidden Potential
- A-10: don't click the target — the gun opens fire automatically on approach; fly low straight at the helicopters, and 95 points become a graveyard for the enemy's helo tab.
- F-15EX — precision strike, not a bombing run: JSOWs release from slightly farther out; 3 missiles kill any tank in the game in one pass — 345 points pay back instantly.
- Sheridan (75) — the force fire nightmare: a heavy gun with huge damage firing "blind" into positions where you expect a hidden enemy; in pairs for maximum effect — they're cheap.
- ISV — taxi and reloader: 9 seats (one heavy NGWS/WS squad or two small Recce/Stinger teams) + 400 kg supply — infantry reloads in the field.
- Kiowa with optronics (140): exceptional flank eyes plus 4 Stingers — recon that kills helicopters itself.
Opening Deployments
MAX «Jeep Fan»
ISVs with NGWS or a Recce/Stinger pair grab key positions → LRAS3 with Recce slips to the flank (or with a Stinger team — stealth-helo block) → ACV-30 (SMAW+FR CQC) fights for the forward line → RQ-4 Global Hawk overhead. Early advantage and a flank picture from minute one.
UNORTHODOX «Air First Move»
Supercobra ×2 + Kiowa airborne immediately: the enemy's heliborne opening dies on the route, your flank sits under optronics. While he rebuilds his air, your jeeps are already on the points.
LOW-ELO BREAKER «MICLIC + Sheridan»
MICLIC demolishes the strongpoint, paired Sheridans force fire the ruins. Low ELO loses the point within a minute without understanding where it came from.
Mid-Game
MAX «AAVP Flank Assault»
The AAVP (2×SMAW + FR CQC or Raiders + SMAW) pushes behind twin LAV-M smoke, MICLIC strikes the resistance node, an HC supports with direct fire. Deploy right up against enemy positions — the AAVP's armor is built for it.
UNORTHODOX «Glass Cannons»
M8 AGS strictly in pairs: two shots kill most armored targets → immediate displacement, smoke when threatened. Pure hit-and-run; standing still after firing is forbidden.
LOW-ELO «A-10 Patrol»
The A-10 flies low onto enemy helo routes — every enemy helicopter run ends in cannon fire. No target click: the jet opens fire by itself on approach.
Late Game
MAX «Full Air Cycle»
The Hornet sweeps the sky with 4×9km missiles (no dogfights — it's the only fighter) → Prowler ×2 thin out the radars → F-15EX precision-strikes the tanks → F-15E erases the blobs with 4×2000lb → A-10 and Supercobra mop up the helicopters. Air for everything — literally.
UNORTHODOX «Brutus Execution»
The RQ-4 and laser recon (Scout Snipers, Force Recon, LRAS3) hold designations → the guided-round Brutus grinds strongpoints, depots and SAMs at full depth. The most cost-effective long-range gun in the game — exploit the lasers.
LOW-ELO «Apache Panic»
Apache ×2 with 76 Hydras each rain onto infantry points: firestorm plus the panic effect. Low ELO abandons the point on its own — no finishing blow needed.
Combo Chain «Air for Everything»
Unit Synergies
| Unit | Best Partner | Why |
|---|---|---|
| ISV (9 seats) | NGWS or Recce+Stinger | Fast point-grab + 400 kg supply: the opening's taxi and reloader |
| AAVP-7A1 (22 seats) | 2×SMAW + FR CQC | The ultimate assault: twin thermobarics + elite out of a heavily armored box |
| Weapons Squad | High-rise on approach | 2 Javelins strip APS or one-shot un-smoked armor |
| M8 AGS ×2 | Smoke and displacement | The paired volley = dead armor; glass survives only through hit-and-run |
| M551A1 Sheridan ×2 | Force fire | Cheap eraser of infantry nests "blind" — maximum effect in pairs |
| SLAMRAAM (6×AIM-120) | Constant movement | The answer to Mi-28 spam; alive only while driving |
| Brutus (guided) | Laser recon | Best cost-to-effect long-range artillery: designation = precision execution at depth |
| AH-64D Longbow | OH-58D Kiowa | Optronics light up the column — 16 Hellfires snipe it from afar |
| F-15EX (3×JSOW) | Prowler | SEAD opens the corridor — one pass = one dead heavy tank |
| A-10C | Supercobra | Two-layer anti-helicopter net: cannon from below, Sidewinders on the routes |
Tactical Groups
MIN — «Flank Patrol» (~300 pts)
ISV + Airborne Recce + Stinger team + Humvee LRAS3.
Why: the flank's minimum cell: speed, optics, MANPADS and reload — positions taken, enemy infiltration blocked.
MID — «Assault Node» (~1200 pts)
AAVP + 2×SMAW + FR + M1A1 HC + LAV-M + MICLIC + SLAMRAAM.
Why: self-sufficient sector assault: a landing force under smoke, node breach, support tank and an anti-helicopter umbrella.
MAX — «Heavy Flank» (~3000 pts)
M1A1 FEP + HC + 2× M8 AGS + AAVP group + MICLIC + PAC-2 ×2 + SLAMRAAM + Brutus + Longbow + Hornet + F-15E + F-15EX.
Why: the ground holds and storms, the air executes everything on approach — a complete flanking army. The match bet.
Phase map: all 14 decks (meta 1.2.0)
Who is strong in which phase — and what to do once your power phase has come and gone. Based on DuroSVK's authored guides and the lineup logic of patch 1.2.0.
Master phase table
| Deck | Start | Mid-game | Late-game | Key phase |
|---|---|---|---|---|
| RU_ROSGVARDYIA+COASTAL | Average | Strong | Strong | Mid-late: blobs + Uragan-1M + the naval sky (Su-33/Su-30SM) |
| RU_ROSGVARDYIA+GUARDS | Average | Strong | Strong | Mid-late: blobs under smoke + Buratino/Uragan-1M + MiG-31BM/Tu-95 |
| RU_GUARDS+VDV | Strong | Strong | Average | Start-mid: airborne tempo + LMUR hunting |
| RU_COASTAL+MOTO | Average | Strong | Strong | Mid-late: a Tochka every 2 minutes + Tornado-S |
| RU_MECH+MOTO | Weak | Average | Strong | Late: Malka/Tyulpan siege of fortified points |
| RU_GUARDS+MOTO | Average | Strong | Average | Mid: wedge under the dome + Tornado-S |
| RU_MECH+VDV | Average | Strong | Strong | Mid-late: blobs + pinpoint executions (LMUR, guided Malka) |
| US_MARINE+BALTIC | Strong | Strong | Average | Start: Wolf aggression + early NASAMS |
| US_STRYKER+SF | Strong | Strong | Strong | Whole match: flank tempo never gives up a single phase |
| US_MARINES+SF (NUKE) | Weak | Average | Strong | Late: closed-map grind + the possible nuclear hour |
| US_ARMORED+MARINES | Weak | Average | Strong | Late: the third rung of escalation — 10 tanks + GMLRS |
| US_ARMORED+SF | Strong | Strong | Average | Start-mid: AMPV assaults behind smoke walls |
| US_MARINE+STRYKER | Strong | Strong | Strong | Whole match: AAVP assaults + the air package |
| US_MARINE+AIR | Strong | Strong | Strong | Whole match: precision flank + aviation for every task |
Tactical groups: master table (meta 1.2.0)
Ready-made packages for standard tasks, with prices pulled from the deck files. Build groups, not units one by one — an army lives longer in groups. Rule of three: no more than three active groups on the map at any time.
| Deck | MIN (recon/node) | MID (self-sufficient operation) | MAX (decisive battlegroup) |
|---|---|---|---|
| RU_ROSGVARDYIA+COASTAL | BT-3F with Morskaya Pekhota (75) + Spetsnaz Vympel (100). (~265) | T-80BVM (255) + T-62M (125) + Uran-9 (65) + Pantsir (170) + BARS (100) + blob hull (~190) + KamAZ (85). (~990) | Tu-22M3 with KABs (550) + MiG-29K (315) + Su-30SM (265) + Katran (275) + Uragan-1M (325) + S-350 (270) + Pantsir (170). (~2170) |
| RU_ROSGVARDYIA+GUARDS | BMO-T with Ingenery-Shturmoviki (70) + Gvardii Motostrelki (75). (~240) | T-90M (270) + T-15 Barbaris (250) + Terminator (200) + BMO-T with assault troops (~165) + Gvardii Motostrelki (75) + Buk-M2 (150) + Floks (90). (~1200) | 2× T-90M (540) + Barbaris (250) + Drozd (250) + Terminator (200) + TOS-1 (225) + Uragan-1M (325) + Buk-M2 (150) + Pantsir (250) + Akula (215) + MiG-31BM (355). (~2760) |
| RU_GUARDS+VDV | A BTR-MDM with 3× VDV Shturm (60 each). (~280) | T-90M (270) + Barbaris (250) + Terminator (200) + Kurganets with Guards (~225) + Buk-M2 (150) + Tor (200). (~1295) | 2× Mi-28NM (1030) + Su-34 (525) + Su-35S (515) + T-90M (270) + TOS-1 (200) + Msta-S (240) + Buk-M2 (150) + Tor (200). (~3130) |
| RU_COASTAL+MOTO | K-16 Bumerang (BM turret + Afghanit) with Diversanty (80). (~255) | T-80BVM (255) + BT-3F with SSO+Diversanty (~285) + Kornet ATGM (90) + Osa-AKM (170) + Igla-S (100) + Ural (65). (~965) | 3× Tochka-U (450) + Smerch (300) + Tu-22M3 (550) + Su-24MP (255) + Su-30SM (265) + Katran (275) + S-300PM (225) + Osa-AKM (170). (~2490) |
| RU_GUARDS+MOTO | Motopekhota (65) + Ingenery-Shturmoviki (70) + Igla-N (80) + Ural (65). (~280) | T-90M (255) + T-80UM-2 (250) + Terminator (200) + Kurganets with Gv. Motostrelki (~225) + BMO-T with Ingenery (~130) + Tor-M2 (200) + Vena (100) + Ural (65). (~1400) | Guided Smerch (300) + TOS-1 (225) + Vena (100) + 2x T-90M (510) + T-15 (250) + T-80UM-2 (250) + Terminator (200) + Tor-M2 (200) + S-300PM (225) + Mi-28N (205) + MiG-29SMT (240) + Su-24M2 (310). (~3020) |
| RU_MECH+MOTO | 2x Motopekhota (130) + Igla-N (80) + Ural (65). (~275) | 2x T-72B (300) + T-72B3A (255) + Khrizantema (85) + Pantsir (250) + BMP-3 with Shturmoviki + BMP-3 with Vampyrs (~330) + Ural (65). (~1300) | 2x guided Malka (540) + Grad (125) + Tulpan (140) + 2x T-72B3A (510) + 2x T-72B (300) + Khrizantema (85) + Pantsir (250) + S-300V4 (175) + Mi-28N (205) + MiG-29SMT (240) + Su-27SM (370) + flank lock (Kozlik + Igla + BRDM-3, ~190). (~3450) |
| RU_MECH+VDV | KamAZ VDV (40) with 2x VDV Shturm (120) + Ognemetchiki (50). (~210) | T-72B3A (255) + T-72B (150) + Shturm-SM (60) + Pantsir (250) + a blob on a BTR-MDM (~210) + BMP-3 with Motostrelki (~145) + KamAZ (40). (~1100) | 2x guided Malka (540) + UR-77 (90) + 2x T-72B3A (510) + 2x T-72B (300) + 2x Shturm-SM (120) + Pantsir (250) + S-300V4 (175) + Mi-28NM (245) + Ka-52 (215) + Su-35S (335) + MiG-35 (365) + Su-34 (335). (~3480) |
| US_MARINE+BALTIC | Wolf WMIK with Jegeris (100) + Piorun (70) + LAV-L (25) + a Scimitar when points allow. (~250) | ACV-30 (SMAW + Force Recon) + CV-90 with Kajinieki (135) + M1A1 HC TUSK (225) + LAV-ATM (100) + NASAMS (130) + Panzermörser (85) + MTVR (65). (~975) | M1A1 FEP TUSK (280) + 2×M1A1 HC (450) + CV-90 (135) + AAVP with stack (~300) + K9 Kõu (270) + PAC-2 (230) + NASAMS (130) + LAV-ATM (100) + Viper (240) + F/A-18C (330) + Prowler (260). (~2625) |
| US_STRYKER+SF | RQ-7 Shadow (50) + Army Snipers (85) + a fully upgraded Stryker RV (~140). (~275) | Stryker Dragoon with Rangers + Combat Engineers (~230) + Stryker MGS (125) + Stryker MC (75) + Troopers ×2 (~220) + C-RAM (210) + HEMTT (75). (~935) | F-22 (395) + F-16CJ (310) + F-16V (365) + F-16C (260) + Comanche (290) + PAC-3 MSE (165) + C-RAM (210) + HIMARS (225) + Stryker MGS (125) + Dragoon group (~230). (~2575) |
| US_MARINES+SF (NUKE) | RSOV with Force Recon (70) + RSOV with Rangers RAWS (140) + resupply economy via MTVR (65). (~270) | AAVP with a Marines + SMAW stack (~240) + M1A1 HC (225) + LAV-AD (160) + LAV-M (60) + War Pig with Rangers (~130) + MTVR (65). (~980) | B-2 with B61 (1400) + F-35A (340) + Prowler (260) + M1A1 HC (225) + AAVP with a stack (~300). (~2525) |
| US_ARMORED+MARINES | ACV with Reserve Marines + Scout Snipers + LAV-M + Linebacker. (~350) | M1A2 SEP v3 + M1A1 HC + AMPV with 2×Force Recon + CEV + LAV-M + PAC-2 + Linebacker. (~1400) | 2× SEP v3 + 2× HC + CEV + Breacher + CATFAE + 2× GMLRS + Paladin + PAC-2 + Linebacker + LAV-M + 2× MTVR. (~3100) |
| US_ARMORED+SF | 2× AMPV (RRC+Para) + M1064A3 + Rangers Stinger. (~350) | 3× AMPV with elite + Assault Breacher + Linebacker + LMTV + Rangers Stinger. (~1200) | 4× AMPV + SEP v3 ×2 + Abrams + Breacher + PAC-3 ×2 + Linebacker + Paladin + Comanche + Guardian + F-22. (~3000) |
| US_MARINE+STRYKER | ACV-30 + Reserve Marines + Stryker MGS + LAV-M. (~350) | AAVP + 2×SMAW + FR + M1A1 HC + LAV-M + PAC-2 + Troopers ×2. (~1200) | M1A1 FEP + 2× HC + AAVP wave + MICLIC + PAC-2 ×2 + SeaRAM + HIMARS + F-16V + F-16C + Hornet. (~2900) |
| US_MARINE+AIR | ISV + Airborne Recce + Stinger team + Humvee LRAS3. (~300) | AAVP + 2×SMAW + FR + M1A1 HC + LAV-M + MICLIC + SLAMRAAM. (~1200) | M1A1 FEP + HC + 2× M8 AGS + AAVP group + MICLIC + PAC-2 ×2 + SLAMRAAM + Brutus + Longbow + Hornet + F-15E + F-15EX. (~3000) |
Maps: deck applicability and versatility
The map pool was verified against in-game screenshots: all 22 maps with official names (community English names in parentheses). For each: terrain character, home/cursed decks, three phase-by-phase moves, versatility. Note: an early version of this section contained the nonexistent "Narva" and "Ventspils" — "Narva" is actually the location of the "Snow Castle" map (Snow Castle = Narva), and the Ventspils port theme is covered by "Black Coast". The section was rewritten from scratch. Images: cards are official renders from the map selection menu; for 8 maps (Kaliningrad, Meandering River, Ruda, The Dam, Chkalovsk, Riga Airport, Klaipeda + bonus) official Steel Balalaika top-downs with faction start zones and objective zones have been added (dev diary). Important: since patch 1.1.1 spawn sides in standard matches are assigned randomly, and the zone layouts for Chernyakhovsk, Jelgava, Bay of Winds and Kaliningrad have been updated — the top-downs show the canonical baseline variant. Tactical markup for all 20 maps (start zones, attack axes, cover, water, chokepoints) is in the game Atlas.
How to read this section
Interactive picker: map → what to take as RU and US
Click a map — get both sides: main pick, backup, first-minutes opening and counter-picks. Data compiled from the matrix below, video breakdowns (Duro: deck roles; LIMA: long-range laws) and patch 1.1.1.
Applicability matrix (map × deck)
| Map | Terrain type | Best decks | Worst decks |
|---|---|---|---|
| Chkalovsk AB (Чкаловская авиабаза) | Airfield, fields, village | RU_ROSGVARDYIA+COASTAL ★★★ · STRYKER+SF ★★★ · GUARDS+MOTO ★★ | MECH+MOTO ★ · NUKE ★★ |
| Riga Airport (Рижский аэропорт) | Terminals + open approaches | GUARDS+VDV ★★★ · ARMORED+SF ★★ | MECH+MOTO ★ · STRYKER+SF ★★ · MECH+VDV ★★ (not for the long flank — per DuroSVK) |
| Baltiisk (Балтийский полуостров) | Peninsula, water on two sides | COASTAL+MOTO ★★★ · ARMORED+MARINES ★★★ · MARINE+AIR ★★ | MECH+MOTO ★ · STRYKER+SF ★★ |
| Dead Centre (Районный центр) | Large dense city | GUARDS+VDV ★★★ · ARMORED+SF ★★★ · NUKE ★★ | STRYKER+SF ✕ · RU_ROSGVARDYIA+COASTAL ★ · MECH+VDV ★★ (not for the long flank — per DuroSVK) |
| Chernyakhovsky District (Черняховск) | City with courtyards, twilight | GUARDS+VDV ★★★ · ARMORED+MARINES ★★ | RU_ROSGVARDYIA+COASTAL ★★ · STRYKER+SF ★ |
| Black Coast (Черное побережье) | Coastline, port, industrial zones | COASTAL+MOTO ★★★ · MARINE+AIR ★★ | MECH+MOTO ★ · RU_ROSGVARDYIA+GUARDS ★★ |
| The Dam (Дамба) | Bottleneck, water, slopes | MECH+MOTO ★★★ · GUARDS+MOTO ★★★ · MECH+VDV ★★ | MARINE+AIR ✕ · STRYKER+SF ★ |
| Highway of Death (Шоссе смерти) | Linear highway, corridors | COASTAL+MOTO ★★★ · MARINE+AIR ★★★ | MARINE+AIR ★ · NUKE ★★ |
| Ignalina PP (Игналинская АЭС) | Dense industry + city by the water | GUARDS+VDV ★★★ · NUKE ★★★ · ARMORED+SF ★★ | RU_ROSGVARDYIA+COASTAL ★ · STRYKER+SF ★ |
| Jelgava Pils (Елгава) | River + city + fields, three layers | RU_ROSGVARDYIA+COASTAL ★★★ · GUARDS+VDV ★★ | NUKE ★ · STRYKER+SF ★★ |
| Kadaga (Военная база Кадага, Baltic DLC) | Enclosed base, CQB labyrinth | NUKE ★★★ · GUARDS+VDV ★★ · ARMORED+SF ★★ | MECH+MOTO ★ · STRYKER+SF ★ |
| Kaliningrad (Калининград) | Dense city, blocks, bridges | GUARDS+VDV ★★★ · ARMORED+SF ★★★ · NUKE ★★ | STRYKER+SF ✕ · MECH+MOTO ★ |
| Klaipeda (Клайпедский разлом) | Port, water, embankments | COASTAL+MOTO ★★★ · ARMORED+MARINES ★★★ · MARINE+AIR ★★ | MECH+MOTO ★ · RU_ROSGVARDYIA+GUARDS ★★ |
| Snow Castle (Снежный замок = Narva) | Urban agglomeration, winter | ARMORED+SF ★★★ · GUARDS+VDV ★★ | MECH+MOTO ★ · MARINE+AIR ★ |
| Oil Rush (Нефтяная лихорадка) | Desert ranges, derricks | GUARDS+MOTO ★★★ · STRYKER+SF ★★★ · RU_ROSGVARDYIA+COASTAL ★★ | MARINE+AIR ★ · RU_ROSGVARDYIA+GUARDS ★★ |
| Bay of Winds (Залив ветров) | Coastline, fields, farms | RU_ROSGVARDYIA+COASTAL ★★★ · GUARDS+MOTO ★★ · STRYKER+SF ★★ | NUKE ★★ · MECH+MOTO ★★ |
| Meandering River (Река Смородина) | Winding river, bridges, floodplain | COASTAL+MOTO ★★★ · ARMORED+MARINES ★★★ | RU_ROSGVARDYIA+GUARDS ★ · NUKE ★★ |
| Ruda Forest (Руда) | Forest, clearings, Delta/Alpha sectors | NUKE ★★★ · GUARDS+VDV ★★ · MECH+MOTO ★★ · MECH+VDV ★★ | RU_ROSGVARDYIA+COASTAL ★★ · STRYKER+SF ★★ |
| Suwalki Gap (Сувалки) | Forests, villages, fields — a mix | All ★★ — the most honest map in the pool | No clear cursed decks |
| Cold Harbour (Холодная гавань) | Night harbor, port, darkness | COASTAL+MOTO ★★★ · GUARDS+VDV ★★ · NUKE ★★ | STRYKER+SF ★ · MECH+MOTO ★★ |
| Daugavpils (Даугавпилс) | Dense city, river, high-rises | ROSGVARDYIA+GUARDS ★★★ · GUARDS+VDV ★★ · NUKE ★★★ | STRYKER+SF ★ · ARMORED+MARINES ★ |
| Coal Mountain (Угольная гора) | Elevated industrial bastion | GUARDS+MOTO ★★★ · STRYKER+SF ★★ · COASTAL+MOTO ★★ | NUKE ★ · RU_MECH+VDV ★★ |
"★★" for all other decks means "playable without caveats". The full 12×20 table is deliberately omitted: only the extremes matter.
Maps one by one: character, decks, phases
Chkalovsk Airbase (Чкаловская авиабаза)
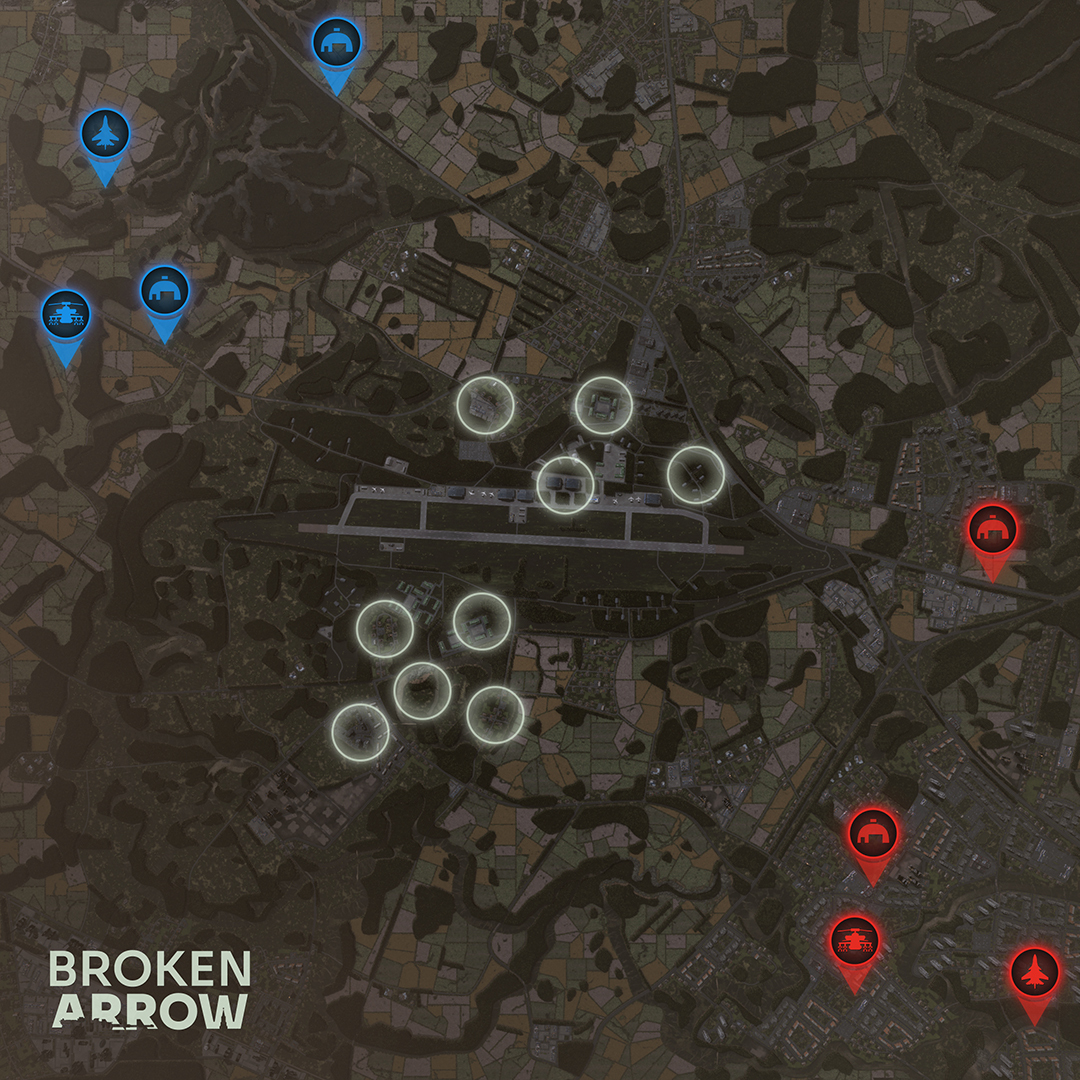
Character: an airfield with a runway and hangars + village + fields. Long sightlines along the strip, pinpoint cover.
Home: RU_ROSGVARDYIA+COASTAL, STRYKER+SF (tempo + HIMARS in the open). Cursed: MECH+MOTO — the siege deck has nothing to besiege.
- Start: a STRYKER wheeled fan around the strip perimeter / the RU_ROSGVARDYIA+COASTAL Smerch onto the enemy zone from minute one.
- Mid: a rocket metronome under drones; spotted = dead — play "whoever saw first".
- Late: air strikes on surviving groups; a dome is mandatory — the enemy will do the same.
Versatility: average: the law of the map is range and vision. A sniper map.
Riga Airport (Рижский аэропорт)
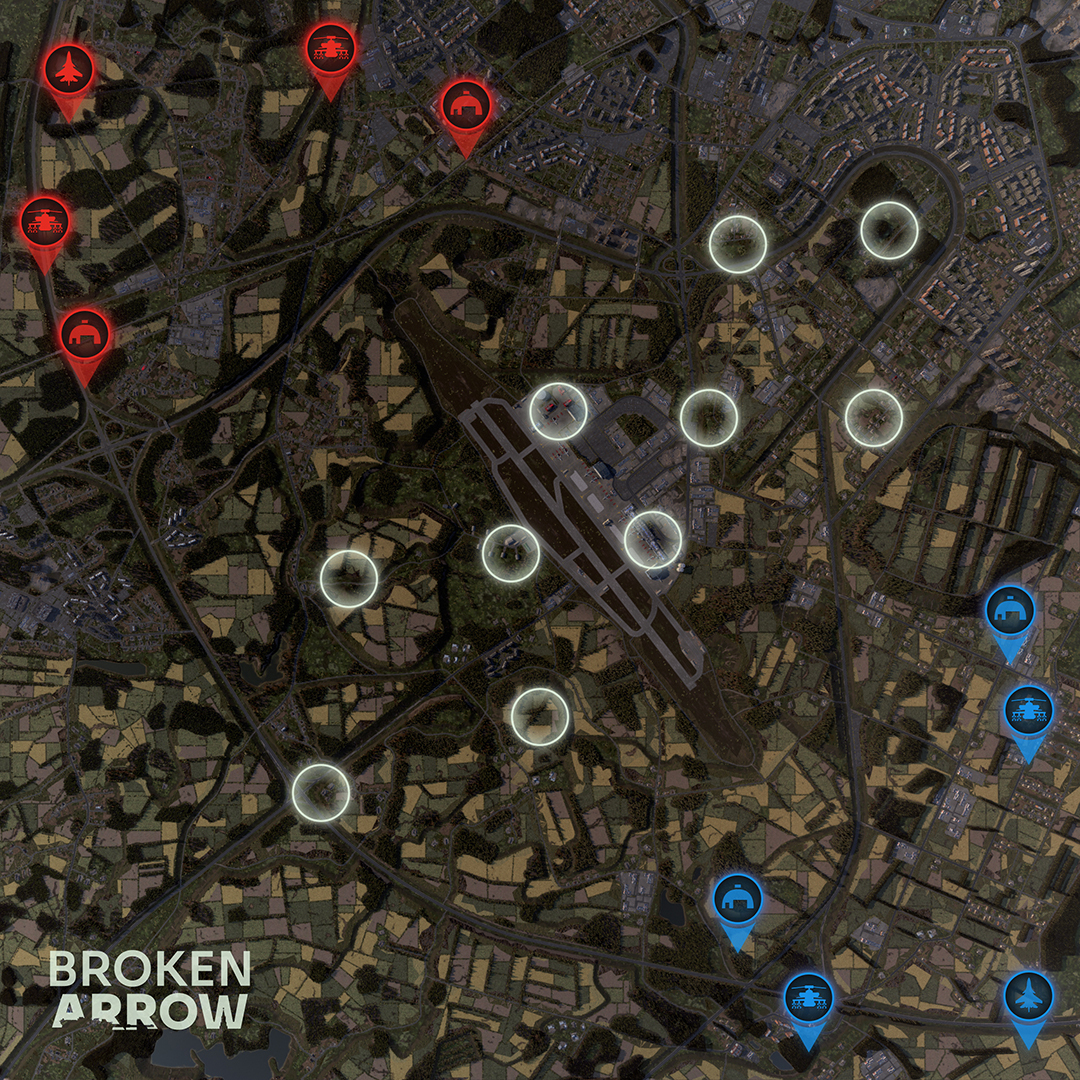
Character: terminals and cargo zones in the center, open approaches at the edges. The center is taken by infantry, the edges by armor.
Home: GUARDS+VDV (terminal assault + airborne), ARMORED+SF. Cursed: MECH+MOTO crawls across fields under missiles.
- Start: VDV on "Typhoons" into the terminals first — whoever holds the terminal holds the center.
- Mid: tank duels on the approaches + infantry knife fights inside; the BMPT at the junction of two fights is the map MVP.
- Late: terminal assault under TOS/smoke, or an armor flanking run around the perimeter — decided by whose artillery is alive.
Versatility: high: center (infantry), perimeter (armor), air (airborne) — three equally valid plans.
Baltiisk (Балтийский полуостров)
Character: a city on a spit/peninsula, water on two sides, narrow isthmuses. A naval map by definition.
Home: COASTAL+MOTO (marines, Ka-29, Tu-22M3), ARMORED+MARINES (ACV/AAVP). Cursed: land-based siege decks.
- Start: amphibians across the water to the spit flank points while the enemy builds a front along the isthmus.
- Mid: helicopters over water are untouchable for ground air defense; Tochkas at isthmus clusters.
- Late: water control = control of both flanks; Kh-32 at the concentration on the isthmus.
Versatility: high for amphibians (water = a second map), low for everyone else.
Dead Centre (Районный центр)

Character: a large dense city: blocks, high-rises, intersections. Full-cycle infantry warfare.
Home: GUARDS+VDV, ARMORED+SF (TUSK + Breacher), NUKE (M202). Cursed: STRYKER+SF — wheeled tempo stalls.
- Start: assault troops into the first buildings on the axes; remember the 1.1.1 rule: from a 9-story building they hit roofs at 200 m, from a high-rise at 400 m.
- Mid: a TOS storm across the blocks → clear the burnt-out ruins; smoke walls across the avenues.
- Late: bridges and squares under heavy armor with APS; air strikes only after MANPADS are cleared from the windows.
Versatility: average: two plans (infantry assault / armor avenues), rich in micro decisions.
Chernyakhovsky District (Черняховск)

Character: a city with courtyards, medium density, twilight lighting (per the screenshot). Wide streets + courtyard wells. Since 1.1.1 — a new zone layout.
Home: GUARDS+VDV, ARMORED+MARINES (armor down the wide streets). Cursed: STRYKER+SF.
- Start: infantry into the courtyards, tanks block the streets; first TOS salvo — at the windows on the main axis.
- Mid: BMPT/Bradley IronFist are the kings of the streets: they strip infantry from windows with bursts.
- Late: the city is taken by intersections: artillery prep on the intersection → armor pushes down the avenue.
Versatility: average: storming buildings or owning the streets — strong players do both at once.
Black Coast (Черное побережье)
Character: a coastline with port terminals and industrial zones; water is a permanent flank.
Home: COASTAL+MOTO, MARINE+AIR (a rare chance: vertical assault on the terminals works). Cursed: MECH+MOTO.
- Start: the water flank to amphibians, the urban one to infantry; non-standard: a Ka-29 over the surface around everything.
- Mid: the fight for the terminals: cranes and containers are cover for AT; helicopters over the water.
- Late: whoever holds the port holds the map logistics.
Versatility: high: two different flanks = two plans at once.
The Dam (Дамба)
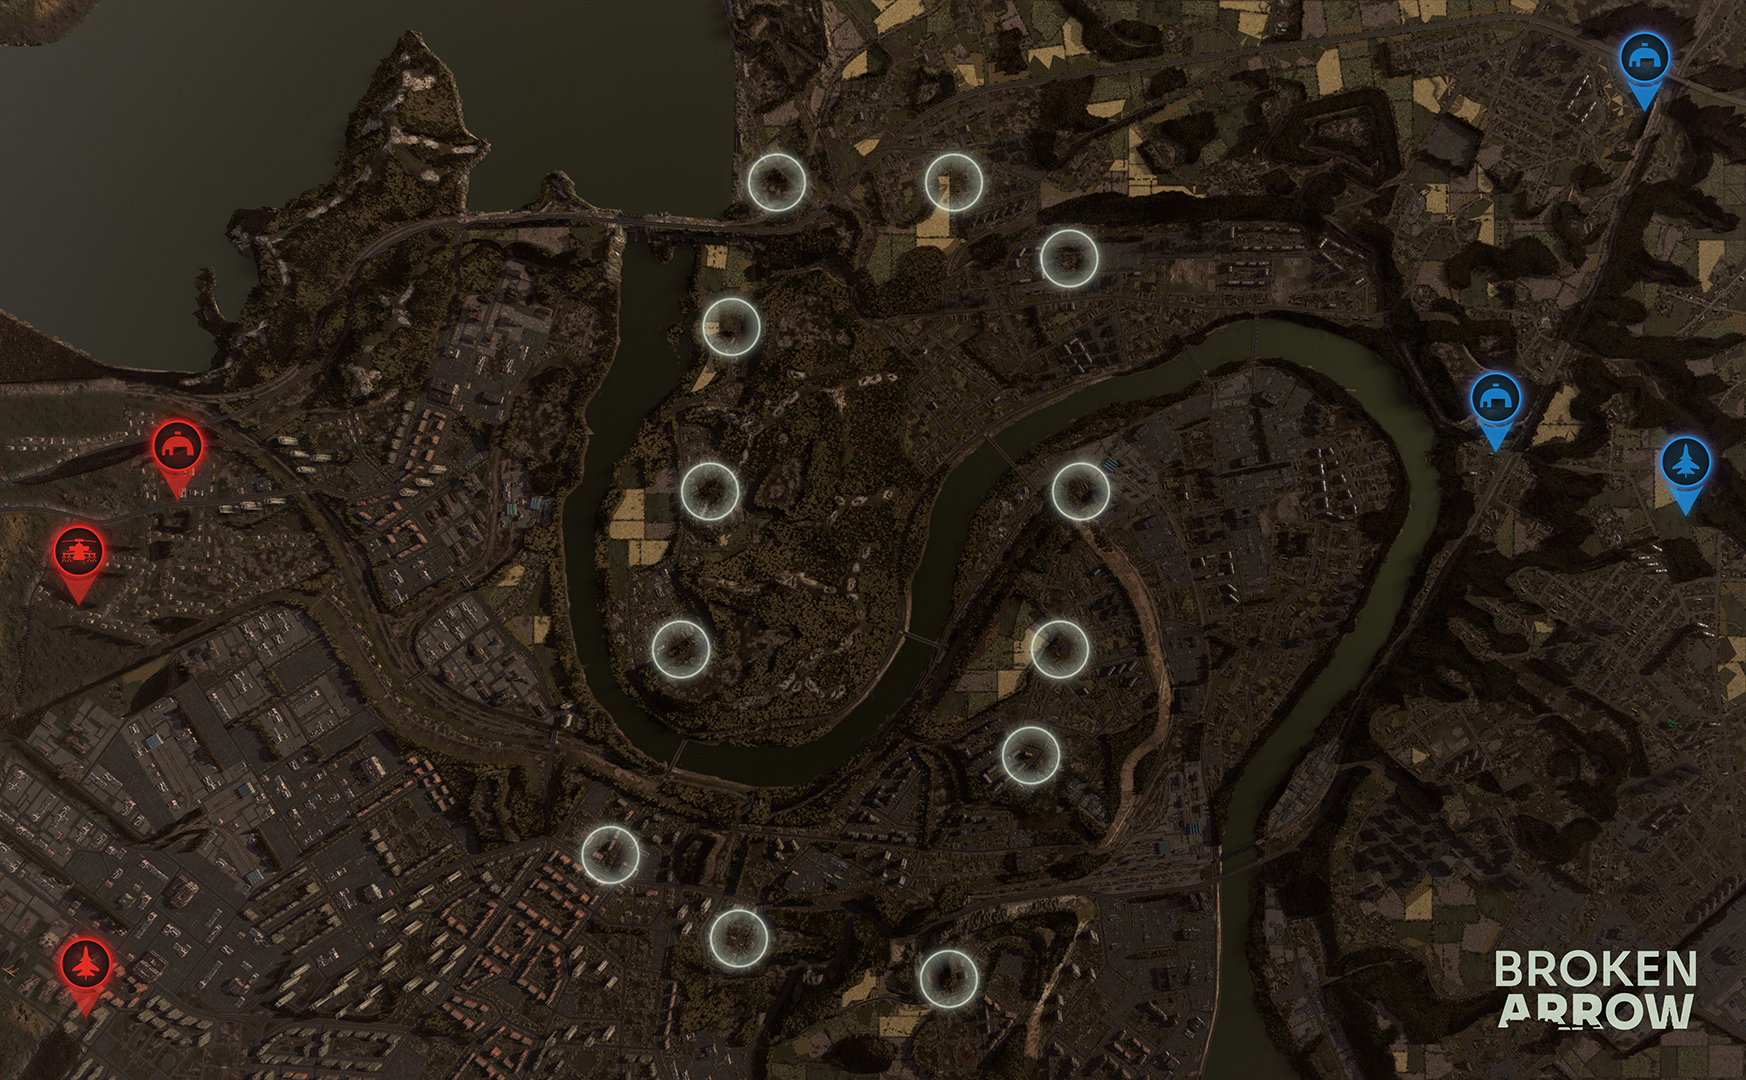
Character: one decisive chokepoint — the dam crest — plus water and slopes. Almost no workarounds.
Home: MECH+MOTO (the siege deck was made for this map), GUARDS+MOTO (Smerch metronome on the chokepoint). Cursed: MARINE+AIR — a beachhead on the crest gets cut out within a minute.
- Start: the race for the crest: fast recon + AT crews onto the slopes. Whoever sets up first dictates.
- Mid: an artillery duel for the approaches: lose the counter-battery fight and the crest becomes a meat grinder for you.
- Late: the siege hammer: UR-77 → 240-mm "Tyulpan" on the strongpoint → flamethrowers mop up.
Versatility: the lowest in the pool: one plan, but it demands flawless artillery and supply. A logistics exam.
Highway of Death (Шоссе смерти)
Character: a long highway across the whole map, corridor combat. Since the Anniversary Update — new spawn/trigger variants: the usual timings have shifted, check the deployment.
Home: COASTAL+MOTO (Hermes swarm over the straight road), MARINE+AIR (JAGM column executions). Cursed: MARINE+AIR.
- Start: a race down the highway with wheeled recon + helicopters along the corridor; AT ambushes on the bends.
- Mid: convoy warfare: cut supply on the highway — the enemy starves on the long arm.
- Late: a rocket salvo down the road at a bunched-up column — a genre classic.
Versatility: low: one axis, variations are "who cuts the corridor, with what and where".
Ignalina Powerplant (Игналинская АЭС)
Character: dense industry + a city by the water: overpasses, workshops, short distances, broken sightlines. The former "Refinery" of our section — same combat logic.
Home: GUARDS+VDV, NUKE (M202 burns out workshops), ARMORED+SF. Cursed: RU_ROSGVARDYIA+COASTAL — the long-range arsenal has nothing to look at.
- Start: assault/flamethrower troops into the workshops from minute one; storage tanks are natural bunkers for AT.
- Mid: incendiary warfare: M202, TOS, napalm — the industrial zone burns; armor crushes the corridors between overpasses.
- Late: the map burns down to ruins — infantry depth decides; NUKE can end it all with one drop on the last fortress-workshop.
Versatility: average: one plan (close assault), many routes. Loves smoke and incendiaries.
Jelgava Pils (Елгава)
Character: river + city + fields in layers. Since 1.1.1 — a new zone layout. Demands three tools from a deck at once.
Home: RU_ROSGVARDYIA+COASTAL (has everything), GUARDS+VDV. Cursed: NUKE — a narrow deck on a wide map; STRYKER+SF — the river breaks wheeled tempo.
- Start: three mini-deployments: infantry to the city, armor to the fields, AT to the crossings. Forces 40/30/30.
- Mid: pressure on the layer seams: find the enemy weak layer and break it with all your artillery.
- Late: the winner is whoever wins two of three layers; do not try to hold everything.
Versatility: high: every layer is a mini-map. A versatility exam — S-tiers pass it best.
Kadaga Military Base (Военная база Кадага)

Character: a Baltic DLC map: an enclosed military base — hangars, barracks, perimeters, forest walls right up close. DuroSVK outright calls the Kadaga sector Alpha the CQB benchmark.
Home: NUKE (CQB grinder per Duro: Ruda Delta/Alpha, Kadaga base Alpha), GUARDS+VDV, ARMORED+SF. Cursed: MECH+MOTO, STRYKER+SF.
- Start: RSOV ambushes on the approaches to the base (the fastest transport in the game — first onto enemy routes).
- Mid: ACV-30s with assault mixes grind the sectors; LAV-AD with Hydra suppresses trenches at point-blank.
- Late: clearing barracks blocks with flamethrowers and assault shields; aviation — only after MANPADS are cleared.
Versatility: low: a closed CQB map with one law — grind. But the micro-tactics are extremely rich.
Kaliningrad (Калининград)
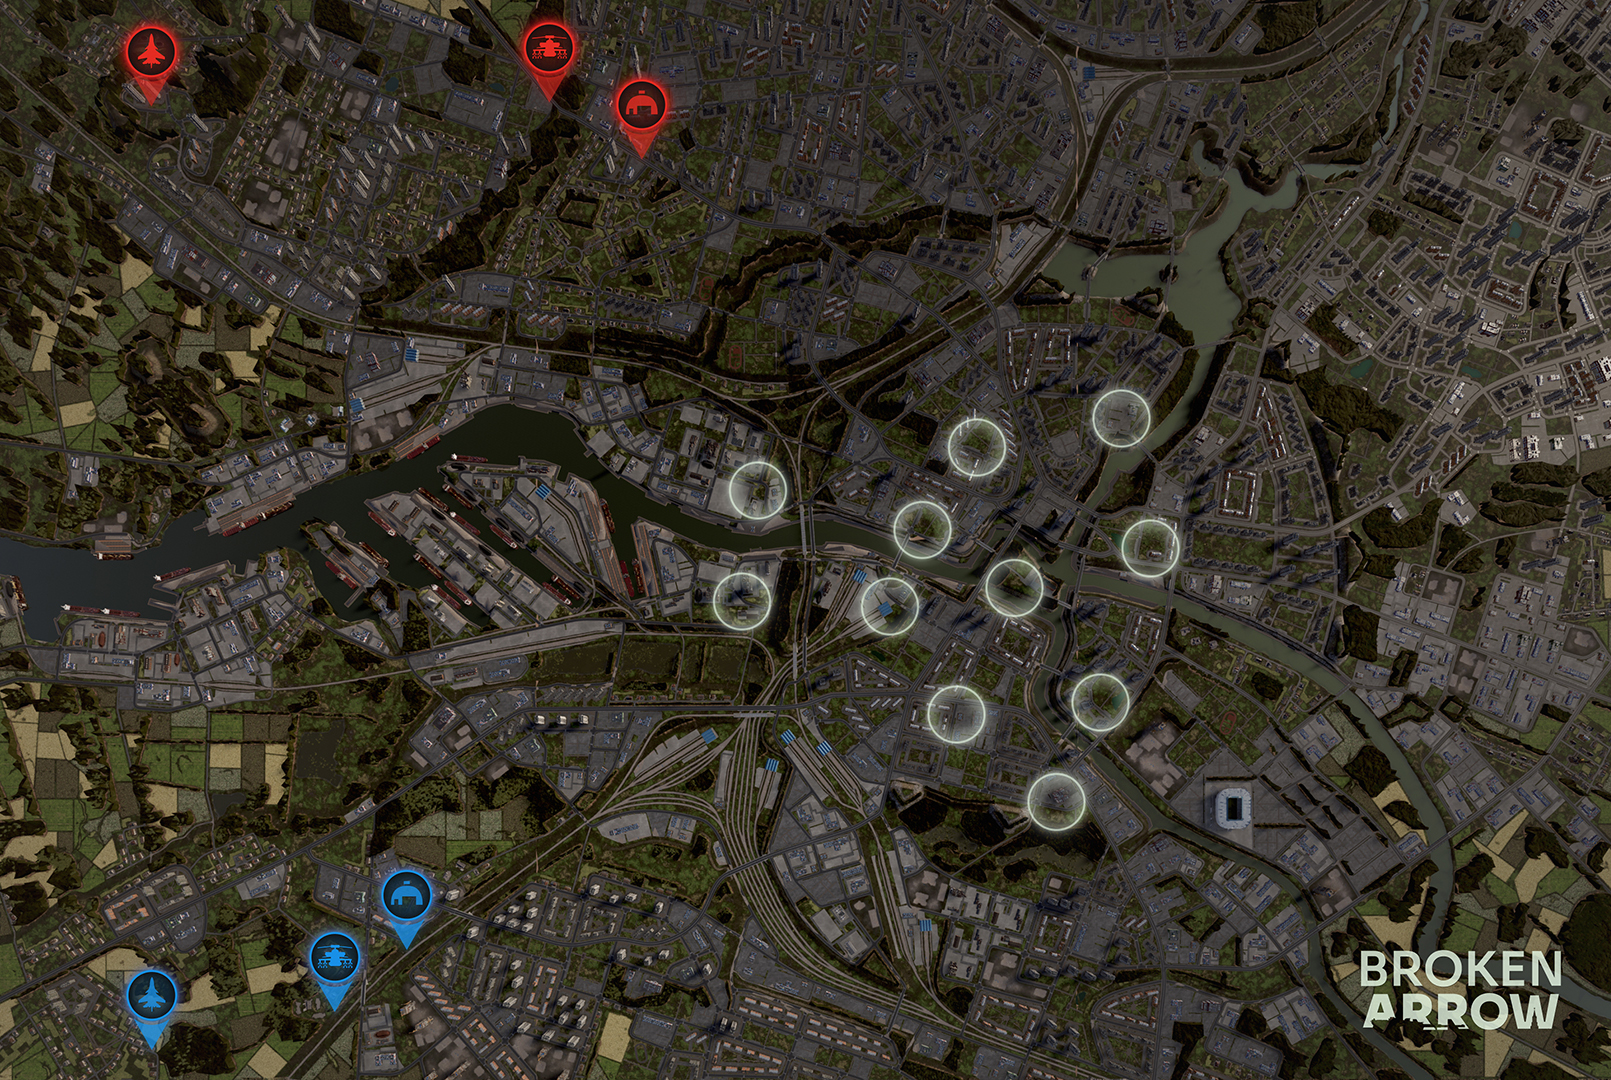
Character: dense city, blocks, bridges. Since 1.1.1 — a new zone layout: the usual axes may have shifted. The fight is decided by infantry and assault armor.
Home: GUARDS+VDV (assault troops + TOS — the benchmark), ARMORED+SF (TUSK2 for RPG streets). Cursed: STRYKER+SF ✕, MECH+MOTO ★.
- Start: assault troops into the first buildings on the axes, BRM-3K to the intersections: the city is taken by infantry in 5 minutes. Alternative: SEP v3 + Breacher up the main street.
- Mid: a TOS storm across the blocks → assault troops occupy the burnt-out ground. Non-standard: NUKE — M202 burns out buildings faster than artillery.
- Late: bridges and squares under T-90M/SEP v3 with APS; air strikes — after MANPADS are cleared from the windows.
Versatility: average. Do not play "long range": the map punishes it.
Klaipeda (Клайпедский разлом)
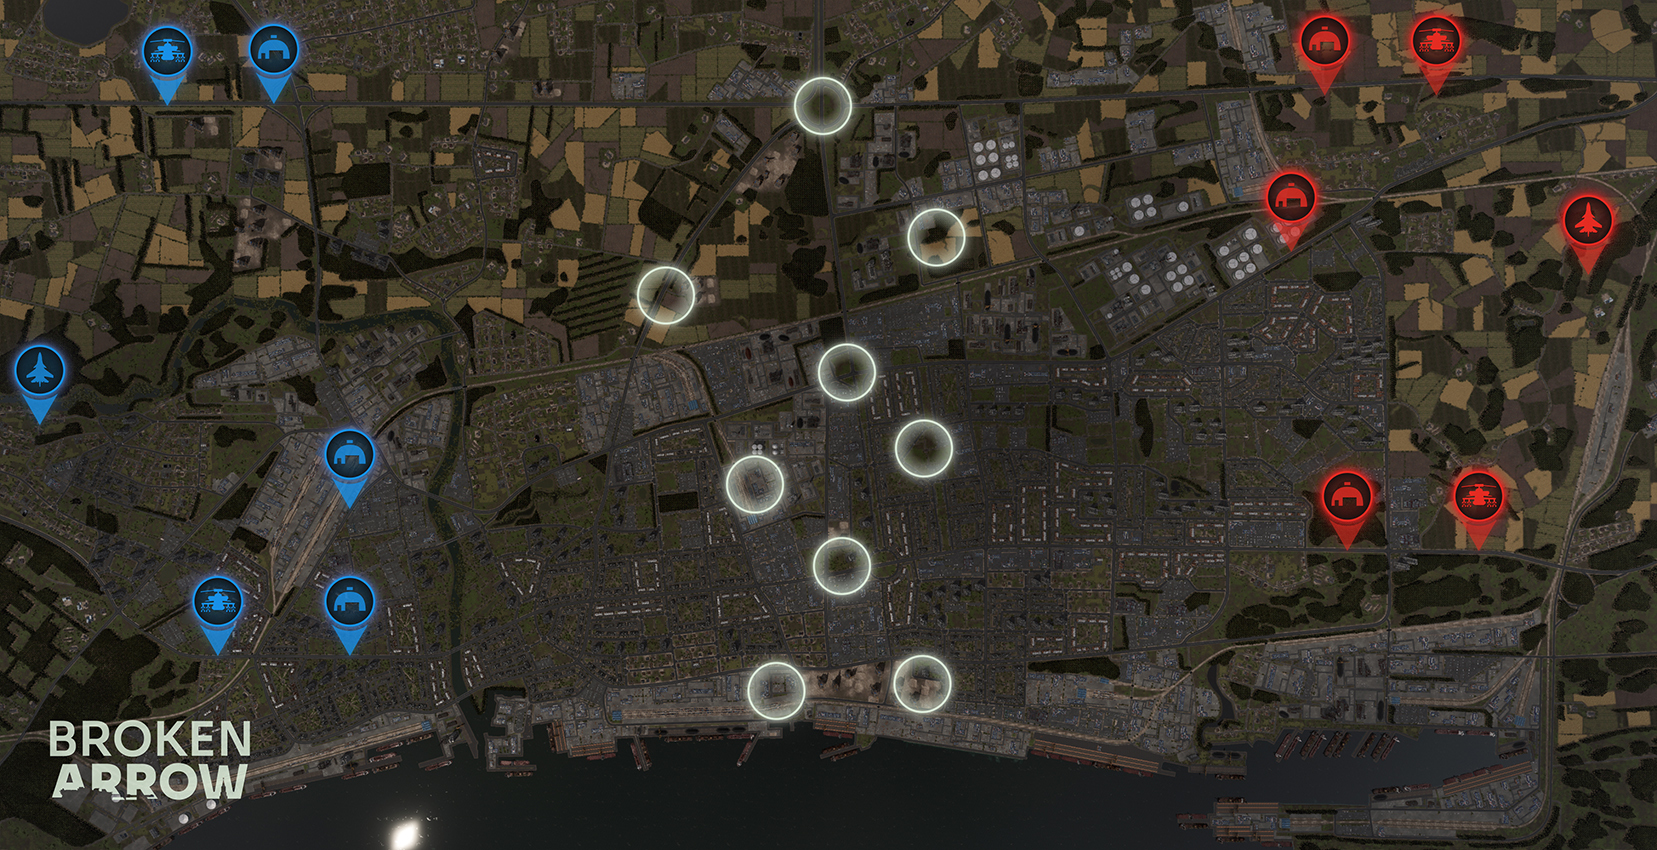
Character: a port city on the water: embankments, piers, a channel. Land corridors are squeezed along the shore.
Home: COASTAL+MOTO (naval specialization in pure form), ARMORED+MARINES. Cursed: MECH+MOTO.
- Start: marines on BT-3Fs straight across the water to the flank point: the enemy deploys overland — you are behind his back.
- Mid: the Hermes swarm (Ka-52K) over the water: targets on the embankment are exposed; Ka-29 on armed recon along the piers.
- Late: Kh-32 at the concentration on the embankment; amphibians cut off the retreat along the shore.
Versatility: high for amphibious decks, low for the rest: 1-2 coastal corridors.
Snow Castle (Снежный замок — the very same Narva)
Character: an urban agglomeration of varying heights in a winter setting, few open areas. This is the map the early version of the section called "Narva" — the location matches (Snow Castle stands on Narva).
Home: ARMORED+SF (SEP v3 + Breacher — the dream assault kit), GUARDS+VDV. Cursed: MECH+MOTO and MARINE+AIR.
- Start: an infantry fan across the blocks + armor down the avenues; Breacher cracks barricades on the main street.
- Mid: block-by-block knife fight: TOS/smoke/assault troops; spec ops cut supply between blocks.
- Late: whoever has assault armor with APS left takes the last blocks.
Versatility: average-low: a meat grinder, infantry micro matters more than deck choice.
Oil Rush (Нефтяная лихорадка)
Character: open desert distances, derricks as pinpoint cover. Since Anniversary — new spawns: old recon timings need re-checking.
Home: GUARDS+MOTO (Smerch at these distances is the law), STRYKER+SF, RU_ROSGVARDYIA+COASTAL. Cursed: MARINE+AIR; RU_ROSGVARDYIA+GUARDS — armor burns on approach.
- Start: artillery into position first, drone recon up high; armor hides behind derricks and folds.
- Mid: a sniper duel: whoever spotted first shoots. Korsars/Orions/RQ-170s are the key units of the map.
- Late: a massed air/rocket strike on the knocked-out sector; there is nowhere to hide — only an air-defense dome.
Versatility: average: one plan (long-range combat), many tools.
Bay of Winds (Залив ветров)
Character: coastal fields and farms: open terrain with rare farmsteads, water at the edge. Since 1.1.1 — a new zone layout.
Home: RU_ROSGVARDYIA+COASTAL, GUARDS+MOTO, STRYKER+SF. Cursed: NUKE, MECH+MOTO (they have nothing to grind).
- Start: fast BRMs/recon through the farmsteads, artillery to far positions: fields are shot through end to end.
- Mid: a rocket metronome on clusters + counter-battery; the flank by the water is for amphibians or fast wheels.
- Late: attrition: whoever has artillery and a dome alive dictates the last points.
Versatility: average-high: fields tolerate everything, water adds a flank.
Meandering River (Река Смородина)
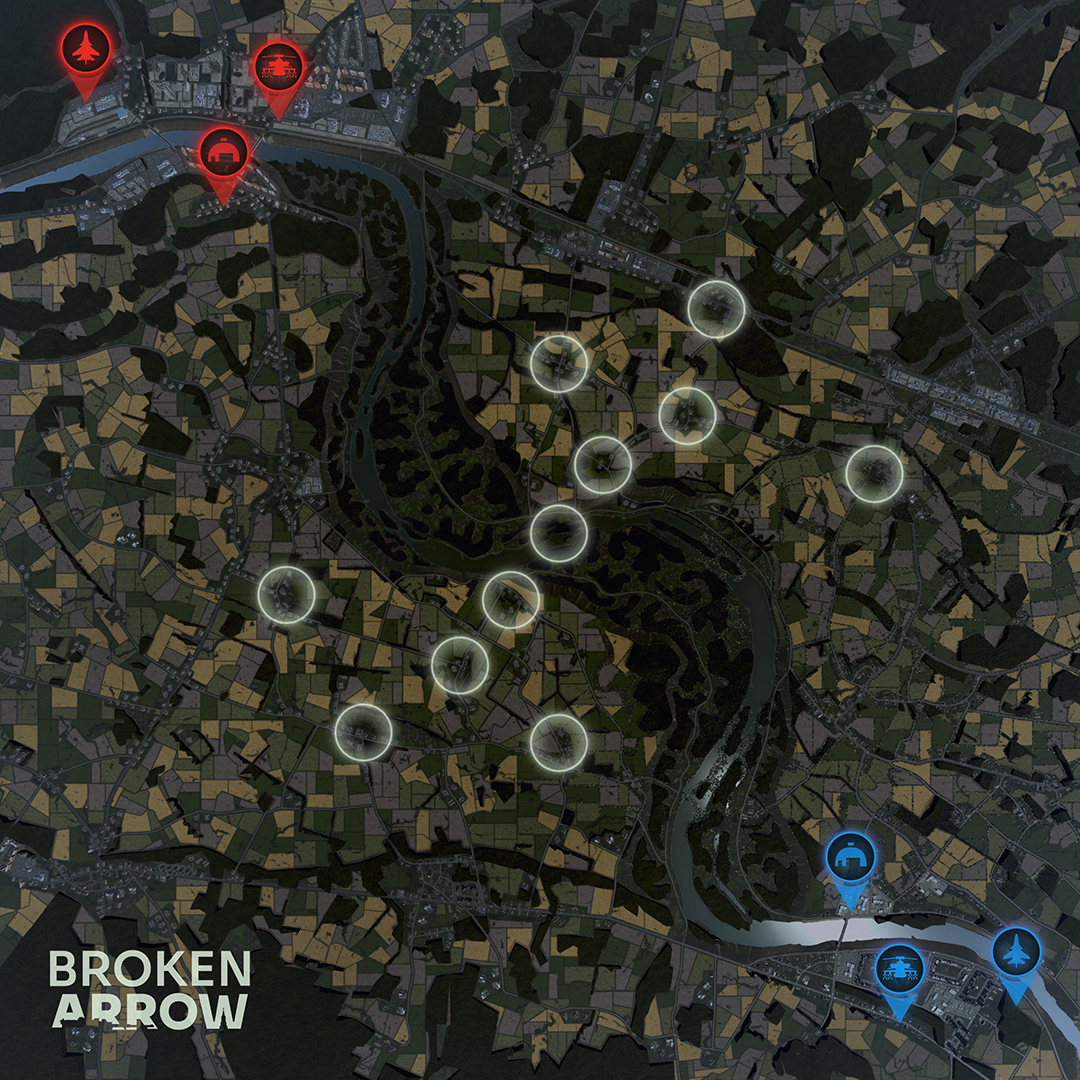
Character: a winding river divides the map, bridges are reliable crossings, the floodplain is open. Bridge control = map control.
Home: COASTAL+MOTO, ARMORED+MARINES — amphibians turn the river into a road. Cursed: RU_ROSGVARDYIA+GUARDS — heavy armor locked onto the bridges.
- Start: an amphibious dash across the river before the bridge duel; for land decks — instant bridge seizure with recon and AT.
- Mid: mining the approaches + artillery along the banks; amphibious decks bypass this whole war.
- Late: assault on the shoreline: TOS on the coastal defense, armor across the bridges under smoke.
Versatility: dual: high for amphibians, for the rest — only bridges.
Ruda Forest (Руда)
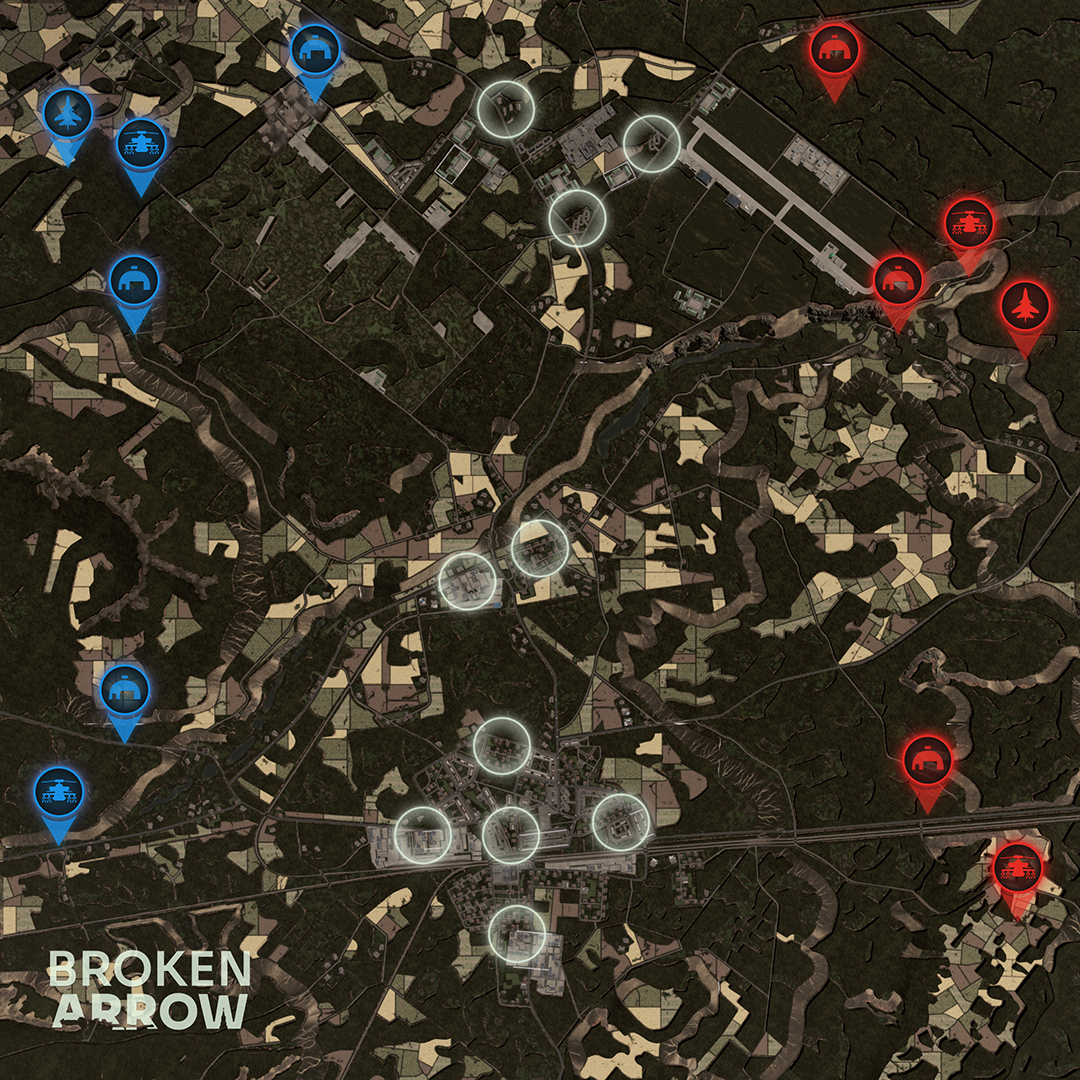
Character: a forest massif with clearings and a village; the Delta/Alpha sectors per Duro are the benchmark of closed combat. Long-range combat breaks against forest walls.
Home: NUKE (Duro: the CQB grinder lives right here), GUARDS+VDV, MECH+MOTO (flamethrowers through the forest). Cursed: open-field duelists lose their range.
- Start: infantry and spec ops into the forest walls; armor — only along cutlines and roads under smoke.
- Mid: the war for clearings: mortar smoke + flamethrowers burn out the edges; LMUR/Khrizantema down the cutlines.
- Late: sectors are cleared with assault shields and shotguns (patch: shotguns keep DPS in panic — this is their map).
Versatility: average: the plan is a forest grind, but there are several routes through the massif.
Suwalki Gap (Сувалки)
Character: forests, villages, fields — a bit of everything, no dominant biome. The most balanced map in the pool.
Home: all ★★. Generalists have a slight edge (GUARDS+VDV, RU_ROSGVARDYIA+COASTAL, ARMORED+SF). Cursed: none clearly.
- Start: any. Forest for infantry and spec ops, fields for armor and helicopters, villages for AT ambushes.
- Mid: the war for biome seams: forest edges and village outskirts. Artillery and aviation — on the fields, AT — from the forest.
- Late: roster depth decides: a deck without blind spots outlives a narrow one. This is where S-tiers show why they are S.
Versatility: the highest in the pool. The map for a series decider — luck reduced to a minimum.
Cold Harbour (Холодная гавань)
Character: a night harbor: port, piers, darkness. Visual contact is shorter, ambushes denser; water is a permanent flank.
Home: COASTAL+MOTO, GUARDS+VDV, NUKE (night CQB). Cursed: STRYKER+SF — tempo is invisible in the dark, and more is demanded of it.
- Start: recon over firepower: in the dark, initiative belongs to whoever lights the contact first and sets the ambush.
- Mid: amphibians across dark water into the port rear; TOS/thermobars on lit-up warehouse blocks.
- Late: night assault on the piers: smoke + assault troops + assault armor at point-blank.
Versatility: average: two plans (water / port blocks), both close-range.
Daugavpils (Даугавпилс)
Character: a dense border city: a river with a bridge, high-rises, blocks, a rail-and-container Delta sector with a CQB labyrinth. A map of linked influence: one high-rise holds two or three sectors under fire at once.
Home decks: ROSGVARDYIA+GUARDS (blobs + TOS — the city benchmark), NUKE (CQB grinder), GUARDS+VDV. Cursed: STRYKER+SF — wheeled tempo stalls in the barricades; ARMORED+MARINES — slow escalation drowns in crossfire.
- Start: infantry into the perimeter blocks and high-rises (they give crossfire over 2-3 sectors); Verba/BARS or snipers onto the high-rises; do NOT force the bridge first — it is a threat, not an opening.
- Mid: the fight for the high-rises: artillery/TOS knocks out garrisons → assault under smoke; the bridge is forced only when another sector is already pulling the enemy away, with smoke on the dangerous part of the crossing and in mass, not one vehicle at a time.
- Late: the Delta sector (rails + containers) is decided by CQB grind and incendiary weapons; armor comes in only along cleared avenues under smoke.
Versatility: high: the isolated Alpha/Echo pocket, the Bravo/Charlie center, the high-rise Delta — three different games on one map. A 1-2-2 player split versus the 1-1-1-1-1 template.
Coal Mountain (Угольная гора)
Character: an elevated industrial bastion: a coal mountain with huge sightlines and almost zero protection, tree lines, open fields and crossroads, short reinforcement routes. The geography punishes impulse for impulse's sake.
Home decks: GUARDS+MOTO (Smerch at range is the law), STRYKER+SF (field tempo), COASTAL+MOTO. Cursed: NUKE — the CQB grinder has nothing to grind here; RU_MECH+VDV — blobs have nowhere to hide from massed fire.
- Start: the race for the forward tree line — whoever takes it looks down on the open reinforcement approaches; artillery to far positions; air defense straight into the front formation.
- Mid: the central crossroads are only taken with preparation: recon + suppression + smoke on the DANGEROUS part of the crossing; the mountain is used as a temporary firing position (shoot and scoot), not a base.
- Late: a won flank becomes cheap territory — hold it with a minimum and shift points to the center; air defense moves with the front, or aviation cuts up the open side.
Versatility: average: two or three plans, all around the tree lines and temporary positions on the mountain. A map of patience: the winner is whoever makes the enemy cross the open ground first.
Map pick/ban strategy
If you ban first
Remove your own deck's cursed map, not the enemy's home map: on their home map they still have to play perfectly, on your cursed map you lose automatically. Order: your ✕ → their ★★★ → neutrals.
If you pick first
Take your home map where the enemy has no more than ★★: the differential matters more than the absolute. GUARDS+VDV and RU_ROSGVARDYIA+COASTAL can pick almost fearlessly — they have no ✕ in the pool.
Series decider
Suwalki Gap is the best "judge" in the pool: maximum versatility, minimum lottery. If the opponent offers it as the decider — they are confident in skill, not in a deck. Prepare for a game without map trumps.
Three laws of maps (with patch 1.1.1 adjustments)
- Water is a second map. On Baltiisk, Klaipeda, Black Coast, Meandering River and Cold Harbour the amphibious flank doubles your playing space. A deck without amphibians on a water map plays at half strength by definition.
- The city eats tempo. STRYKER+SF and RU_ROSGVARDYIA+GUARDS lose Dead Centre, Kaliningrad and Kadaga not because they are weak, but because their strength does not convert in the blocks. Conversely — the siege MECH+MOTO is helpless in the field and unstoppable at the walls. Since 1.1.1 urban infantry hits tank roofs from high-rises (100-400 m) — armor in the city has become even more cautious.
- Openness empowers recon. On Chkalovsk and Oil Rush a drone's value triples: spotted = dead. On Ignalina and in Kaliningrad a drone sees walls — its value drops. Base infantry optics are now 1400 m (1.1.1) — infantry recon on open maps has become more valuable in a good way.
Tier list and matchups (meta 1.2.0)
The pool's final hierarchy after patch 1.2.0, and who eats whom. Ratings reflect lineup mechanics at equal skill; a good player flips any "=" and half of the "−".
Final tier list
| Tier | Decks | Why |
|---|---|---|
| S | RU_MECH+VDV · RU_GUARDS+VDV · RU_ROSGVARDYIA+GUARDS | Complete decks with no blind spots: blobs/airborne/elites + an AA dome + pinpoint or area firepower, strong in two-plus phases and on most maps |
| A | RU_ROSGVARDYIA+COASTAL · RU_COASTAL+MOTO · RU_GUARDS+MOTO · US_ARMORED+SF · US_STRYKER+SF · US_MARINE+STRYKER · US_MARINE+AIR · US_MARINE+BALTIC | Strong decks with one exploitable weakness: thin aviation / the cost of a mistake / dependence on the map or a flank |
| B+ | RU_MECH+MOTO · US_MARINE+STRYKER — more precisely, A− | Situational decks: MECH+MOTO is a siege trap, strong on closed/siege maps and weak in the open field; M+STR is a generalist the matrix gives little to, but one that collects matches on tempo |
| B | US_ARMORED+MARINES · US_MARINES+SF NUKE | Narrow decks: escalation with a micro price and a weak start; a CQB grinder for closed maps only, and its B-2 went up to 1400 — the nuclear gambit now hurts twice as much |
Matchup matrix (row vs column)
| R-COAST | R-GUARDS | G+VDV | COAST | MECH | G+MOT | M+VDV | BALTIC | Stryk | NUKE | A+MAR | A+SF | M+STR | M+AIR | |
|---|---|---|---|---|---|---|---|---|---|---|---|---|---|---|
| R-COAST | — | = | = | + | + | = | − | = | − | + | + | = | = | = |
| R-GUARDS | = | — | = | + | + | + | = | = | = | + | + | = | = | + |
| G+VDV | = | = | — | = | + | + | = | = | = | + | + | = | + | + |
| COAST | − | − | = | — | + | − | = | = | − | + | + | − | = | = |
| MECH | − | − | − | − | — | − | − | − | − | + | + | − | − | − |
| G+MOT | = | − | − | + | + | — | = | = | = | + | + | − | = | − |
| M+VDV | + | = | = | = | + | = | — | + | = | + | + | = | + | = |
| BALTIC | = | = | = | = | + | = | − | — | − | + | + | = | = | = |
| Stryk | + | = | = | + | + | = | = | + | — | + | + | = | + | + |
| NUKE | − | − | − | − | − | − | − | − | − | — | + | − | − | − |
| A+MAR | − | − | − | − | − | − | − | − | − | − | — | − | + | − |
| A+SF | = | = | = | + | + | + | = | = | = | + | + | — | = | = |
| M+STR | = | = | − | = | + | = | − | = | − | + | − | = | — | = |
| M+AIR | = | − | − | = | + | + | = | = | − | + | + | = | = | — |
"+" — the matchup favors you, "=" — even, "−" — hard. The bottom four decks (MECH, NUKE, A+MAR, M+STR) lose the matrix on points — but they win maps and phases: the matrix measures head-on integrity, not the game plan.
The big stories of meta 1.2.0
- Rosgvardia arrived strong: both of its decks sit in the top half. ROSGVARDYIA+GUARDS goes straight into S: Vympel+Alpha/SOBR blobs, Buratino+Uragan-1M as a double MLRS salvo, T-90M/Barbaris/BMPT, plus a MiG-31BM and a Tu-95 on top. ROSGVARDYIA+COASTAL is a working A with a powerful naval sky (Su-33, Su-30SM after the patch move).
- US_STRYKER+SF — the best matrix balance: 8 favorable matchups and not a single hard one. Tempo + the recon triad + PAC-3 MSE ×2 and C-RAM ×2 cover nearly every scenario. Its pain is the cost of a mistake (expensive units).
- MECH+MOTO — the trap deck survived: the most minuses in the matrix (11), because head-on it has neither tempo nor sky. But on siege and closed maps the guided Malka with the Tyulpan has no counters — that is an A− by map, not by lineup.
- NUKE and ARMORED+MARINES are at the bottom not from weakness, but from conditions: NUKE only lives in closed areas (Ruda, city maps), and its B-2 now costs 1400 — the nuclear gambit hurts twice as much; ARMMAR demands micro and eats a rough start, but in the late game it fields more tanks than any other deck.
- The patch reassignments changed infantry identity: the Shturmoviki moved from the Guards Tank spec to the Mechanized one (and vice versa for the engineers) — RU_GUARDS+VDV and GUARDS+MOTO swapped infantry identity, while MECH+MOTO and MECH+VDV got the T-72B3A as the answer to the T-72B3 losing its APS.
Patch chronology: what changed the game
A breakdown of all significant updates based on the official Steel Balalaika/Slitherine changelogs. Key takeaway: the current meta is 1.2.0 "Russian Guard" (31.08.2026): our 14 decks are already built in its economy (art pricing +25, T-72B3 without APS, B-2 B61 +1200, SOF limits SUP 250/HEL 1000). The 1.1.1 breakdown is kept — its mechanics (dynamic income, thermobarics, air rules) remain in effect in 1.2.0.
Timeline
| Patch | Date | Summary | Meta impact |
|---|---|---|---|
| 1.0.7 → 1.08 | 18.06–11.07.2025 | Post-release stabilization: infantry sprint 60→30 sec, PvE scenarios (Kaliningrad, Ruda), price fixes (CAAT TOW 110→100), Verba ×2 for Spetsnaz GRU, Assault Engineers 60→70 | First balance pass; faster infantry set the game's tempo |
| 1.0.9 → 1.0.12 | 13.08.2025–22.01.2026 | Spec popularity rebalance; laser designation range; 30.10 — EAC anti-cheat + Halloween event; 16.12 — "Allied Command"; January fixes | Shifted the meta: Armored+SoF dethroned, Coastal soared; side effect — RF win rate up to ~54% |
| 1.0.10 «Everyone fights!» | 23.09.2025 | Huge balance patch: Kh-32 climbs to altitude (Tu-22M3 nerf), Kh-29 aim 1→3 sec, M830 HEAT 400→600, PAC-2 moved from Armored to USMC, PAC-3 from Stryker to Armored, Guardian from SF to Airborne, Kornet-T/Khrizantema reload 5→8 sec, TOS reloads 150→210 sec, F-35A limit 4→2, prices on dozens of units, transport seats | Architecture of today's decks: long-range SAMs split across specs, AT platform pricing, death of the "missile refund" |
| Baltic Battalion DLC | 30.03.2026 | New US specialization (Latvia/Lithuania/Estonia) + Kadaga Base map | "Anti-spam" Baltic deck; new map |
| Anniversary Update | 02.07.2026 | PTE merged into the main build after 3 months of testing: upkeep 6→5%, anti-overkill improved, heavy SAMs 2-3→3-4 sec between missiles, +range against SEAD, deck return timer display, autocannon DPS, low-flying indicator, smoke delay on the icon; new spawns on Highway of Death and Oil Rush | Economy sped up (more units on the field); foundation for the Major Update |
| 1.1.1 «Major Update» | 30.07.2026 | Largest patch since release (see below) | Foundation of the current meta: mechanics remain in effect in 1.2.0 |
| 1.1.1.1 | 05.08.2026 | Underbarrel grenade launchers: penetration 40→20 mm; VDV Shturm optics 1200→1400 m; T-15 Barbaris gained supply; standardized CM/BM reloads (120/100 sec); Ka-52K and KC-130J nerfs; SSO/Rangers prices; fog-of-war fix (500+ units), double ELO and enemy-card peek exploit | Major Update polish; important: UBGLs weakened |
| 1.1.1.2 | 11.08.2026 | Multiplayer database fixes | Technical |
| 1.1.2 | 21.08.2026 | CIS networking, view enemy cards with LCTRL+LMB, frozen timer fix, Mods/ folder in the build | Networking and QoL ahead of the DLC |
| Russian Guard DLC + 1.2.0 | 31.08.2026 | 6th RF specialization "Rosgvardiya" (Rosgvardiya+FSB+Army Reserve): 8 squads ×20 loadouts, 31 units (Uran-9, BARS, SOBR, Reservists, Border Guards, T-62M, Uragan-1M, Ka-50, Sapsan, MiG-31BM, Tu-95); Daugavpils and Coal Mountain maps; SOF limits (SUP 0→250, HEL 1250→1000); moves (Shturmoviki→Mech Infantry, Ing.Shturmoviki→Gds. Tank, Su-30SM→Coastal, LMTV/MML→SOF); T-72B3 lost APS (+new T-72B3A); VDV Shturm nerf (650→500 mm); artillery pricier (Smerch 250→275, Tornado 275→300, HIMARS 200→225); SAM rebalance; helicopters +10; B-2 B61 +800→+1200; nuke redeploy/refund 46 min | The current meta. The reference point for this entire guide |
| 1.2.1 | 03.09.2026 | Fixes on top of the DLC | Stabilization |
| 1.2.0.2 | 07.09.2026 | Hotfix | Targeted polish |
| Roadmap | fall 2026 → early 2027 | Replays and saves (confirmed by the CEO for fall 2026); a big DLC with a new faction (per video breakdowns — likely China) + a campaign with deck modification | Watch closely — the meta will flip |
Patch 1.2.0 "Russian Guard" (31.08.2026) — breakdown by system
DLC and core
- 6th RF specialization "Rosgvardiya (Russian Guard)" (Rosgvardiya + FSB + Army Reserve, $9.99): 8 infantry squads × 20 loadouts, 31 units — Uran-9 (combat robot), BARS (SPG-9M/Igla-N/RPG-26), SOBR, Reservists, Border Guards, Spetsnaz Alpha/Vympel, FSB Snipers, T-62M, T-72A, MDP-01 "Termit", "Shchuka", S-70 "Okhotnik", Tor-M2KM, 2S40 "Floks", 2S43 "Malva", 2S44 "Giatsint-K", Ka-50 "Akula", Ka-60, Ka-226, Mi-8AMTSh-VN "Sapsan", MiG-31BM, Tu-95
- 2 new maps: Daugavpils (dense city, river, high-rises) and Coal Mountain (elevated industrial bastion) — the pool grew to 22; 3 scenarios, new AI army
- SOF tab limits: SUP 0→250, HEL 1250→1000 — US air decks rebuilt to the new ceiling
- 81-120 mm mortars: aim 6-8 → 4-6 sec; Igla-S replaced with "Verba" on Ka-52, Mi-35M, Mi-8AMTSh; B-52H lost JASSM
Russia: key changes
- T-72B3 lost all APS upgrades (limit 4→6) — replaced by the T-72B3A with APS (limit 3): the old "workhorse" now survives on smoke and price, not active protection
- VDV Shturm nerf: PG-7VR (650 mm) → PG-7VL (500 mm), TBG-7V → TBG-7L — VDV assault troops no longer penetrate top-tier armor
- Moves: Shturmoviki → Mechanized (8→7 men), Ing.Shturmoviki → Gds. Tank (7→8), Su-30SM → Coastal — the logic of several decks flipped
- Recon rework: Razvedka — 7 men for 65 with RShG-2×5; Scouts — 60 with 8 soft armor
- SAM rebalance: Buk-M3 200→170; S-300PM 200→225/250→275; S-350 250→230/300→270; S-300V4 200→225/150→175
- Artillery got pricier: Smerch 250→275, Tornado-S 275→300, MLRS 250→275 — the "art economy" of all Russian decks recalculated
- Su-57 235→225; missile mixes got cheaper (R-73 ×2 35→25, R-77+R-37 90→80)
USA: key changes
- B-2 with B61: +800 → +1200 — the NUKE deck's nuclear gambit became a luxury; nuke redeploy/refund — 46 minutes (Tu-160/B-1B/B-2)
- SAMs: PAC-3 200→185/300→270; PAC-2 120→145/200→225; PAC-3 MSE 175→160/250→230/300→270; IRIS-T 140→110/185→150; NASAMS 170→140 — cheap long-range SAMs are back in the meta
- Helicopters +10 across the board: Supercobra 65→75, Viper 100→110, Venom 70→80, Black Hawk 70→80, SOAR 95→105, DAP 105→115, Comanche 140→150, Silent Hawk 100→110, Baltic Hawk 70→80, Dauphin 55→65
- Infantry prices: Marines 80→90, Raiders CQC 100→120, Delta 100→115, Stinger 80→100, STT 100→80, RAWS 70→60, Rangers CQC 85→95; GMLRS 275→300, HIMARS 200→225
- F-22 285→275, F/A-18C 185→175, F/A-18D 175→165; AIM-9 mixes and AIM-9+HARM (140→120) got cheaper; LMTV and MML moved to SOF
What this changes tactically
- Nuke economy broken upward in price: a B-61 at +1200 is a match bet, not an option; DuroSVK's NUKE verdict "fatal price of a mistake" rests precisely on this
- Artillery duels cost more: +25 to all heavy MLRS — artillery spam punished, counter-battery value up
- APS on the T-72 is now a deliberate choice: a swarm of cheap B3s vs three expensive B3As; both schemes show up in new decks
- Rosgvardiya's arrival shifted the early game: cheap Reservists/Border Guards + the perfect seating math of 14-seat transports make the RF opener denser
Patch 1.1.1 (30.07.2026) — breakdown by system mechanics foundation, still in effect in 1.2.0
Game core
- New dynamic income system + 1500-point reserve call-in limit; new "Conquest" mode (zones generate points over time); random spawn sides; respawn timers increased; supply radius from depots 50→75 m
- New zone/spawn layouts for Chernyakhovsk, Jelgava, Bay of Winds, Kaliningrad (plus Highway of Death and Oil Rush from Anniversary)
- Infantry stress system flipped: full resilience when calm, minimal in panic; aim-time penalties ×2/×3; base infantry optics 1200→1400 m; infantry in buildings hits tank roofs: ~100 m from the 5th floor, ~200 m from 9 floors, ~400 m from a high-rise
- When a transport dies, infantry inside takes ×1 damage (was ×0.3) and 30% losses on auto-dismount — "burning inside the armor" got costlier
Russia: key changes
- Thermobarics and AT/infantry HE warheads: penetration halved across the board (TBG-7V 105→55, RShG-1 105→55, Kornet-F/Khrizantema-F 150→80, Kokon-F 130→70, Shmel-M 95→50) — assault infantry now counters manpower and buildings, not armor
- VDV Shturm: TBG-7V ×6 → PG-7VR ×3 + TBG-7V ×3 — thermobaric volley halved; Gds. Motor Rifles: RPG-28 4→5; Recon: RPG-26 3→4
- Black Berets: limit 3→2, reworked into a 12-man squad with two configs (CQC with RShG-1 ×6 / Stand-off with RPG-29)
- AGS-17 removed from Motorized Infantry; added "Motorized Infantry AGS" config for the Metis AT platoon (70 points) — exactly the one in our files
- Kornet-T/Khrizantema: reload 5→8 sec (a window for gun runs); Atakas on the move (Terminator, Barbaris-57, BRM-3K): +1 sec aim
- Prices: SSO 85/90→100 · VDV Spetsnaz 60→70 · Diversionists 100→80 · Spetsnaz GRU 120→110 · Gds. Motor Rifles 85→75 · Sprut-SDM1 100→120 · T-15 Kinzhal 325→300 · Terminator-2 175→160
- Helicopters got cheaper across the board: Mi-35M 115→75, Mi-24P 130→65, Mi-28NM 120→115, Ka-52 140→135 — our .dek prices confirm it: the files were built after the patch
USA: key changes
- Guardian returned to SOF (it moved to Airborne in 1.0.10 — now back): SOF has 16 JAGM again; DAP got Hellfire/DAGR on outer pylons and 8 seats
- Seats: M113 10→14 · Bradley 6→7 · AAVP-7A1 21→22 · Silent Hawk 12→14 · HEMTT 24→27 · MTVR 18→21 — the combo loadouts from Duro's videos work on exactly these numbers
- New Resupply mechanic for transports: IFVs/APCs with guns — 250 kg, basic APCs — 400 kg, specialized (BMO-1, BTO, War Pig) — 800 kg; speed — half the depot rate
- Recon vehicles got 2-4 infantry seats (BRDM-3, IFAV, LRAS3, Sarmat-2, etc.); stealth reworked (Reostat/PRP-5/FISTV → 1.5; Typhoon VDV/BRM-3K/RSOV → 1)
- Prices: Delta 110→100 · Marine Raiders 120→100 · Marines 95→80 · Reserve Marines 70→80 · Rangers Snipers 110→100 · M8 Thunderbolt 120→150
Fire, air, artillery — what changes the guide's tactics
- Tank guns: aim 3-4 → 1.5-2.5 sec; shell damage up (120-125 mm APFSDS 8→10, HEAT 10→11) — Duro's "tanks aim faster than ATGMs" = from here
- M109A6 Paladin: Copperhead moved to the base HE config — LIMA's "meta artillery" now costs no slot; officially confirmed
- Smart bombs: aim-time removed entirely (but the countdown starts after climbing to altitude) — F-35 runs are faster; separate laser-free drop mode
- All 4-card aircraft → 2 cards; fuel +50%; afterburner burns ×2 instead of ×3; pilots do NOT eject when shot down (only when fuel runs out) — Duro's "pilots don't eject" = not a bug, a patch feature
- SEAD and cruise missiles removed from target lists: Igla-S, Stinger (radar SHORADs), Osa-AKM, Tunguska, Fletcher — short-range SAMs no longer intercept Kh-31P/HARM/JASSM. Interception — only medium/long-range SAMs
- AA rebalance: SHORAD high-altitude range cut, ZPU capped at 1000 m, SHORAD radar multiplier ×2→×1, turrets traverse much faster; S-300/Antey/PAC-2 damage 25→20
- Artillery reloads standardized: Smerch/Tornado-S 40 sec/rocket (8 min for 12) · HIMARS 4 min for 6 · Tochka-U 2 min for 1 · Iskander 4 min for 2 · TOS-1 6 min for 30 · Grad 6 min for 40 · Malka got pricier (HE 220, guided 270)
- Rocket pods more accurate: S-8/S-13/Hydra 20×20→8×12 m, APKWS/DAGR 15×15→4×6 m — LIMA's "15 S-13 rockets on a tank" got even more real
- LMUR: acceleration and speed increased (buff!) — but the Ka-52K pays longer for SEAD (Kh-31P 25→50 sec reload), as do Cobra Sidearms
- Ranges: Tochka-U 6→8 km · Iskander 8→10 · ATACMS 7→9 · PrSM 8→10; howitzers and MLRS +500 m; MLRS minimum dispersion up close doubled — don't fire "at your feet"
- Killer Egg/Little Bird: HP 8→6, but soft armor 0→10
What patch 1.1.1 changed in decks 1.2.0 successors shown
| Deck | Patch effect |
|---|---|
| RU_GUARDS+VDV | Shturm thermobarics weakened against armor (penetration halved) — they're for infantry/buildings, not tanks. BTR-MDM got armor for 10 (but loses airborne capability). SSO went up to 100. Mi-28NM with LMUR boosted by missile speed — LMUR hunting even stronger |
| RU_ROSGVARDYIA+COASTAL (ex-El Classico) | Black Berets now limit ×2 and 12-man — our ×2 CQC are definitely meta. Naval Infantry 75 and BT-3F 20 for ERA — official patch prices. Tu-22M3 with Kh-32: high-altitude climb — SAMs pick it up with high-altitude optics; hence Duro's "3-4 sorties per game". Cluster Grad weakened (damage 3→1.5) — our HE Grad is fine |
| RU_ROSGVARDYIA+GUARDS (ex-Tanks VDV) | T-14: the patch didn't save it — APS doesn't protect against aircraft/artillery; Duro's verdict officially confirmed by the mechanics. Sprut +1 smoke — lives a little longer |
| RU_COASTAL+MOTO | Ka-52K SEAD reloads twice as long — the Hermes swarm is more valuable. Osa-AKM no longer intercepts SEAD missiles — enemy HARMs are more dangerous than we wrote |
| RU_GUARDS+MOTO | Atakas on the move +1 sec aim — Mi-28N/Korsar with Atakas slightly slower on the snapshot. Tor-M2 high-altitude range cut |
| RU_MECH+MOTO | Malka got pricier (220/270) — our 220 for HE = up to date. UR-77 90 points and 35 damage — cheaper and slightly weaker. Khrizantema reload 8 sec — a counterplay window appeared |
| RU_MECH+VDV | Built entirely around the patch: guided Malka 270 — official price; BTR-MDM with +10 armor (new 1.1.1 option); engineers with shields hold DPS in panic; SEAD flies freely — SHORADs don't intercept Kh-58/Kh-31P; smart bombs without aim-time — the FAB-3000 falls fast |
| US_MARINE+AIR (ex-US Laser) | F-35 ×2 — now the patch limit (was 4 cards). RQ-170 HP standardized to 10. Bombs without aim-time — laser cycle is faster |
| US_MARINE+AIR (ex-US Marine-AB) | Airborne Recce Standard = 55 points with MAAWS tandem ×4 — our config is straight from the patch. Fighter Harrier unchanged; LIMA's gun-run trend — from this same meta |
| US_ARMORED+SF | M113 with 14 seats = Duro's combo (engineers+riflemen). Guardian back in SOF — our 16 JAGM are legal. AMPV-Resupply 250 kg — the assault vehicle resupplies itself |
| US_STRYKER+SF | The spec got +250 points moved from support to infantry (back in 1.0.10) — hence the infantry density. Stryker RV stealth 1.5. Miniguns 700 m / 0.9 damage |
| US_MARINES+SF (NUKE) | AAVP 22 seats (buff) — waves are cheaper. Pilots don't eject when shot down — Duro's advice about the M240 on PAC-2 lost its point (it was protection against ejected pilots) |
| US_ARMORED+MARINES | Hornet with AIM-174: missiles sped up — Gunslinger rear-guard duty is more effective. M60A1 CEV — "most cost-effective tank" (Duro) with the 100-mm APFSDS buff 6→8.5 |